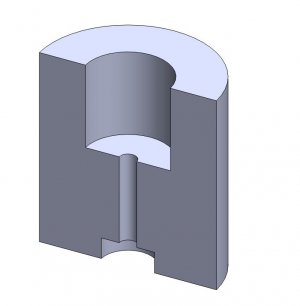
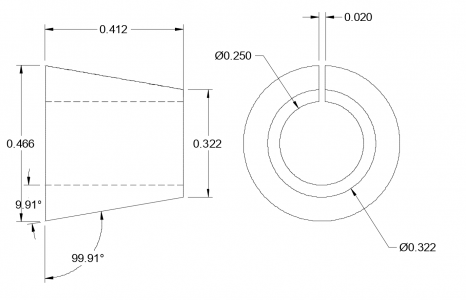
Accurately determining the taper angle of a part that small by reverse engineering is a challenging task. I would start by turning a cylinder of known length with a hole slightly larger than the small end of the taper . On the other end, I would counterbore to a diameter slightly smaller than the large end of the taper and deep enough that the collet will seat on the rim of the counterbore.
As suggested by Dabbler, I would fix a close fitting pin in the collet with a glue (I would use cyanoacrylate as the pin would be removable with moderate heat and and the glue can be dissolved with acetone) so the pin is slightly proud of the top of the collet.
To determine the the taper, I would insert the collet into the small end and measure the combined length of the cylinder and seated collet. Then I would flip the cylinder and seat the collet and measure the new combined length. The difference between the two measurements is the distance between the two diameters so you now have the measurements you need to determine the taper.
Concerns are the accuracy of the two diameters and how crisp the edges of the holes are. Any chamfer will offset the seating location. The face of the pin should be flat and perpendicular to central axis of the pin. Another concern is keeping the collet and pin concentric with the two holes. This can be addressed by modifying the cylinder. First drill and ream a hole through the the cylinder for a tight slop fit on the pin to be used in in the measurement and extend the pin past the small end of the collet so it will act as a guide for the seating. Then add a counter bore slightly larger than the small end of the collet. Finally, measurements should be made as accurately as possible. To that end, the combined lengths should be made with a micrometer and multiple measurements should be made and averaged. Counterbore diameters can be bored to fit a pin gage, using care to try to get the same fit on both and the pin gages should be measured with a micrometer to verify their actual diameter.
Done properly, you should now have three values accurate to tenths which is as good as can be done outside a metrology lab. Even so, realize that a stacked error of .0002" on the difference between the diameters and the potential error in the difference between the two combine distances can cause an error of +/- .02º.


