X-stop Improvement For Rf-45 Mill

petertha

H-M Supporter - Gold Member
H-M Supporter Gold Member
Joined
Jan 15, 2016
Messages
994
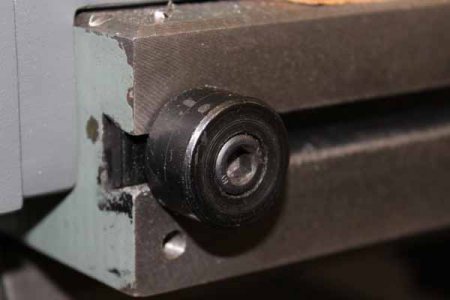
I decided to make some better x-direction stops for my milling machine. I like this feature for repetitive positioning or pocket milling. I never cared for those little stock buttons. Seems like if you just kiss the center post gently, they always allow a couple thou movement. And tightening them hard always makes me worry about cracking the dovetail in cast iron.

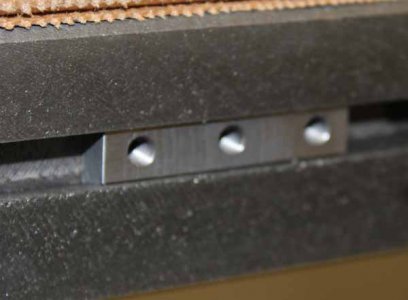
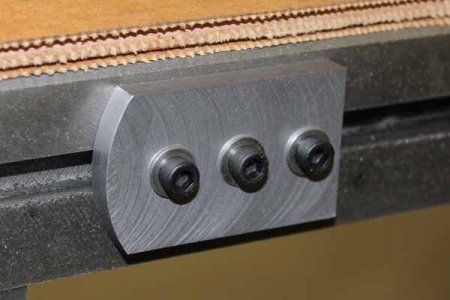
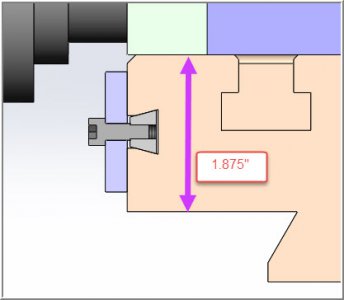
So... this is my solution. The stops have a lot more contact area to the table edge which is what provides the grip. Three 10-32 bolts might seem like overkill but its pretty quick & they just need to be moderately snugged. The dovetail slider nut is a 15-deg chamfer. I also made it thicker so there is more dovetail contact & thread engagement. I gave it a test drive, backing off & contacting a several time. The DRO shows the exact same number to 0.0005" so I'm happy. Last thing to do is blacken them. Some before & after pics.
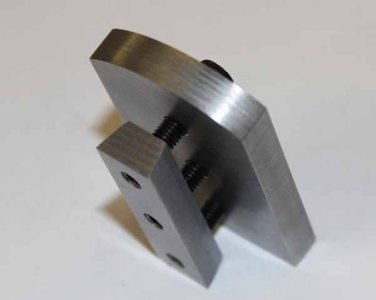
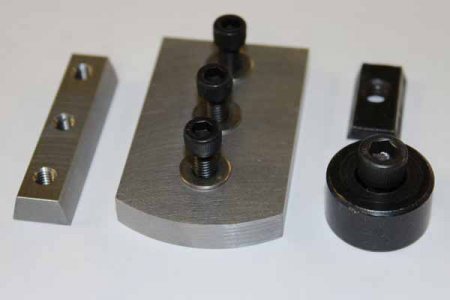
IMG_0722_edited-1.jpg IMG_0720_edited-1.jpg IMG_0717_edited-1.jpg IMG_0716_edited-1.jpg IMG_0715_edited-1.jpg
 
I wonder why they used dovetails instead of the more usual (to me, anyway) T-slots?
 
I'm actually not sure why the dovetails vs. T slot. My mill is a King RF-45 & the table is 1.875" thick. Maybe to keep more meat in the front edge? A T nut would have been an easier part to make than the bevelled edge nut. I don't expect to be making many other accessories to hang in this slot, so hopefully this is a 1-time deal.

Related to stops, this improves the X-stop. For Y-positions I use simple dial gauges on mag stands. It doesn't mechanically stop of course, just gives me a needle position. I've had a few ideas about how to make Y-axis hard stops, but they all look a bit hack-ish & involve drilling into parts I may later regret holes in, and/or mounting arms on irregular casting surfaces etc. Anybody seen any good tricks or how the big boy mills handle this issue?

2-14-2016 0000.jpg
 
I believe the original stops stuck out further so a powerfeed stop would hit them and stop the table if you had a powerfeed, that's how mine work. But nice job on them.
 
Well done on the X axis stop! I have the same problem with my original button stops as you mentioned. Will get to work on some stop modeled after yours. Thanks. Would like suggestions on a Y axis stop also.
 
I wonder why they used dovetails instead of the more usual (to me, anyway) T-slots?
Round column drill mills are made to a price point; no matter how 'nice' they are. I don't mean to deride users; marketing departments call them mill drills. Anyway, dovetails are slightly less expensive to cut; less proportional depth-reduced material removal- even a smaller [lower cost again] tool than t-slotter, a bit faster feed rate, all those 'smallers' mean less power consumption too.
Nonetheless, you'll find a flat stop superior to common post [aka button], even on a full-fledged machine. A few reasons, main one nearly eliminates deflection of one that projects 5 or 6 times height of petertha's flat version. One suggestion; under cut [bevel] so that which contacts rigid point lessens accumulated chips that'll interfere with intended stop position. Seems incidental, until your collection of 15 items vary or are increasingly different.

So while I'm on a roll; here are extensions of petertha's table stop. Desiring an "Y" axis stop, not unconquerable feature.
Cut a stout gantry shaped "U" that bolts to side of main casting; remember to add length for a stop plate/ button. [You might reuse the button from "X" here, at least to engineer according to material on hand.] T-slot [dovetail, lol] that gantry to perform as the "X" does. Bolting to a casting is a simple consideration; two attaching bolts surrounded with 4 setscrews as jacks. Wanna blow cronies off the pier? Cup or point setscrews aren't bad center punches. Build the rail, match drill/ tap bolts holes [2], run setscrews out to protrude and mark surface, attach briefly and tighten bolts snug, remove rail and center drill the 8 marks lightly. For intents and purpose those spots are no longer 'cast'.
An indicator and square aid registering position with the travel. Less accuracy is required but like mounting DRO scales. This creates a new indicator affixing platform too.

Like that? OK, another...
Make 3 plates like petertha's but slotted, not drilled. 2 of length about twice that across 2 slots of mill table top, slotted just over 1.5x distance between slot centers. 3rd can be shorter, it's going to be the stock stop.
Why?
I make gibs on occasion. This kind of setup can replicate long tapers very easily, though I rough all first and 2 finish passes, the last only .005 or so. With a subplate below, any drilling, slotting, blahblah is performed without issue, using every fraction of table travel. And I'll bet most don't have two equal machine vises as alternative. Long parts this way, greatly reduce Abbe' errors too, where extended travel leaves so much unsupported "X".
When I post, consider it a gift....not that I'm so awesome, but you go along for the ride that I'm really offering to my friend C-Bag. But that's what community is about.
Describing my ventures is like this; I'd rather wander than search...
 
Back
Top