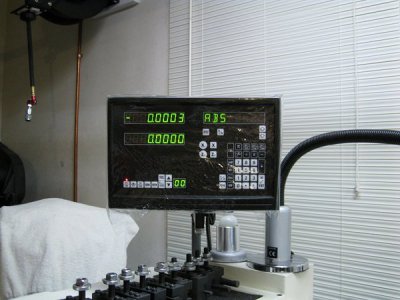
What Dro For The Home Shop Guy... G4003g

Dman1114

Active User
Registered
Joined
Jun 28, 2014
Messages
176
So Since my lathe will be pulled away from the wall and down for a few days... Ill be installing a 3 phase motor and a VFD.

I figured i mine as well do the Dro at the same time.

I don't use coolant. I mostly machine aluminum and delrin with the occasional gun barrel.

When I'm machining aluminum and delrin i like to use WD40. so it goes everywhere.


The one Dro that has peeked my interest is the TPAC tools dro....


what all does everyone recommend ?

Id love to go with magnetic scales but the prices are quite high.

So those that are running dro's do u have any regret for the one u chose? if you could do it over what would u go with?


need some advice here


Thanks
 
I have glass scales & I don't have any regrets buying them nor have I ever had issues with them. I have glass scales on my my lathe & mill but they are also shielded though.

When I was in the market for my lathe DRO I shopped around for a while. It sucks that there isn't a whole lot out there with the features I wanted. Finally I found one that met my criteria. I won't mention what model it is as it's no longer available. But I wanted a lathe specific display & not a universal mill display. I wanted my display to marked X & Z instead of X &Y & without all the useless mill functions that can't be used on a lathe. That was not a deal breaker for me though.

Main thing was I wanted the radius/diameter mode button which I use very often. Universal displays often just have a setting for it. The button allows you to change back & forth on the fly. I also wanted the display for tool offsets available without having to go through a menu. These are just convinces, most all work the same & for a lathe you really only need basic functions. IMO, at the least is should have absoltue/incremental modes, radius/diameter setting, SDM, & inch/mm.


Img_7558_zps7c45b198.jpg
 
I went with the DroPros magnetic scales for my G4003. I agree they are a bit higher price but I have been very happy with no regrets. Installation was easy and I liked that I could cut the scales to the exact length needed.
 
FYI the DroPros How-To videos on their website use a G4003g as the installee lathe.
 
Hey dark Zero.... that looks like the Miester BC-10L Dro...... Same one that steve beadair did a write up on...


Thats the one i want.
 
I went with the DroPros magnetic scales for my G4003. I agree they are a bit higher price but I have been very happy with no regrets. Installation was easy and I liked that I could cut the scales to the exact length needed.

Ditto I have the EL400 on my G4003G
 
Man the more i look at the EL400 ..... The more i like it.

Its got the X Z axis labeled properly.... and has everything ill need plus magnetic scales... Looks like i may need to just spring the extra coin


Plus the 6 yr warranty sounds like a deal too.

Being veteran owned you think he gives a discount to his fellow Vets?
 
Being veteran owned you think he gives a discount to his fellow Vets?

It never hurts to ask. I would also tell them you heard about them from the Hobby-Machinist forum.
BTW, the installation videos are some of the best how-to videos I have have seen. Made what could have been a big job, easy. I also have the EL400
 
If you go with the EL400 here are some installation tips and pictures.

1. Note the thick aluminum bar bolted to the back of my G4003G in these first two pictures. Note the gap behind it at each end required to clear the bow in the middle of the lathe casting. My casting was bowed left/right and up/down. Yes the kit provides brackets and gib adjustment screws, they FAIL for a couple of reasons on my lathe. Due to the length of this Z axis scale its pretty flexible, if those brackets are not perfectly flat and parallel to each other just a slight turn to a gib screw will twist and bow the scale. Even if you could get them all adjusted what you will find is then the paint/bondo gives way and the scale is twisted and bowed again. Trust me on this just spend a few dollars for some aluminum bar, this made installing this scale so incredibly easy after struggling for a couple days with the bracket/gib screw method. I was able to dial the scale in with a high degree of accuracy and its rock solid bullet proof. Also gave me a surface to mount the scale cover. Way easier installation method.


Look at the gap at this end wow! I used the lathe to turn the shims so that it is parallel to the ways. Those stainless sheets are chip shields.


1. Here you see the Z axis read head bracket, it fits fine using the stock bolt holes in the saddle. As I recall I did have to hog out the holes to fit the bolts. Note the simple brass scale cover on the X axis, the supplied cover was not suitable without a lot of machining. Frankly I'd just buy some proper size L extrusion vs trying to use what was provided. Note the read head cable exits left from under the scale cover, if turned the other way it gets tight when the carriage is up near the head stock.

If I could do one thing over I might buy some cable carrier from McMasterCarr like I just purchased for my mill and get the DRO and light cables up out of the oily chip pan mess.


3. Important note, notice how close to the back V way you have to position the read head, it needs to be all the way back there to give you the full X axis travel, there's not a lot of room left when the cross slide is fully to the rear. You will therefore need a long drill bit and I had to fashion a long reach tapping extension (see pic below) and drill and tap that hole with the carriage run way over to the tale stock end.
 
Last edited by a moderator:
Back
Top