- Joined
- Jan 22, 2014
- Messages
- 578
I recently started my next project which I've been contemplating for some time now, deciding if it would be possible to make a scale model of the trophy by hand w/o CNC. I enjoy challenging myself with projects that are out of the ordinary and utilize all of the tools at my disposal. Since football has started up again, what better way to start off the 2014 NFL season than by making the ultimate sculpture. I did a lot of research, found some great pics and a rough, nearly illegible blueprint for Tiffany’s original Vince Lombardi Trophy, the iconic Super Bowl Trophy. One thing that stands out is the football looks large for the size of the base. During my research I read that it was designed on a bar napkin over drinks and it’s a full-size football that is mounted to resemble the ball in a kicking tee.
Factoid: The real trophies stand 22” tall, weigh 7 pounds and are made of sterling silver sheet metal.
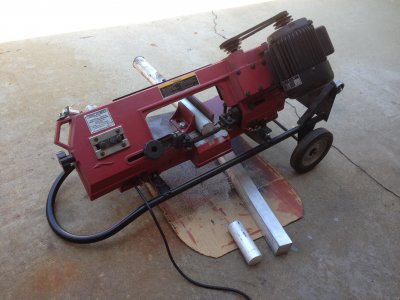
I started by scaling the project to ¼ scale using dimensions from the blueprint and I devised a plan of attack. It turned out that to make the compound triangular base I could whittle it out of some 2” X 2” 6061 aluminum bar stock I had left over from my Turner’s Cube if I used an off-set center and a 4-jaw chuck. For the football I used a 6” piece of 2” 6061 aluminum round bar that I purchased.
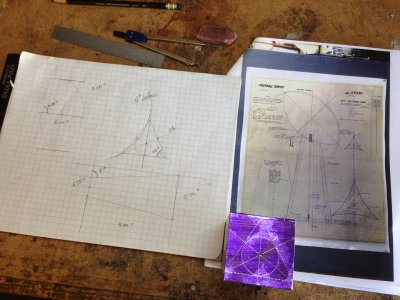
Primary machines & fixtures:
Grizzly G0602
LMS Hi Torque mini Mill w/ power feed, rotary table & tailstock
Steve Bedair design Ball Cutting fixture & angle vise
One of the big challenges was how to make the compound triangle base. After measuring the bar stock I prepped and trued it by turning ¾” X ¾” off-set tenons at each end w/centers. At the same time, I drilled a #7 hole in the bottom and tapped it to ¼” X 20 TPI to eventually mount it on a stand. I drilled the top with a 3/16” drill to eventually mount the football.
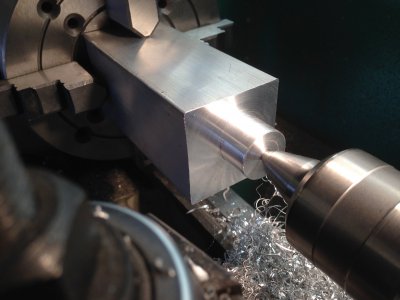
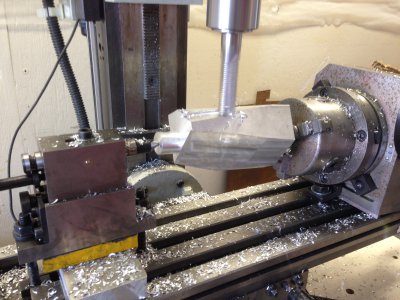
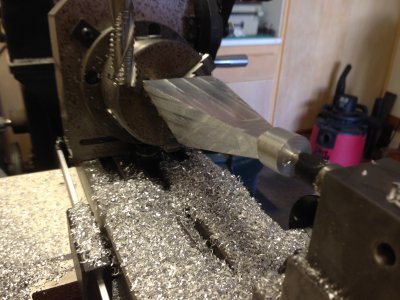
Then I mounted it by the bottom tenon, horizontally in my rotary table on the mill and wedged one side up to the appropriate angle. I supported the top end with a rotary table tail stock in the center hole. I used a 5/8” 3-flute roughing cutter at about 1000 rpm @.100” per pass using a 45% auto feed rate. Because it produced many odd angles turning a square into a triangle it didn't look like it would ever come together. After the initial “knock down” of the copious amounts of waste, I rolled it around in 120* increments taking down a little at time off all 3 sides. It eventually came together per my drawing proving that the math doesn't lie! Before taking it out of the chuck, I cut 3 flats on the bottom tenon (between the jaws) so I could easily/accurately orientate the sides for some other operations later on.
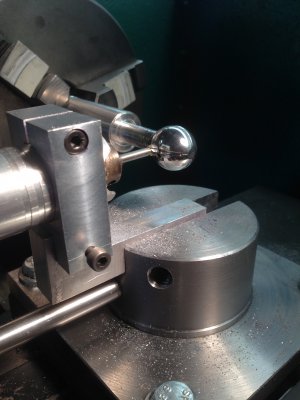
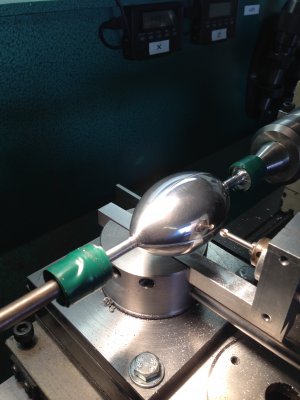
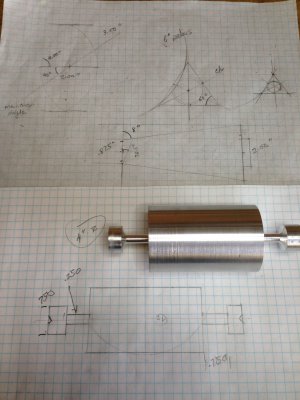
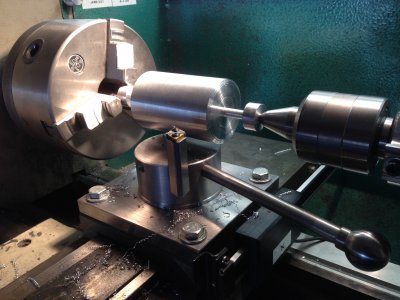
For the football, I did the same prepping truing my 2” round bar. I trued up the OD to 1.875” and the length to 6”. This time I made the tenons .750” X .500”. The reason is I planned on shaping the football with my Ball Cutter and it needs room for tool swing and clearance. I cut the clearance area to ¼” X .750” wide with an outside radius which I hoped would still provide enough support. I cautiously approached the shaping by cutting very slowly with very light cuts (.010”). Because of the large radius (4”), I had to make several adjustments moving the tool outward while bringing it in to shape and diameter. I stopped short of taking off the mounting tenons because I still needed a way to hold it for several remaining operations. Once I hit the scaled dimensions, I sanded the piece while I could still spin it true.
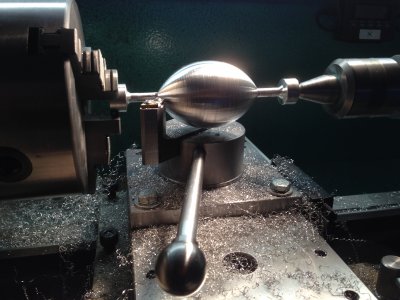
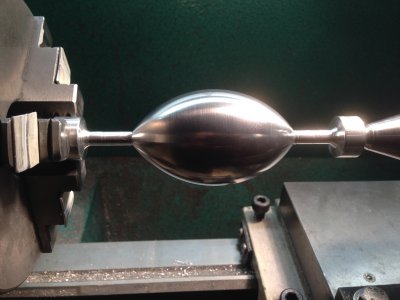
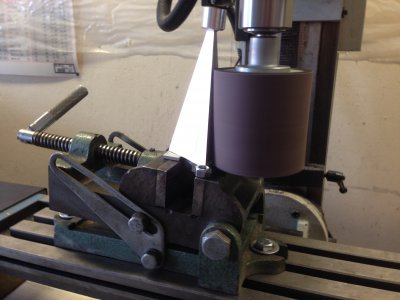
I wanted to cut the radius in the sides of the base but found that my mill doesn’t have headstock clearance to cut it vertically with a standard fly cutter or boring tool, so I used a 3” drum sander with the base mounted in my angle vise. I started with 180 and finished with 320 grit paper.
I then did a preliminary buff the two pieces with my 10” 3-stage buffing wheels starting with Tripoli and then White Diamond.
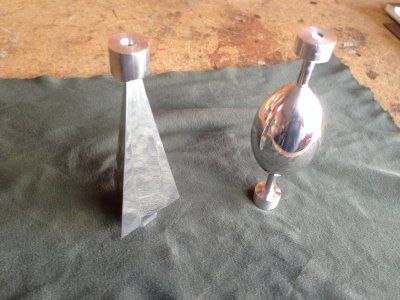
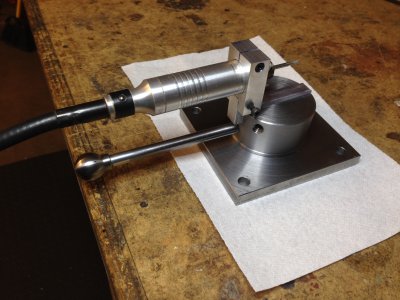
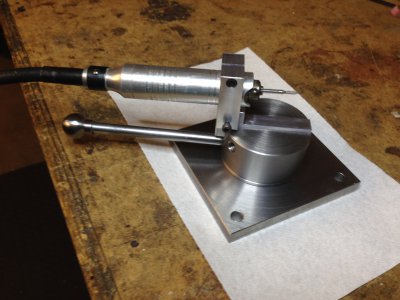
I get a bit side tracked here because I need to stop and make a fixture for my ball cutter that would hold my flex-shaft pencil grinder. My idea is to use the Ball Cutting fixture on the mill table with the pencil grinder and appropriate bit, to swing/cut the seams of the football @ 90* increments with the ball in the rotary table.
Still a lot of detail work left to do. Mount the ball, make a base and even some engraving.


Factoid: The real trophies stand 22” tall, weigh 7 pounds and are made of sterling silver sheet metal.
I started by scaling the project to ¼ scale using dimensions from the blueprint and I devised a plan of attack. It turned out that to make the compound triangular base I could whittle it out of some 2” X 2” 6061 aluminum bar stock I had left over from my Turner’s Cube if I used an off-set center and a 4-jaw chuck. For the football I used a 6” piece of 2” 6061 aluminum round bar that I purchased.

Primary machines & fixtures:
Grizzly G0602
LMS Hi Torque mini Mill w/ power feed, rotary table & tailstock
Steve Bedair design Ball Cutting fixture & angle vise
One of the big challenges was how to make the compound triangle base. After measuring the bar stock I prepped and trued it by turning ¾” X ¾” off-set tenons at each end w/centers. At the same time, I drilled a #7 hole in the bottom and tapped it to ¼” X 20 TPI to eventually mount it on a stand. I drilled the top with a 3/16” drill to eventually mount the football.


Then I mounted it by the bottom tenon, horizontally in my rotary table on the mill and wedged one side up to the appropriate angle. I supported the top end with a rotary table tail stock in the center hole. I used a 5/8” 3-flute roughing cutter at about 1000 rpm @.100” per pass using a 45% auto feed rate. Because it produced many odd angles turning a square into a triangle it didn't look like it would ever come together. After the initial “knock down” of the copious amounts of waste, I rolled it around in 120* increments taking down a little at time off all 3 sides. It eventually came together per my drawing proving that the math doesn't lie! Before taking it out of the chuck, I cut 3 flats on the bottom tenon (between the jaws) so I could easily/accurately orientate the sides for some other operations later on.


For the football, I did the same prepping truing my 2” round bar. I trued up the OD to 1.875” and the length to 6”. This time I made the tenons .750” X .500”. The reason is I planned on shaping the football with my Ball Cutter and it needs room for tool swing and clearance. I cut the clearance area to ¼” X .750” wide with an outside radius which I hoped would still provide enough support. I cautiously approached the shaping by cutting very slowly with very light cuts (.010”). Because of the large radius (4”), I had to make several adjustments moving the tool outward while bringing it in to shape and diameter. I stopped short of taking off the mounting tenons because I still needed a way to hold it for several remaining operations. Once I hit the scaled dimensions, I sanded the piece while I could still spin it true.


I wanted to cut the radius in the sides of the base but found that my mill doesn’t have headstock clearance to cut it vertically with a standard fly cutter or boring tool, so I used a 3” drum sander with the base mounted in my angle vise. I started with 180 and finished with 320 grit paper.

I then did a preliminary buff the two pieces with my 10” 3-stage buffing wheels starting with Tripoli and then White Diamond.

I get a bit side tracked here because I need to stop and make a fixture for my ball cutter that would hold my flex-shaft pencil grinder. My idea is to use the Ball Cutting fixture on the mill table with the pencil grinder and appropriate bit, to swing/cut the seams of the football @ 90* increments with the ball in the rotary table.
Still a lot of detail work left to do. Mount the ball, make a base and even some engraving.


