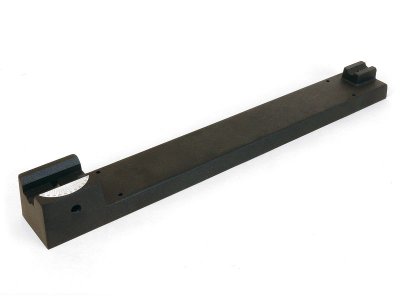
Sherline lathe spindle center and bed divergence.

EricB

Registered
Registered
Joined
Feb 15, 2020
Messages
375
While I was working my first steam emgine build I noted that the center of work held in my lathe chuck rose away from the bed as you moved away from the headstock: https://www.hobby-machinist.com/threads/the-journey-begins-pm-research-5.83114/post-766928

I have another project to start so I decided to thoroughly investigate the problem before I start making scrap.

I discovered that the wrinkle paint they used was compressed by the two screws that hold the lathe bed onto the base. It was fairly uniform at the handwheel end, but only around the screw hole at the headstock end. Tightening the screw against the paint caused the lathe bed to flex. I could see the flexing using a square placed on the bed. At first I tried to add shims between the bed and base where the paint was compressed. No joy! I finally just removed all the paint from the contact areas under the headstock.
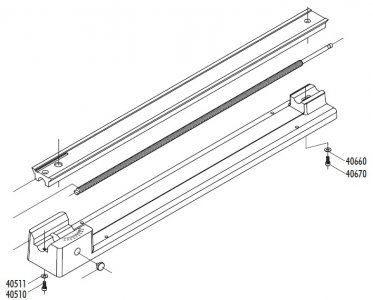
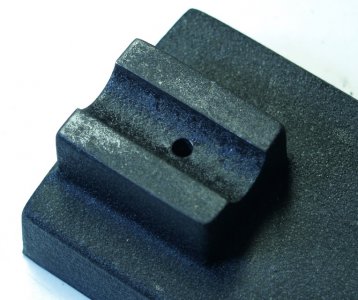
bed and base.jpg
handwheel end.jpg
headstock end.jpg

Hopefully this will solve the problem.

Eric
 
That's what I thought too. It's like an entirely different machine now.
 
While I was working my first steam emgine build I noted that the center of work held in my lathe chuck rose away from the bed as you moved away from the headstock: https://www.hobby-machinist.com/threads/the-journey-begins-pm-research-5.83114/post-766928

I have another project to start so I decided to thoroughly investigate the problem before I start making scrap.

I discovered that the wrinkle paint they used was compressed by the two screws that hold the lathe bed onto the base. It was fairly uniform at the handwheel end, but only around the screw hole at the headstock end. Tightening the screw against the paint caused the lathe bed to flex. I could see the flexing using a square placed on the bed. At first I tried to add shims between the bed and base where the paint was compressed. No joy! I finally just removed all the paint from the contact areas under the headstock.
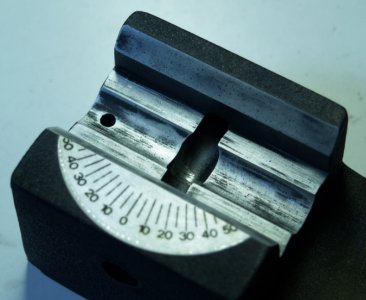
View attachment 376318
View attachment 376320
View attachment 376321

Hopefully this will solve the problem.

Eric

Good that you have improved the alignment of your lathe.

However, at least on my two Sherline lathes, the areas that you have cleaned up would make no difference. They are "in the wind" and have clearance and do not touch the cylindrical parts that house the leadscrew or anything on the headstock end. The contact on the headstock end is on the angled part of the bed and fits the underside of the bed vee ways. That is the part that you did not clean up. Look again at the way it goes together. Check to see that there is clearance. Maybe that when you took the lathe apart and put it back together you did something else that made the difference? Or perhaps there was a manufacturing error on your lathe's bed.
There is an important sequence in tightening the bolts on the headstock end. The bolt that screws into the cylindrical housing that the lead screw fits into is tightened first. The screw that goes through the aluminum lathe bed and screws into the cylindrical housing is tightened afterwards.

Thank you for your insights. I agree with you that some of those areas should not have been part of the problem, but they were. I scraped the paint from all but the two vertical surfaces on each side of the slot, or everywhere that I could see in the paint that the lathe bed was making contact. That includes the two angled sides, as you've stated, and in the curved bottom where the lead screw support rests as shown in the picture above. The paint was at least 0.020" thick in places. Cleaning out the curved bottom made the greatest difference. I think the manufacturing error with my lathe was painting the machined surfaces where the bed and base make contact.

Eric
 
Last edited:
Thank you for your insights. I agree with you that some of those areas should not have been part of the problem, but they were. I scraped the paint from all but the two vertical surfaces on each side of the slot, or everywhere that I could see in the paint that the lathe bed was making contact. That includes the two angled sides, as you've stated, and in the curved bottom where the lead screw support rests as shown in the picture above. The paint was at least 0.020" thick in places. Cleaning out the curved bottom made the greatest difference. I think the manufacturing error with my lathe was painting the machined surfaces where the bed and base make contact.

Eric
I checked my Sherline lathe. All the surfaces are painted, at the headstock end and at the handwheel end.

This is Sherline's photo of the 24-inch long lathe base, at https://www.sherline.com/product/24-lathe-base/.
44010_pic.jpg
In the photo, all the surfaces appear to be painted. Perhaps the paint is a problem when it is too thick.

My lathe might have an alignment problem. When the lathe was screwed to a level 80/20 frame, the headstock end was level but the handwheel end was not. To make the two ends level, I installed a 0.008" shim under the lathe base at the front, right mounting point.

Karl
 
You wouldn't think a layer of paint would make any difference, but in my case it was quite obvious.

Eric
 
Back
Top