- Joined
- Jan 8, 2013
- Messages
- 232
Since I was able to get a really good deal last summer on a Clausing 8520 mill, I decided to splurge and buy an X-axis power feed. I went with the Servo M-9130-140, which cost me almost as much as I paid for the mill.
This model is designated to be for Clausing mills and, while I was skeptical, I had read in various places that it would be an easy, almost "bolt-on" installation. In reality, it seems to be made for a larger current mill and is probably very similar to the Taiwanese or Chinese version that Enco and others sell in terms of what is involved in installation. I talked to a long-time employee of Servo who told me that thirty years ago they actually had sold a "bolt-on" unit for the 8520 (which I'm guessing is the unit shown in the H-M thread "Green mill").
Since I paid more than twice what the Enco version costs, I may have overpaid--unless the much-vaunted American quality pays off over time--but it wasn't too difficult to adapt it to my mill and it works well. In hindsight, I would probably buy the Enco version instead.
I took some pictures of the process because I know a number of people have expressed interest in adding a power feed to their 8520.
This is the whole kit (some of which wasn't used):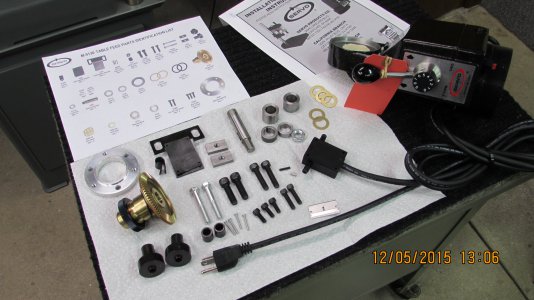 The bevel gear as supplied:
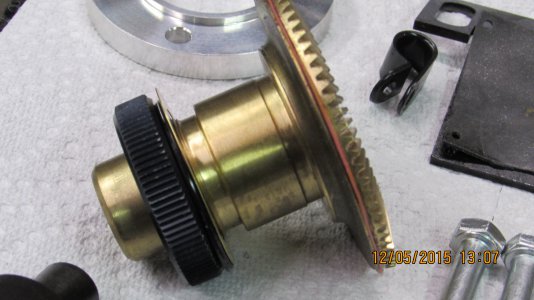 I had to turn down the fillet on the back of the bevel gear so the dial would be in the right position. I made the steel collar shown to bridge the gap between the dial and the new lock nut:
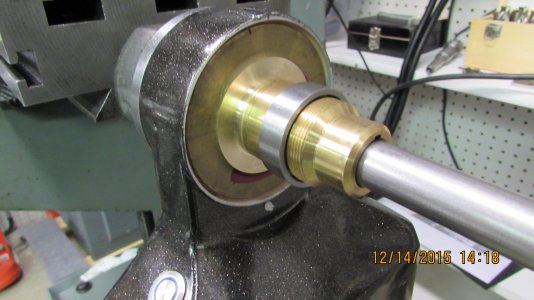 The original shaft is 7/16" so I had to sleeve it to 5/8" to fit the new power feed. The sleeve is pinned to the original shaft and is keyed to the bevel gear:
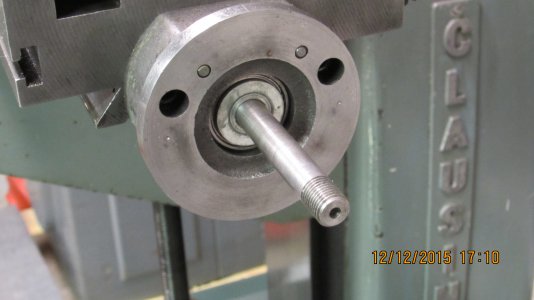
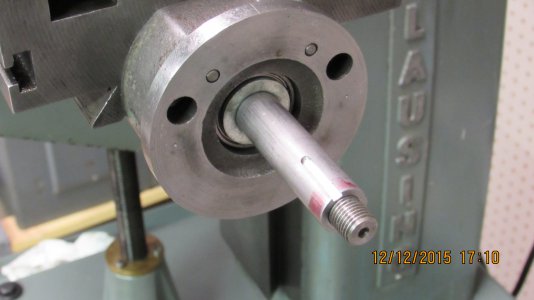 I had to bore out the dial to fit over the bevel gear shaft:
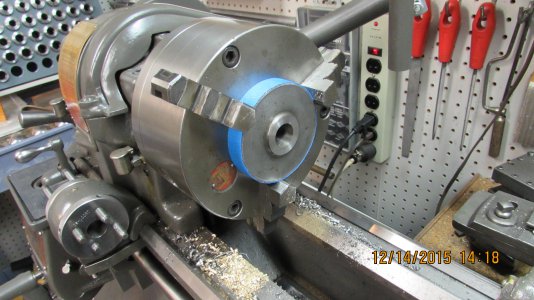 I also had to make an extension to the shaft, which screwed on to the original end threads (pinned to the shaft through the threads) and then stepped down to 7/16" to fit the original handle and nut:
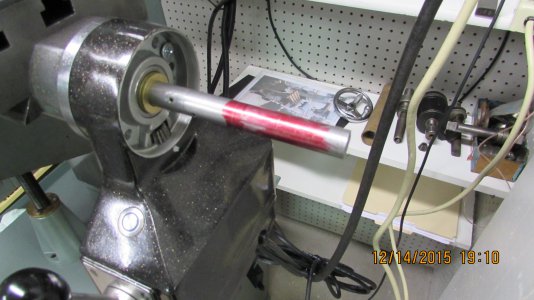
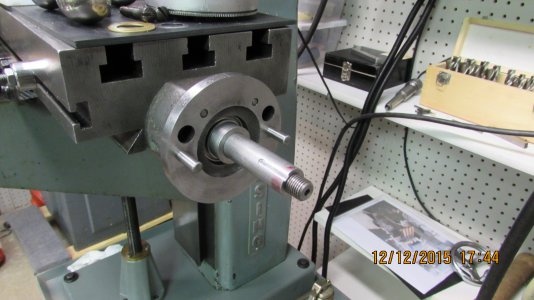
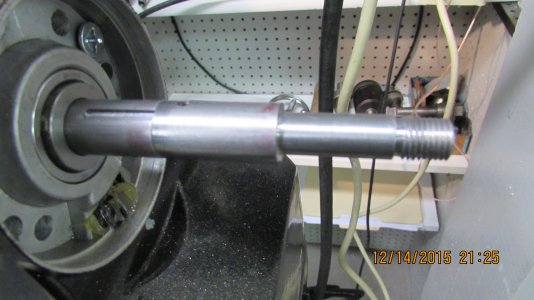 The power feed needs to be exactly centered on the shaft. It had holes in the right spots to bolt through the original collar into the end of the bed, but I added two pins so it would stay in the right position:
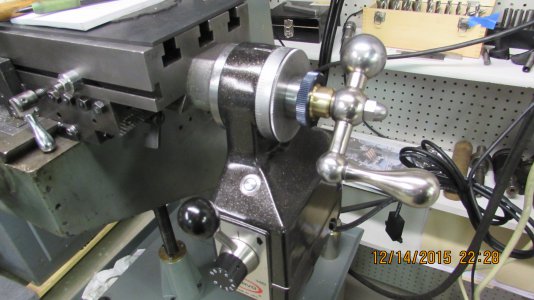
 Everything needs to be shimmed carefully for the bevel gear to work correctly and not destroy itself. A bunch of shims are provided and I made a couple. This is what it looks like installed:
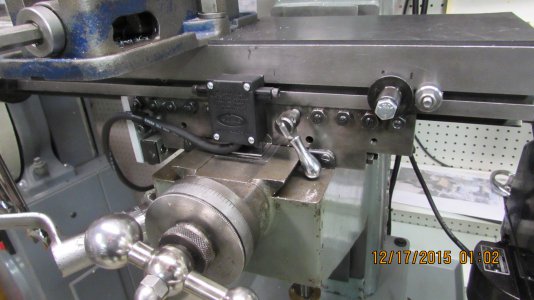
 It works fine! The ears for the limit switch bracket (intended for a Bridgeport-type machine) needed to be removed. The bracket was then bolted to the original table stop block. The switch attaches to the bracket with the four small bolts supplied. The large diameter part of the two stops had to be turned down a little in order to clear the gib screw nuts and the supplied t-nuts had to be milled to fit:
I'm sure there are other ways to successfully adapt a power feed of this type to the 8520, but this worked for me and I hope it proves helpful.
Bill Burton
This model is designated to be for Clausing mills and, while I was skeptical, I had read in various places that it would be an easy, almost "bolt-on" installation. In reality, it seems to be made for a larger current mill and is probably very similar to the Taiwanese or Chinese version that Enco and others sell in terms of what is involved in installation. I talked to a long-time employee of Servo who told me that thirty years ago they actually had sold a "bolt-on" unit for the 8520 (which I'm guessing is the unit shown in the H-M thread "Green mill").
Since I paid more than twice what the Enco version costs, I may have overpaid--unless the much-vaunted American quality pays off over time--but it wasn't too difficult to adapt it to my mill and it works well. In hindsight, I would probably buy the Enco version instead.
I took some pictures of the process because I know a number of people have expressed interest in adding a power feed to their 8520.
This is the whole kit (some of which wasn't used):
 The bevel gear as supplied:
 I had to turn down the fillet on the back of the bevel gear so the dial would be in the right position. I made the steel collar shown to bridge the gap between the dial and the new lock nut:
 The original shaft is 7/16" so I had to sleeve it to 5/8" to fit the new power feed. The sleeve is pinned to the original shaft and is keyed to the bevel gear:
 I had to bore out the dial to fit over the bevel gear shaft:
 I also had to make an extension to the shaft, which screwed on to the original end threads (pinned to the shaft through the threads) and then stepped down to 7/16" to fit the original handle and nut:
 The power feed needs to be exactly centered on the shaft. It had holes in the right spots to bolt through the original collar into the end of the bed, but I added two pins so it would stay in the right position:
 Everything needs to be shimmed carefully for the bevel gear to work correctly and not destroy itself. A bunch of shims are provided and I made a couple. This is what it looks like installed:
 It works fine! The ears for the limit switch bracket (intended for a Bridgeport-type machine) needed to be removed. The bracket was then bolted to the original table stop block. The switch attaches to the bracket with the four small bolts supplied. The large diameter part of the two stops had to be turned down a little in order to clear the gib screw nuts and the supplied t-nuts had to be milled to fit:
I'm sure there are other ways to successfully adapt a power feed of this type to the 8520, but this worked for me and I hope it proves helpful.
Bill Burton

