Rockwell 21-100 Pulley Shaft And Bearings

john.oliver35

H-M Supporter - Gold Member
H-M Supporter Gold Member
Joined
Apr 26, 2014
Messages
242
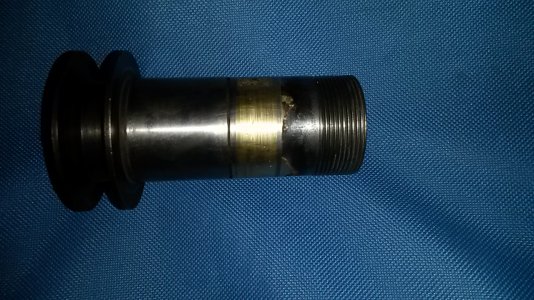
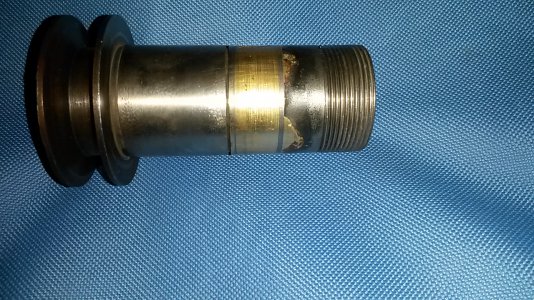
Hello again all. While testing my newly-acquired 21-100 I found that there was quite a lot of noise from the spindle assembly at high speeds. Imagine my surprise when I loosened the belt and found I could lift the pulley hub (part #22 in the Army 21-100 manual) right out of the pulley with two fingers! The nut on the bottom of hub had come loose and fallen inside of the top of the quill.
20150509_203706.jpg

20150509_203715.jpg
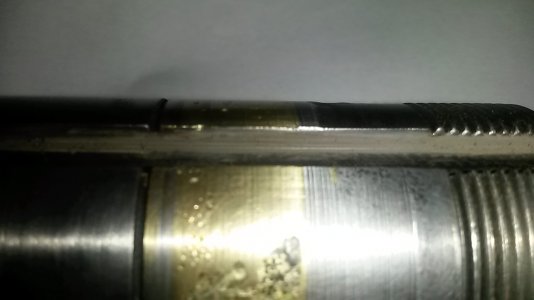
The hub had obviously had an attempted repair before using brazing. The bearings themselves run smooth - my guess is that the nut was never properly tightened after this previous repair attempt and the hub has been bouncing around in the pulley ever since.
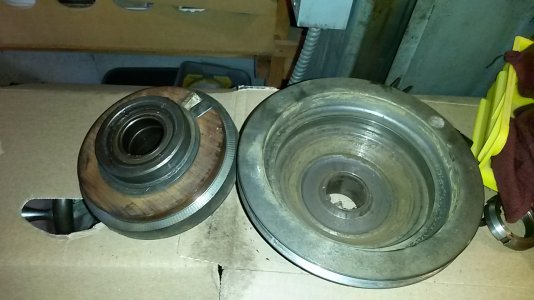
20150509_183302.jpg
So, this appears to be a steel shaft. How would one go about doing a second repair? My only lathe is a little Sherline (don't laugh). I believe this shaft would just fit on that lathe if I turned an arbor which fit snuggly on the inside of the splines within this hub. I could build up the damaged area with another brazing attempt then turn it down to a slight press fit into the pulley bearings. Some forum's say not to heat a shaft like this to brazing temperatures in case it is hardened as this could temper the piece. If so, it looks like someone has beat me to it!

Advise is appreciated!!
 
Hi John,

Sorry I have no useful info directly related to your question.....but,

Zooming in on those pictures it almost looks like it had been broken in half...there is brazing material on both sides of what looks like a steel ring at the right end, and a groove outside of what looks like another steel ring towards the left end.

If you look thru or put your finger thru do you see/feel anything?

Does an original part have a groove there? Or is something else going on?

-brino
 
Brino,

I believe the appearance of that steel 'ring' is where the original bearings spun at one time and cut into the shaft. Looking at a cross section of shaft at the keyway shows that that this ring does not extent through the part.
20150510_181112.jpg
 
aaaahhh....okay, now I see what you see!
Thanks for the additional photo.

This must be covered somewhere......let me check some books......

-brino
 
John,

The only "shaft repair" methods I've found are:

1) if a bearing is spinning you can knurl the area to raise a pattern and increase the shaft OD; this was suggested only as a temporary means until the shaft could be replaced

2) turning down the damaged area to press-fit or shrink-fit an oversize sleeve, the sleeve is then itself turned down. This would be difficult on your shaft due to the threads and the key slot.

Could you sleeve the whole thing (except the threads) to a bigger diameter and use a bearing with larger ID?
The sleeve could again be press-fit, shrink-fit or maybe even plug welded to the spindle....of course that key way is still a problem.....

Maybe you'll get a "voice of experience" answer to your original question about another brazed layer.....

-brino
 
Is there alot of play between the shaft and inner race of the bearing? You could have a sleeve tig welded then cut the key way. If all else fails J B weld and turn it down to size.
 
Sorry for the long delay in replying - I do have the mill up and running again. Unfortunately I lost many of my pictures of the repair. I will post what I have here.

First, I opted to build up the shaft by brazing. I was an experience, and it took me a couple of tries to get an even enough build up around the worn area. I determined that I was too worried about over-heating the hub and was not getting good bronze flow. I don't have any pictures of my brazing job before I turned it down to a shaft - it still looks really ugly in my minds eye though!

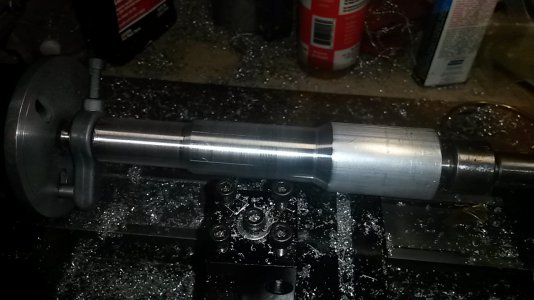
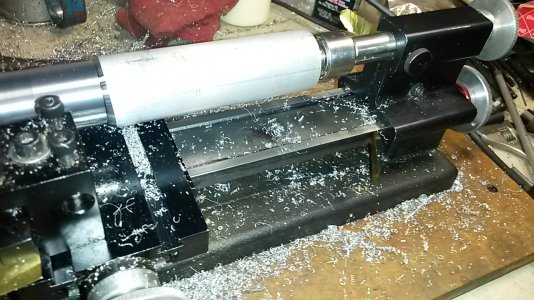
My only lathe is a little Sherline. Certainly not idea for this but it worked. I started by turning an aluminum mandrel that would press into the center of hub:

20150514_191234.jpg 20150513_183522.jpg

Note the little brass shims in the tailstock V-ways and ram to get the arbor to have less than 0.001" of taper!

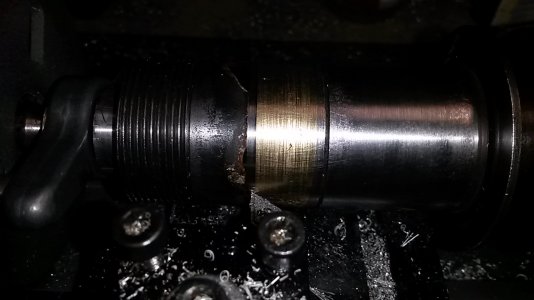
I pressed the arbor into the hub then returned it to the Sherline and turned down the brazing from the original repair just to confirm it was concentric:

20150514_192021.jpg

At this point I removed the arbor, cleaned the hub well and brazed to build up the diameter. I then returned to the sherline and turned the diameter down to a light press fit of the hub bearings. This is the point where I lost all of my pictures - it did happen thought. I got bronze into the threads when brazing and had to clean them up with he little Sherline threading attachment

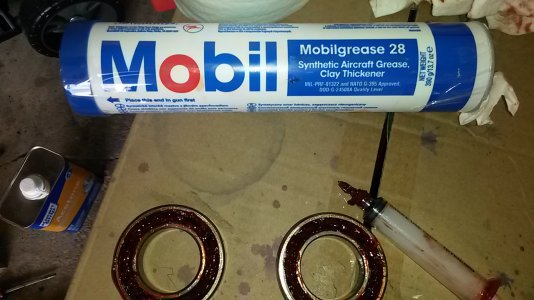
I cleaned the existing bearings with mineral spirits and then acetone. They seems smooth, and were hand-marked with the 'S' following the part number as a pair with the ground preload. There is a bunch of informaiton on the bearings in the Yahoo 21-100 Forum. For some reason, I have the picture of the packed bearings:
20150613_160022.jpg

I pressed the bearings, hub, and pulley together, and tightened the retaining nut to about 50ft-lbs using a special socket which I made by modifying a Chinese 1/2" impact socket on my Sherline mill. That little operation took well over an hour and several beers on the little Sherline - made me remember why I bought the Rockwell! This socket is also documented on the Yahoo Forum. Here is a picture of mine:
20150705_132204[1].jpg

I have the head back together and it is running much smoother than before. Still some spline rattle. Perhaps when I get a bigger lathe I'll make a new hub. A gentleman on the Yahoo forum documented his making of a new hub and also has YouTube videos up. Try searching for '21-100 Hub'.

I'll have to pull the hub again at some point to make a new brake shoe. Right now I have the tables removed for a good cleaning and re-lube.
 
run the spindle without the drawbar, they rattle a lot and you think its a spindle. Tim
 
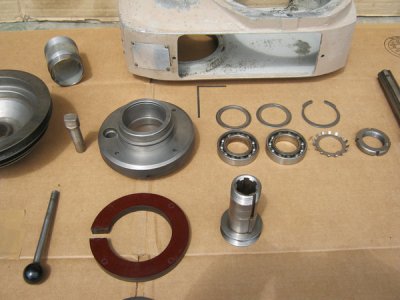
Hey John, just to add, there should be a retaining ring under the nut that has small tabs that bend up to keep the nut from unscrewing. If you have the ring, then maybe the tabs weren't bent up to hold it in place. Here is a pic...it is to the right of the bearings.
IMG_1260.jpg
 
Back
Top