- Joined
- Sep 29, 2014
- Messages
- 2,102
I ran all of the rectangular and square parts that needed lathe work today, 19 parts combined. Multiple parts are made faster in a lathe then a mill with a boring head especially if internal retaining ring grooves and multiple diameters are involved, we also do not have a mill that will interpolate accurately the given +.001 -.000 bearing bore tolerances including Haas and Fadal 3 axis machining centers.
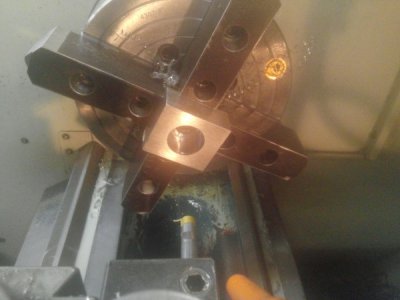
The blanks were milled to size and a hole reamed at the proper location so that I could indicate the parts in the 4 jaw. I milled pockets in soft jaws .100 deep X .100 wide. these parts are thin being 1" or less. Got them close to center using a live center in the tail stock pushed into the hole against the jaw pockets then tightened the jaws lightly and indicated from there. One excellent practice when using a 4 jaw on repetitive parts is to mark 2 of them that you will open when changing parts, the part will remain close to correct position but will still need to be indicated, I use a sharpie marker for this.
The part in the picture (8 total in 304 SS) has a 1.125" +.001 -.000 bore X .750 deep then a .88 bore X .780 deep then a .65 bore through with an internal retaining ring groove .625 out from the .750 bore depth -.005 +.000 and the groove depth has a ± .004 tolerance. The tool in the pic is the internal groove tool.
All in all a PITA


