-
Welcome back Guest! Did you know you can mentor other members here at H-M? If not, please check out our Relaunch of Hobby Machinist Mentoring Program!
You are using an out of date browser. It may not display this or other websites correctly.
You should upgrade or use an alternative browser.
You should upgrade or use an alternative browser.
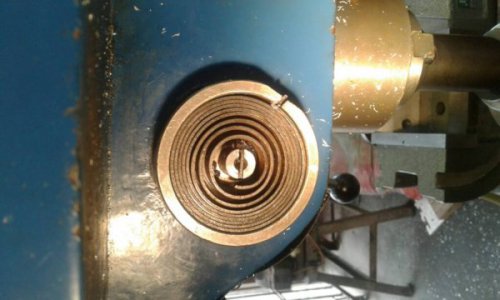
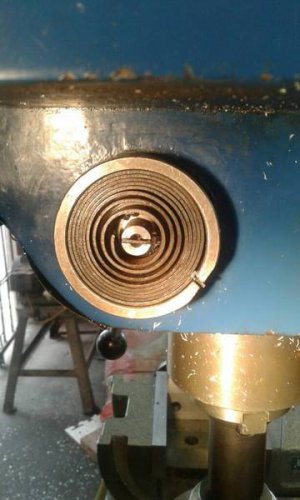
quill spring fitment
- Thread starter Suzuki4evr
- Start date
- Joined
- Feb 1, 2015
- Messages
- 9,575
The spring likely broke because the ends where the bends were made were not annealed prior to bending. I would separate the coils enough to permit putting a heat sink on the coil and heat the end where you want to make the bend to draw the temper. If you polish the spring, you can see the colors change. The colors will run from a light straw to amber, brown, violet, deep blue, light blue and finally grey. Spring temper is usually a deep blue. Past that softens the steel and makes it less likely to break when bent. I would take the ends to the grey color. Don't heat to a glowing red or you may actually harden the spring and make it brittle.
You want to use a heat sink to prevent removing the temper from the working part of the spring. You can use a pair of vise grips or some wet paper towel stuffed the spring. Heating should be with a torch capable of raising the temperature quickly. This minimizes the transfer of heat to the bulk of the spring. The outside bend shouldn't be to difficult. To do the inside bend, I would suggest pulling the spring out to make a cone to enable heating and bending. Don't overstretch the spring or you will create. a permanent distortion.
Keep in mind that shortening the spring will increase the spring constant. For the inch or so that you are shortening, it shouldn't be an issue.
When installing the spring, keep the spring in as relaxed a state as possible. I usually work from the outside in. Use a pair of needle nose vise grips to hold the inner tab and a clamp to keep the outer tab in place is helpful. If you don't have needle nose vise grips, a pair of long nosed pliers with heavy rubber bands wrapped around the grips should work. I don't see it on yours but my mill/drill spring has a provision for winding. I loosen the cap enough to slide past the detent and wind it up. Winding the spring only enough to provide positive return of the quill will help to prevent further breakage.
- Joined
- Sep 29, 2017
- Messages
- 2,250
Thank you. You have given me plenty information.The spring likely broke because the ends where the bends were made were not annealed prior to bending. I would separate the coils enough to permit putting a heat sink on the coil and heat the end where you want to make the bend to draw the temper. If you polish the spring, you can see the colors change. The colors will run from a light straw to amber, brown, violet, deep blue, light blue and finally grey. Spring temper is usually a deep blue. Past that softens the steel and makes it less likely to break when bent. I would take the ends to the grey color. Don't heat to a glowing red or you may actually harden the spring and make it brittle.
You want to use a heat sink to prevent removing the temper from the working part of the spring. You can use a pair of vise grips or some wet paper towel stuffed the spring. Heating should be with a torch capable of raising the temperature quickly. This minimizes the transfer of heat to the bulk of the spring. The outside bend shouldn't be to difficult. To do the inside bend, I would suggest pulling the spring out to make a cone to enable heating and bending. Don't overstretch the spring or you will create. a permanent distortion.
Keep in mind that shortening the spring will increase the spring constant. For the inch or so that you are shortening, it shouldn't be an issue.
When installing the spring, keep the spring in as relaxed a state as possible. I usually work from the outside in. Use a pair of needle nose vise grips to hold the inner tab and a clamp to keep the outer tab in place is helpful. If you don't have needle nose vise grips, a pair of long nosed pliers with heavy rubber bands wrapped around the grips should work. I don't see it on yours but my mill/drill spring has a provision for winding. I loosen the cap enough to slide past the detent and wind it up. Winding the spring only enough to provide positive return of the quill will help to prevent further breakage.
Sent from my SM-J111F using Tapatalk


