- Joined
- Feb 5, 2015
- Messages
- 662
Many new hobbyists seem to have little use for this type of work holder, preferring devices that tend to self-align, like a three jaw chuck or some form of collet system.
A typical 4-jaw alignment experience might go like this:
Does that seem about right ? OK, that procedure will get shorter and shorter with practice but it can be improved considerably with just one simple change:
For initial alignment in a four jaw chuck, I prefer a travel indicator rather than a DTI. This is because the run-out of the work piece is likely to be excessive, at least initially, and would probably exceed the travel limits of a typical DTI.
This one is permanently mounted to a magnetic stand and is parked on the back of the lathe taper attachment when not required.
At this point, for safety sake, disengage the drive system of the machine by loosening the belt drive or placing the spindle drive in neutral. In this old Sheldon, lifting the lever loosens the belt as can be seen in the photo.
Rotate the chuck (and work piece, of course) so that one of the jaws is aligned with the travel indicator. With the spindle of the travel indicator touching the center line of the work piece, note the reading (or zero the reading). Rotate the chuck 180 degrees and note the reading.
Insert the two chuck keys in the near and far side adjustment screws. NOTE: This is a posed photo with the lathe drive train disconnected. NEVER leave a chuck key in a lathe chuck. If the key is in the chuck it needs to have a hand attached to it !
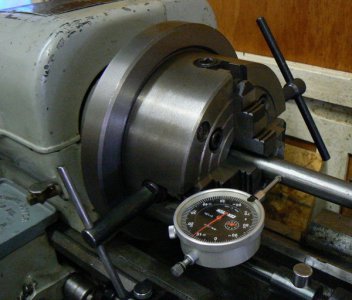
Using the two chuck keys, one to loosen and one to tighten, watch the indicator while gently adjusting the chuck keys until the work is moved ONE-HALF of the error previously noted.
Rotate the chuck ¼ of a turn so that the other two jaws are now aligned with the indicator axis. Note the indicator reading then rotate the chuck 180 degrees and determine the difference between the highest indicator and the lowest one.
Using both chuck keys, tightening and loosening simultaneously, move the work one-half of the error distance.
Repeat this one or two more times until the run-out is about .001 or .002. At this point, we need to do some tightening to secure the work in the chuck. Continue the process of rotating the chuck, checking the run-out and then rotating 180 degrees and correcting by one-half of the small error.
You might try using only one chuck key to “push” the work away from the high point of the run-out. Do this a couple of times and the result should be a tightly secured work piece with minimal run-out.
OK, so the work is centered at the location of the indicator, near the chuck, but it’s highly unlikely to be centered along the entire length. Typically the next step is to move the indicator near the end of the work. Rotate the work until the high point is found.
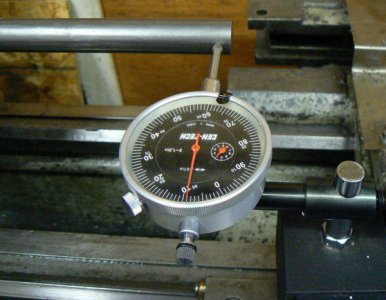
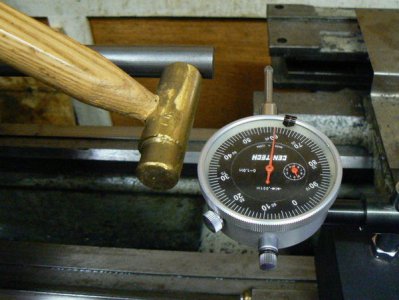
Move the indicator off of the work then lightly tap the high point of the work piece with a soft-faced hammer. Check the run-out and repeat the process as required.
When the run-out is within desired limits, carefully drill a center hole and then use the tailstock center to keep the work properly aligned with minimum run-out.
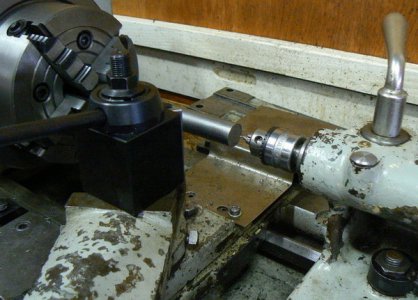
If for some reason it’s not practical to center drill the end of the part, a steady rest can provide the support required to keep the work aligned.
This simple process can reduce the time required to align a 4-jaw chuck from minutes to seconds. When I aligned the test bar for the above photos, I timed the alignment process. It took less than one minute to align the bar to within .001 !
A typical 4-jaw alignment experience might go like this:
- Work is installed in chuck and the jaws tightened loosely while visually centering the work
- Chuck is rotated by hand, checking work eccentricity with DTI and adjusting as required
- Repeat , over and over and over and …
Does that seem about right ? OK, that procedure will get shorter and shorter with practice but it can be improved considerably with just one simple change:
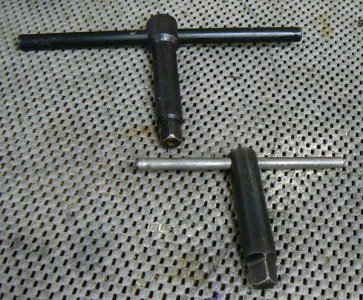
- Make another chuck key.

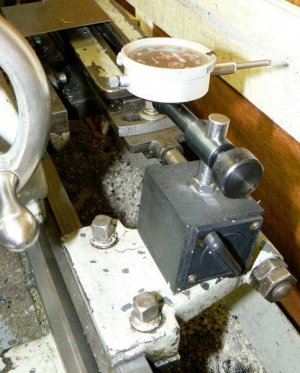
For initial alignment in a four jaw chuck, I prefer a travel indicator rather than a DTI. This is because the run-out of the work piece is likely to be excessive, at least initially, and would probably exceed the travel limits of a typical DTI.
This one is permanently mounted to a magnetic stand and is parked on the back of the lathe taper attachment when not required.

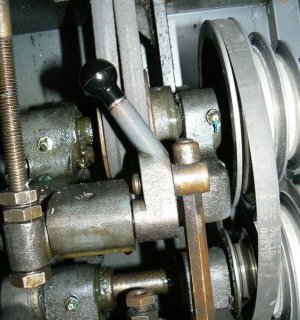
At this point, for safety sake, disengage the drive system of the machine by loosening the belt drive or placing the spindle drive in neutral. In this old Sheldon, lifting the lever loosens the belt as can be seen in the photo.

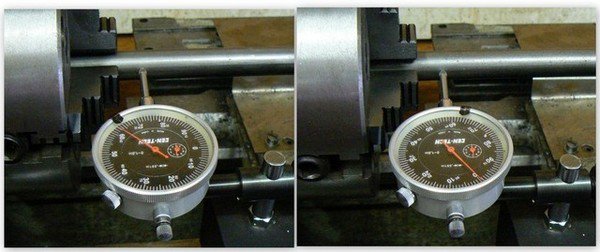
Rotate the chuck (and work piece, of course) so that one of the jaws is aligned with the travel indicator. With the spindle of the travel indicator touching the center line of the work piece, note the reading (or zero the reading). Rotate the chuck 180 degrees and note the reading.

Insert the two chuck keys in the near and far side adjustment screws. NOTE: This is a posed photo with the lathe drive train disconnected. NEVER leave a chuck key in a lathe chuck. If the key is in the chuck it needs to have a hand attached to it !

Using the two chuck keys, one to loosen and one to tighten, watch the indicator while gently adjusting the chuck keys until the work is moved ONE-HALF of the error previously noted.
Rotate the chuck ¼ of a turn so that the other two jaws are now aligned with the indicator axis. Note the indicator reading then rotate the chuck 180 degrees and determine the difference between the highest indicator and the lowest one.
Using both chuck keys, tightening and loosening simultaneously, move the work one-half of the error distance.
Repeat this one or two more times until the run-out is about .001 or .002. At this point, we need to do some tightening to secure the work in the chuck. Continue the process of rotating the chuck, checking the run-out and then rotating 180 degrees and correcting by one-half of the small error.
You might try using only one chuck key to “push” the work away from the high point of the run-out. Do this a couple of times and the result should be a tightly secured work piece with minimal run-out.
OK, so the work is centered at the location of the indicator, near the chuck, but it’s highly unlikely to be centered along the entire length. Typically the next step is to move the indicator near the end of the work. Rotate the work until the high point is found.

Move the indicator off of the work then lightly tap the high point of the work piece with a soft-faced hammer. Check the run-out and repeat the process as required.

When the run-out is within desired limits, carefully drill a center hole and then use the tailstock center to keep the work properly aligned with minimum run-out.

If for some reason it’s not practical to center drill the end of the part, a steady rest can provide the support required to keep the work aligned.
This simple process can reduce the time required to align a 4-jaw chuck from minutes to seconds. When I aligned the test bar for the above photos, I timed the alignment process. It took less than one minute to align the bar to within .001 !

