- Joined
- Jun 24, 2012
- Messages
- 14
Well, this is a post I put up in the CASE garden tractor forum about a couple years ago. It turned out to work unbelievably well, so I thought I'd drop it in here as it would seem to cross over nicely...
You'll have to forgive some of the text as it was posted to a group that knew tractors and hydraulics rather than machining... I'm just doing a copy and paste, so if something needs to be clarified, I'll have to catch those as I go...
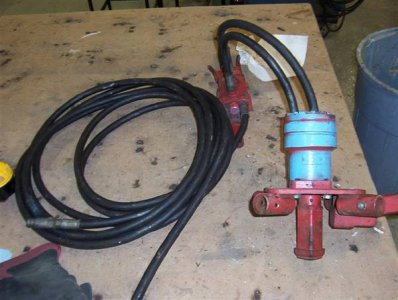
My girlfriend and I foster dogs... At my house, this is not a problem since the yard is fenced... At her place, its more of a pain since there are gaps between the various neighbor's fences, and we also need to cut the yard in half by the garage to keep the dogs in... I've had to dig a few holes there already for cement piers to support her front porch, and its nothing but rock, and packed clay... So when the topic of fence came up, it was either rent a machine, or perhaps I'd get lucky and find one that was affordable... Well for a variety of reasons the fence didn't happen this summer, so it gave me some more time, and I came up with the drill head from a Little Beaver hydraulic post hole digger.
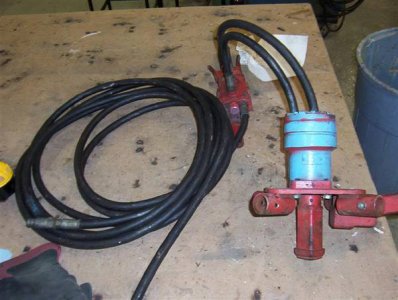
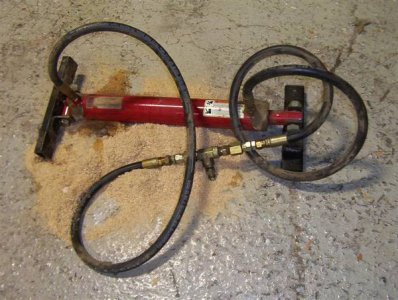
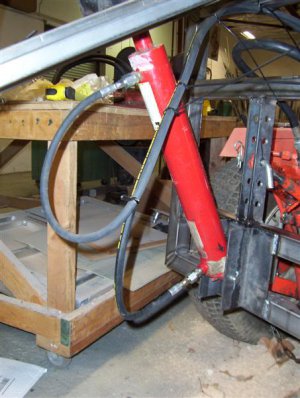
I then headed over to a shop I used to work at where there is a stash of hydraulic components that nobody there knows anything about except me... They let me have this cylinder which was used for 4 weeks for a show, and then put away...
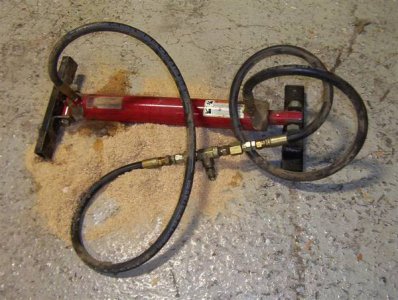
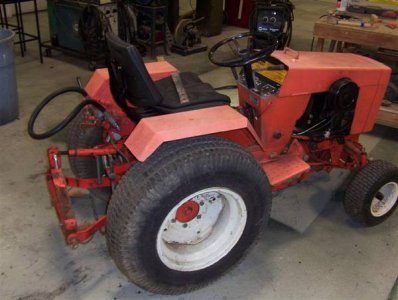
I got the 444 last year for the princely sum of $250 along with a tiller, but haven't used it for much other than pulling a dump cart, so I decided to put the digger on that rather than mounting it on the 646's hoe. Paint is a train wreck, but the engine and hydraulics are all in good shape.
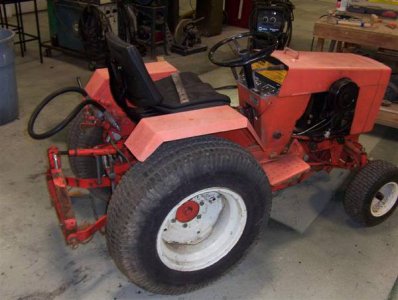
So it was off to the races... Well more like off to the CAD station... No photo of that, but it was easier to figure out the various arcs and mounting locations I'd need that way... Then it was off to the steel rack, and saws...
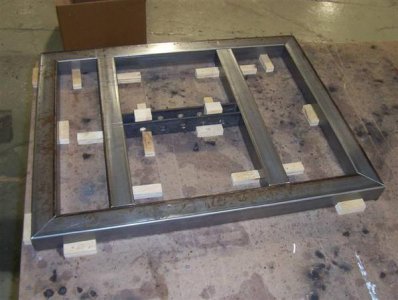
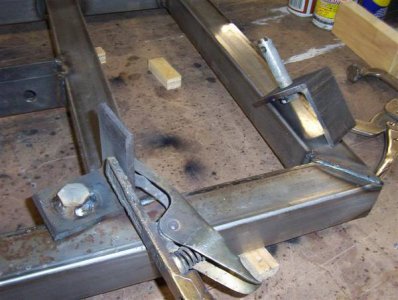
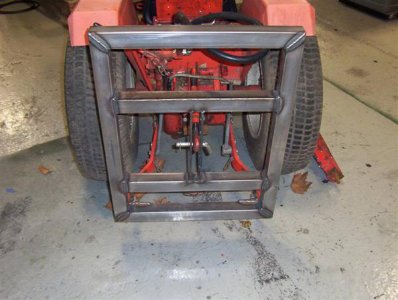
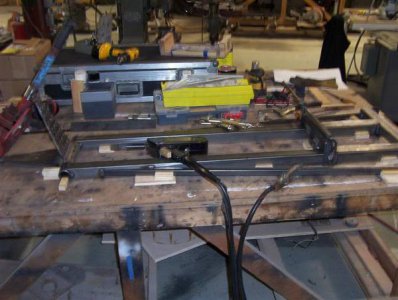
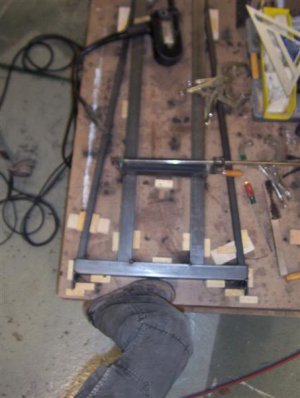
First up was the frame to put on the 3 point...
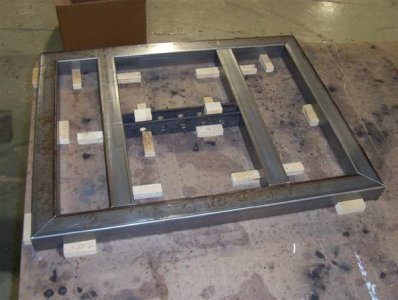
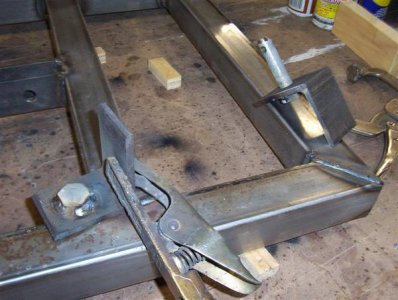
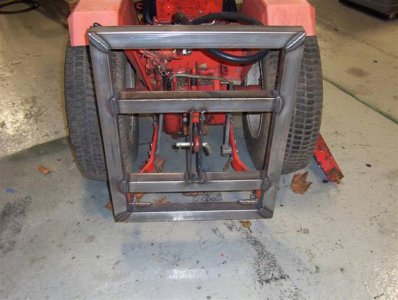
That's all 2" box that has been hanging around my shop for I don't know how long... Works quite nice for this kind of fab as its quite light, and yet very strong... 0.065" walls...
That was day 1...
On day 2, I decided I needed to deal with the mount for the Little Beaver head... I knew I needed two axis of flexibility to keep the drill plumb. This particular digger was a 2 man unit, so it is set up with 4 handles... On first look, I thought I'd be just fine using their mounting plate, and I proceeded that way... I'm going to have to remake their plate as it turns out since they didn't get the mounting tubes in a straight line... Not the end of the world, but it would bother me if I didn't fix that... That will be for another day though...
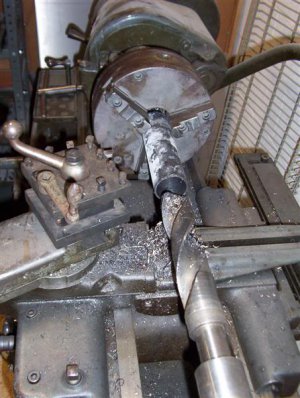
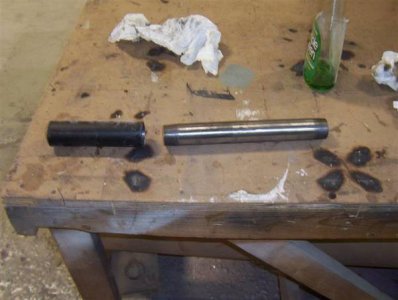
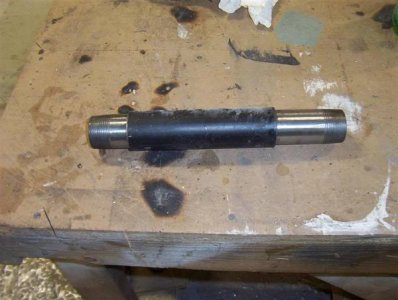
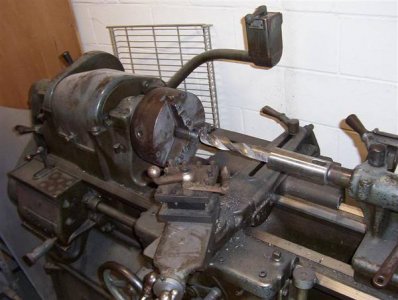
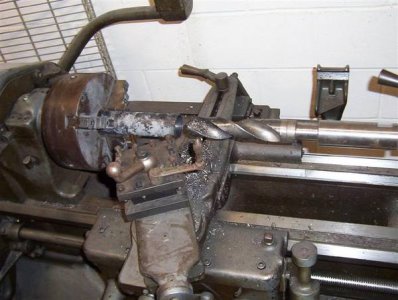
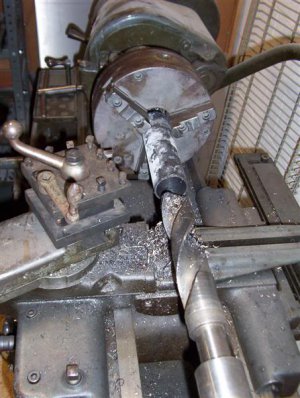
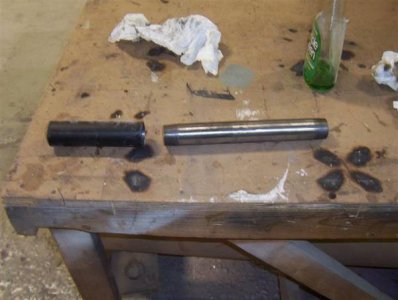
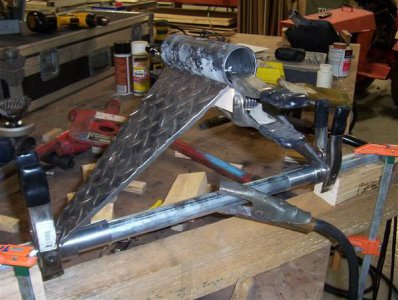
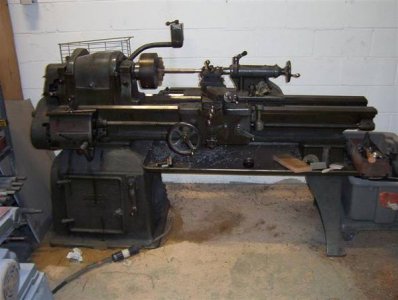
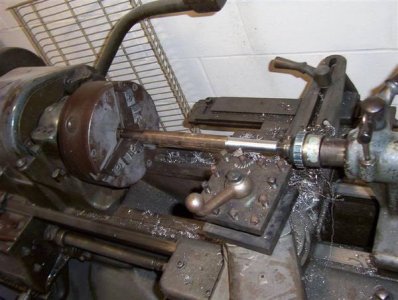
I wanted to use some pipe as the pivot points. Gives a nice large area to weld against, and its cheap, plus I have lots hanging around... Since I was planning to use their handles as the pivots, I found they almost slid through a 1" pipe coupling... So off to the lathe, and a good size bit...
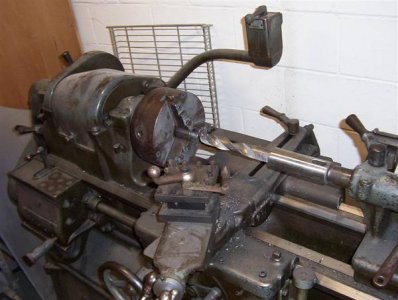
For the top pivit I wanted something longer and larger, so 1.5" scd 40 pipe almost allows you to slide a piece of 1.25" scd 40 pipe through... So off to the lathe, and the bigger drill bits...
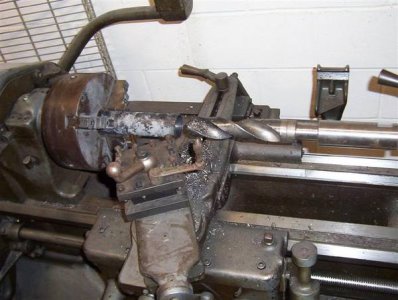
Next came the plates to connect things...
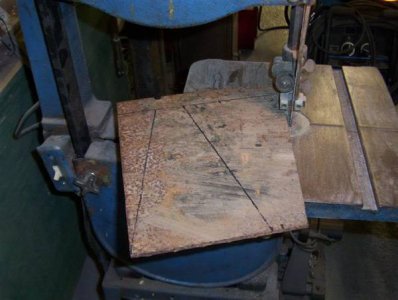
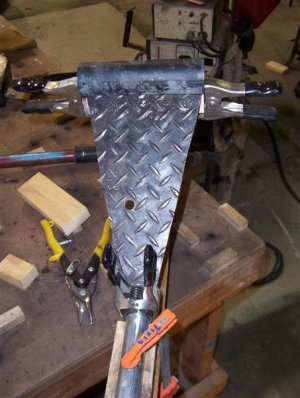
Some jigging to hold things in place...
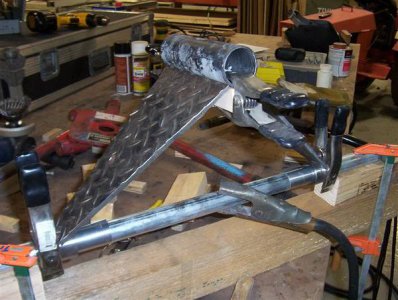
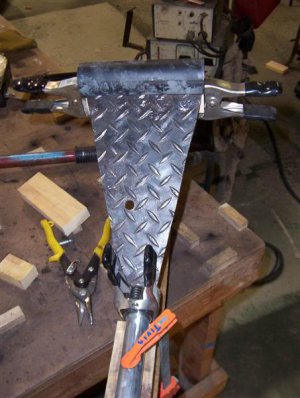
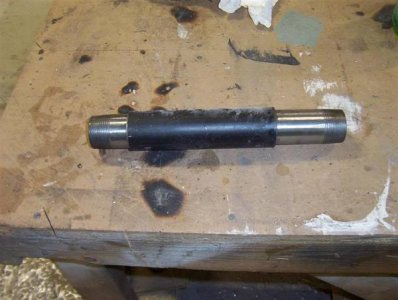
You can see I made sure my pivot points were in line by running the conduit I was using to jig straight through...
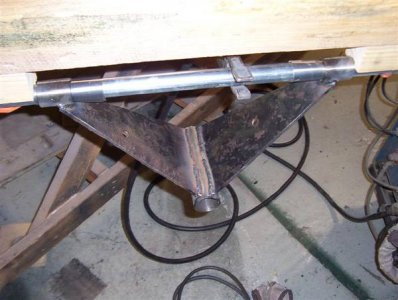
In these photos, the bracket looks wider than it is tall... I screwed up on a measurement, and ended up having to grind it all apart, and redo all the lathe work. The plates were saved... No photos of the second assembly process...
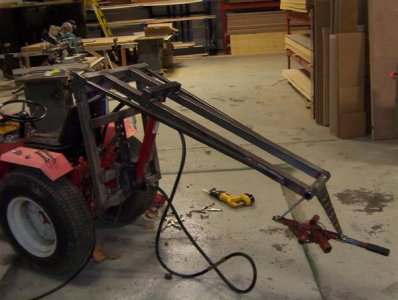
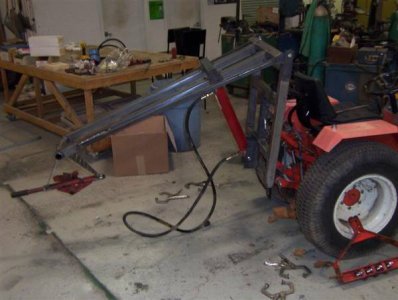
Day 3 came, and it was time to deal with the boom, and lift cylinder placement... I did all the metal work in CAD again to avoid most major errors... As always I did neglect one thing, and we'll get to that...
Here it is jigged on a table.
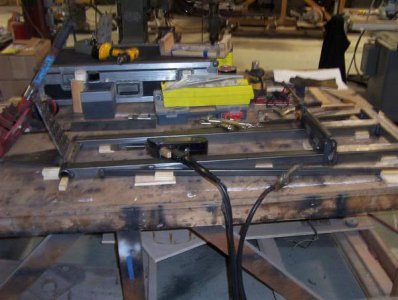
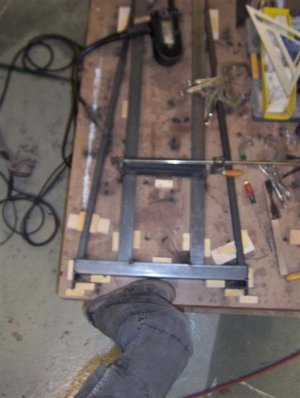
After that cooled, I bolted it to the 3 point frame, and started working on the cylinder mounts...
I had the upper mount already welded to the boom, but at some point managed to forget the thickness of the head of the 3/4" bolt, and as such, I couldn't take the bolt out of the frame once it was welded together... So out came the saw-z-all and the bolt is no more... Since a bolt wasn't going to work, it was off to the lathe again to make a pin...
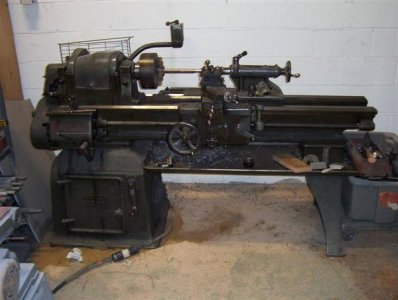
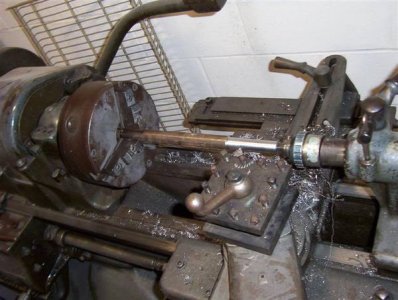
The pin will go in with washers, and a couple cotter pins. I ran out of time for that detail, but I did want to get the lower mount done today, so I got everything in place and welded the lower mount on... Its starting to look like what it should... You can also see the revised motor mounting bracket/ pivot...
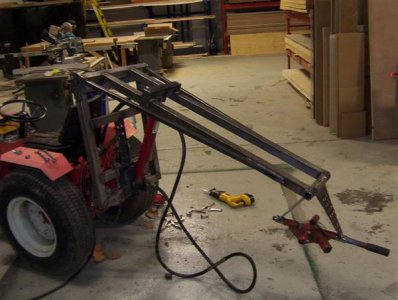
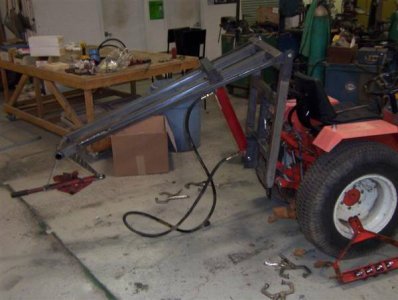
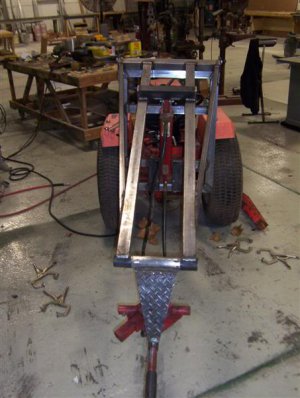
And then work intruded... Progress slowed to a snails pace for a while... But:
Here we go again...
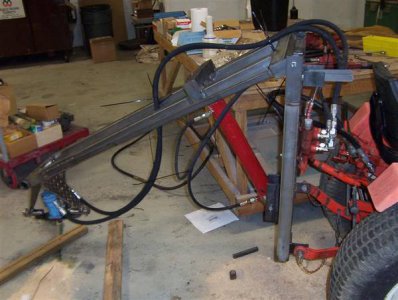
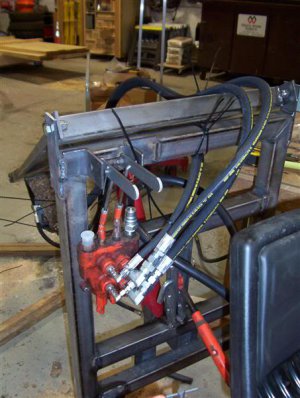
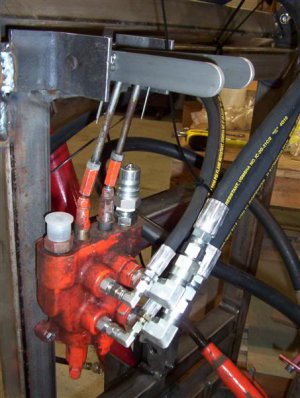
First order of plumbing came in, so I'm able to do the lines from the extra TCV out to the cylinder, and motor...
Most everything came from Surplus Center for this. The ORB to JIC came from FittingsandAdapters.com.
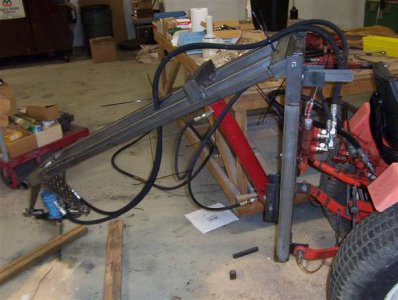
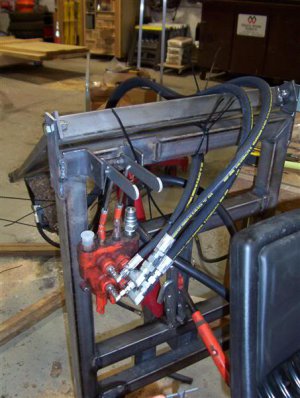
The zip ties are mostly temporary. I have to break all the hydraulics off the build for paint, so no point in trimming things too neatly... I want to know everything has enough play to swing through the complete motions...
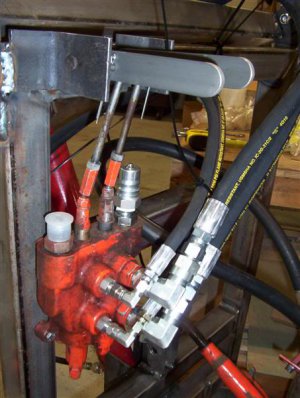
Hard down on the left lever is the float position. I'm hoping that works well to let the auger pull in to the ground on its own... So far my only concern is the lack of spring return on the right hand lever. That's nice in that I don't have to hold it down to drill, but it would be nice to have a detent to return to the off position... I may have to do something there, but we'll just have to see...
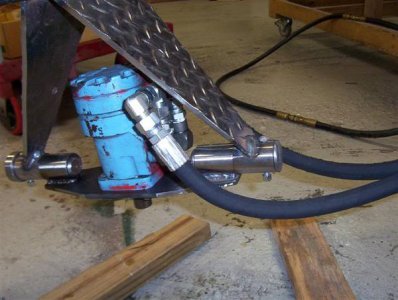
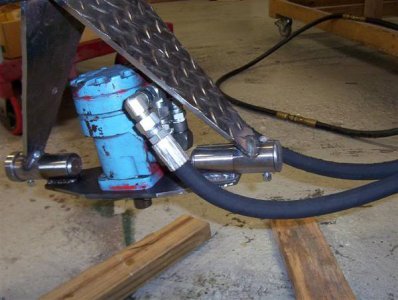
I'm not sure if I'm going to leave this as is, or swing the motor around so the ports come out the back. If I swing it, it may give me a little more room for the hoses to flex without hitting the frame. I can pivot the motor probably 15-20 degrees left/right now, and I doubt I'd set up with that much tilt, but it'd be nice to never have to worry about that... Front to back everything swings nicely as it is...
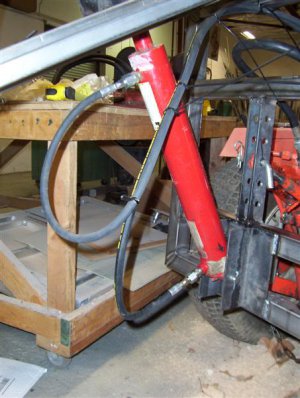
I was supposed to come out of the cylinder with a 90, but ended up using them back on the motor fittings... As it turns out, straight out seems to work just fine. Once I get plumbed in to the PTO, and can cycle the cylinder, I'll see how things look... Its always easy to add a JIC 90 later if I need a little more bend...
With any luck, there's another box from Surplus center at home now... If so, I can probably finish the plumbing tomorrow, and if I remember to bring oil, fill it, and see how things work... I guess I ought to order an auger now...
Another Day...
So yesterday, I got all the plumbing in... I also found the short that killed the fuse when I was snowblowing. (headlight wire as expected)
I got everything plumbed, fired it up, found a couple points I had to snug up a JIC fitting here and there, and was happy to watch the motor go around, and the boom go up and down...
Two observations...
1) The engine seems to exhibit more load than I'd think it should when powering the boom... There really is very little load on that cylinder since there isn't an auger on the drill... I will have to do some more testing there with a load on the arm. Something just seems off... I guess I ought to check the flow direction on the PTO valve again just to make sure I'm not running backwards...
2) I need to add a couple live swivels, and short hoses at the pivot point at the end of the arm... It seemed like the hoses would be ok, but they're putting a pretty good twist on the JIC fittings on the motor... They're now on the way.
Overall, I'm happy so far... Would have been nice not to need those live swivels since they're not cheap, but just seeing the motor turn was a nice sight...
And Another...
No, really, I didn't kick off... Just haven't had time...
So, today I pulled the digger back out, because spring is looming, and there are 3 fences on the schedule this summer somehow...
I had mounted one of the live swivels back in late January, and wasn't happy with it, plus the short hose I got to run from the swivel to the motor was too short... Getting disgusted, I ordered 2 of every length from Surplus Center, so I wouldn't have an issue when I got back to it...
Today, I cut new brackets to mount the swivels from some 1/2" aluminum plate I had. They work great. Ran the new lines, and connected up the existing ones. Got it mounted back on the tractor, and it all seems happy. I even have an auger for it now, so it looks a lot more like it ought to. I'll have to get some photos soon. Just didn't take the time today.
So, I need to deal with the telescopic feet next. At least I have a plan for that, and all the material is in house... Also need to make a weight bracket for the front from a surplus mower mule... Then hopefully 1 test hole, and if successful then I would love to get it painted. If I run out of time, I'll just use it raw, and send it to the sandblaster at the end of the season...
I sure hope this thing performs as expected... I'll never hear the end of it if it's a dud...
Weeks are between many of these posts...
Still no photos... I've been busy... But...
I finished the outriggers and made a front counterweight last week. Then over Saturday, and Sunday, I ran it out to my folks place in PA, and punched 33 holes with the rig. For those not from PA, the "ground" in the eastern portion of the state is rock, shale, and clay... Its murder to dig, but, to my surprise, it did a tremendous job. Yes we had to work some of the rocks with a bar, but it made the job pretty easy overall.
Observations... I need to straighten and reinforce the two angles that the lower 3 point arms attach to. They bent outward, but that should be simple enough. I also need to add a crossbar up by the head so I can swing the motor up and over the arm to get it out of the way when you need to work in the hole with a bar. Also need to do some work on the sway chains as the unit will swing enough for the arms to catch in the lug tire bars.
We're pretty busy at my shop now, so pictures may not come quick, but they will... I couldn't be more pleased with how well the rig works!
And then there were pictures...
Back again...
Ok... I just wrapped up the modifications/tweaks... I should be ready to go next time I need a hole...
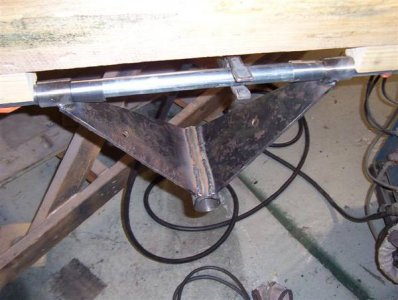
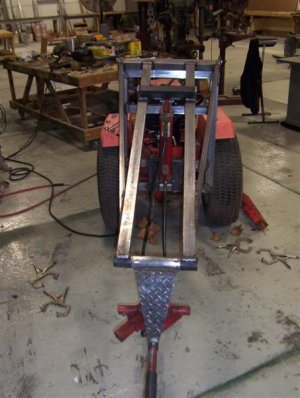
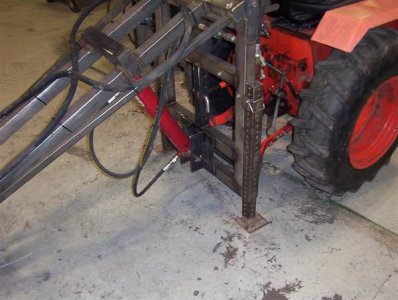
Here are the outriggers I mentioned.
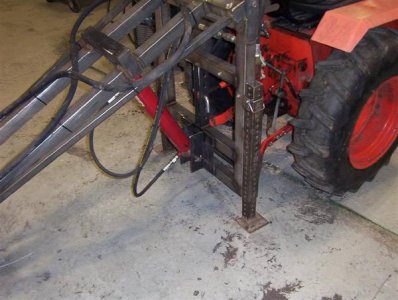
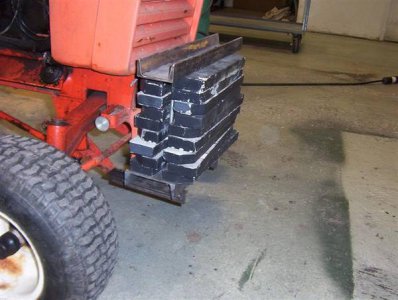
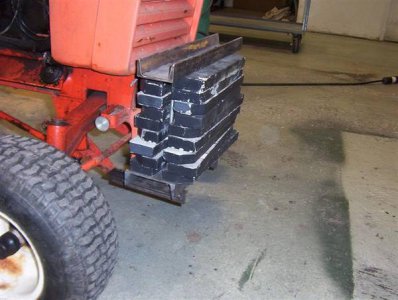
Then, this is the counterweight... These plates are normally used in theatres to counterweight the scenery that is flown overhead. They also are used to counterweight elevators apparently... I had a pile I don't use frequently, so they'll live here... 20# per plate, for 180# total... I had to add another 100# when I was working on a really obnoxious slope to prevent wheelies... All this is welded to a spare mower mule bracket that was reinforced a bit.
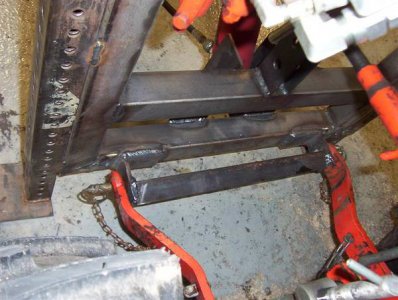
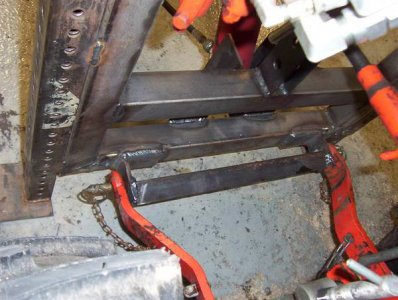
Next I straightened the lift pin angles. After that, I didn't really like their position, so I ground them off, and moved them in a bit so the lift arms are parallel. With a length of 1.25"x .25" angle, I tied the two together once they were in their new location. Welded things up, and that should work nicely now, and keep the arms away from the tire lugs.
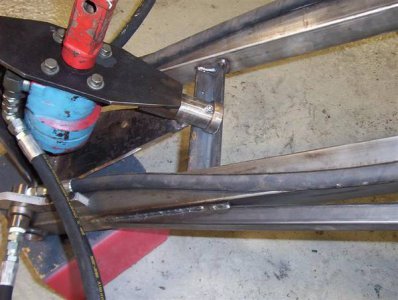
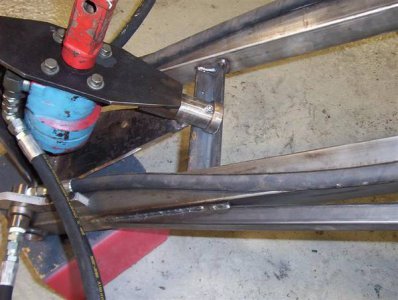
Finally, I added this piece of angle out on the arm. It lets me swing the motor up and over the arm, without the hoses or plumbing taking the stress of that weight. When having to clear a rock or some such from a hole, its real easy to pop the auger out, swing the head up, and work in there without having to screw around repositioning the tractor.
Next step... Paint... Still one more show in my business season, so that will have to wait a bit...
Finally...
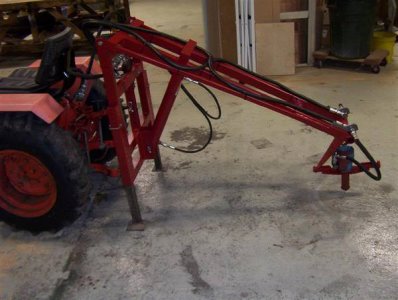
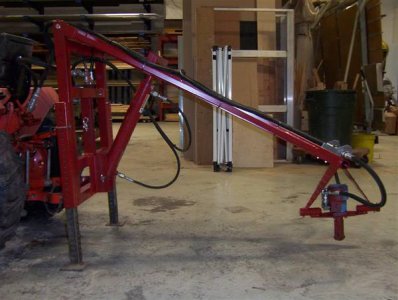
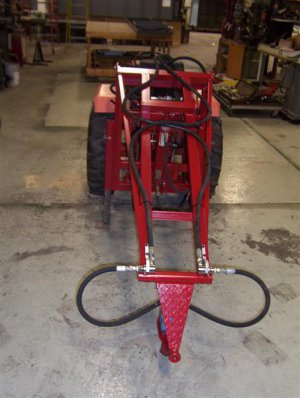
Well here we are...
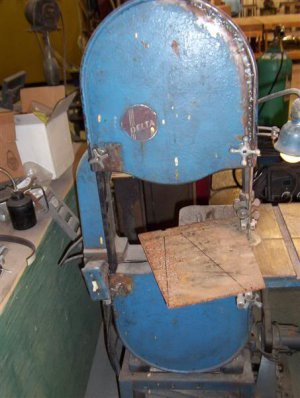
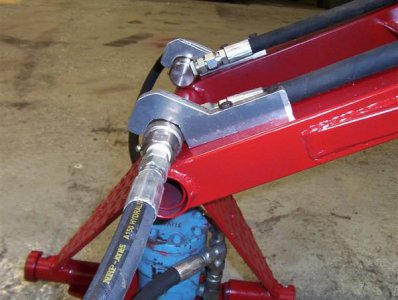
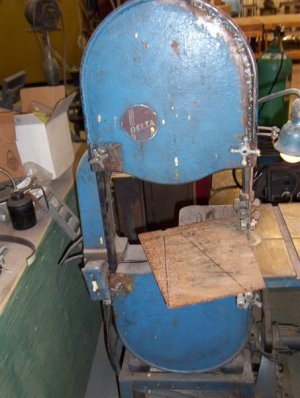
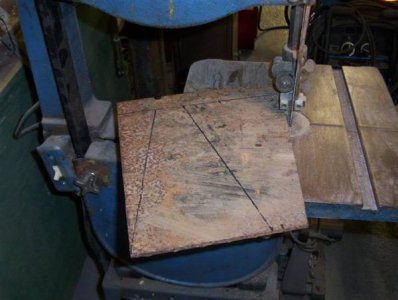
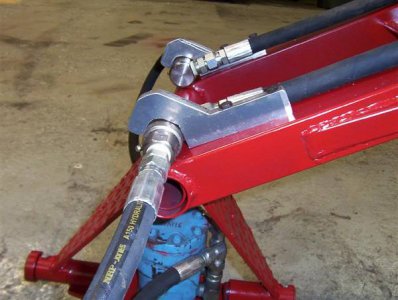
I mentioned these at one point, but never really documented them... I had to make these brackets to hold the swivel connections out on the end of the arms. That was made more difficult, because the swivels are pretty narrow, and they have grease fittings that get in the way of a wrap around clamp... I had some 1/2" aluminum plate hanging around, and bandsawed these out. I didn't see any reason to paint them as I like the raw aluminum look for them.
But now the good stuff...
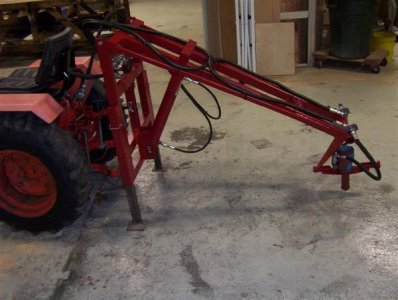
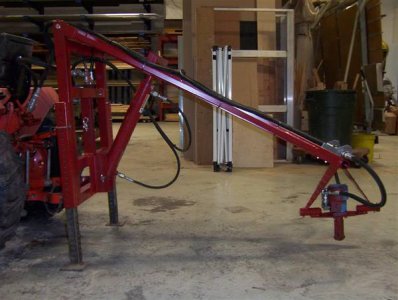
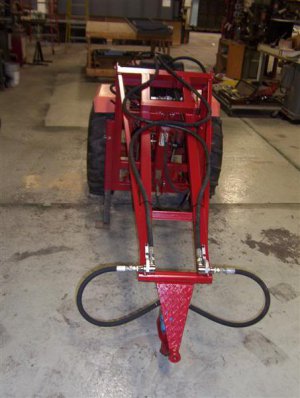
Done.
Cheers!
-Tim
You'll have to forgive some of the text as it was posted to a group that knew tractors and hydraulics rather than machining... I'm just doing a copy and paste, so if something needs to be clarified, I'll have to catch those as I go...
My girlfriend and I foster dogs... At my house, this is not a problem since the yard is fenced... At her place, its more of a pain since there are gaps between the various neighbor's fences, and we also need to cut the yard in half by the garage to keep the dogs in... I've had to dig a few holes there already for cement piers to support her front porch, and its nothing but rock, and packed clay... So when the topic of fence came up, it was either rent a machine, or perhaps I'd get lucky and find one that was affordable... Well for a variety of reasons the fence didn't happen this summer, so it gave me some more time, and I came up with the drill head from a Little Beaver hydraulic post hole digger.

I then headed over to a shop I used to work at where there is a stash of hydraulic components that nobody there knows anything about except me... They let me have this cylinder which was used for 4 weeks for a show, and then put away...

I got the 444 last year for the princely sum of $250 along with a tiller, but haven't used it for much other than pulling a dump cart, so I decided to put the digger on that rather than mounting it on the 646's hoe. Paint is a train wreck, but the engine and hydraulics are all in good shape.

So it was off to the races... Well more like off to the CAD station... No photo of that, but it was easier to figure out the various arcs and mounting locations I'd need that way... Then it was off to the steel rack, and saws...
First up was the frame to put on the 3 point...


That's all 2" box that has been hanging around my shop for I don't know how long... Works quite nice for this kind of fab as its quite light, and yet very strong... 0.065" walls...
That was day 1...
On day 2, I decided I needed to deal with the mount for the Little Beaver head... I knew I needed two axis of flexibility to keep the drill plumb. This particular digger was a 2 man unit, so it is set up with 4 handles... On first look, I thought I'd be just fine using their mounting plate, and I proceeded that way... I'm going to have to remake their plate as it turns out since they didn't get the mounting tubes in a straight line... Not the end of the world, but it would bother me if I didn't fix that... That will be for another day though...
I wanted to use some pipe as the pivot points. Gives a nice large area to weld against, and its cheap, plus I have lots hanging around... Since I was planning to use their handles as the pivots, I found they almost slid through a 1" pipe coupling... So off to the lathe, and a good size bit...

For the top pivit I wanted something longer and larger, so 1.5" scd 40 pipe almost allows you to slide a piece of 1.25" scd 40 pipe through... So off to the lathe, and the bigger drill bits...


Next came the plates to connect things...


Some jigging to hold things in place...


You can see I made sure my pivot points were in line by running the conduit I was using to jig straight through...

In these photos, the bracket looks wider than it is tall... I screwed up on a measurement, and ended up having to grind it all apart, and redo all the lathe work. The plates were saved... No photos of the second assembly process...
Day 3 came, and it was time to deal with the boom, and lift cylinder placement... I did all the metal work in CAD again to avoid most major errors... As always I did neglect one thing, and we'll get to that...
Here it is jigged on a table.


After that cooled, I bolted it to the 3 point frame, and started working on the cylinder mounts...
I had the upper mount already welded to the boom, but at some point managed to forget the thickness of the head of the 3/4" bolt, and as such, I couldn't take the bolt out of the frame once it was welded together... So out came the saw-z-all and the bolt is no more... Since a bolt wasn't going to work, it was off to the lathe again to make a pin...


The pin will go in with washers, and a couple cotter pins. I ran out of time for that detail, but I did want to get the lower mount done today, so I got everything in place and welded the lower mount on... Its starting to look like what it should... You can also see the revised motor mounting bracket/ pivot...


And then work intruded... Progress slowed to a snails pace for a while... But:
Here we go again...
First order of plumbing came in, so I'm able to do the lines from the extra TCV out to the cylinder, and motor...
Most everything came from Surplus Center for this. The ORB to JIC came from FittingsandAdapters.com.


The zip ties are mostly temporary. I have to break all the hydraulics off the build for paint, so no point in trimming things too neatly... I want to know everything has enough play to swing through the complete motions...

Hard down on the left lever is the float position. I'm hoping that works well to let the auger pull in to the ground on its own... So far my only concern is the lack of spring return on the right hand lever. That's nice in that I don't have to hold it down to drill, but it would be nice to have a detent to return to the off position... I may have to do something there, but we'll just have to see...

I'm not sure if I'm going to leave this as is, or swing the motor around so the ports come out the back. If I swing it, it may give me a little more room for the hoses to flex without hitting the frame. I can pivot the motor probably 15-20 degrees left/right now, and I doubt I'd set up with that much tilt, but it'd be nice to never have to worry about that... Front to back everything swings nicely as it is...

I was supposed to come out of the cylinder with a 90, but ended up using them back on the motor fittings... As it turns out, straight out seems to work just fine. Once I get plumbed in to the PTO, and can cycle the cylinder, I'll see how things look... Its always easy to add a JIC 90 later if I need a little more bend...
With any luck, there's another box from Surplus center at home now... If so, I can probably finish the plumbing tomorrow, and if I remember to bring oil, fill it, and see how things work... I guess I ought to order an auger now...
Another Day...
So yesterday, I got all the plumbing in... I also found the short that killed the fuse when I was snowblowing. (headlight wire as expected)
I got everything plumbed, fired it up, found a couple points I had to snug up a JIC fitting here and there, and was happy to watch the motor go around, and the boom go up and down...
Two observations...
1) The engine seems to exhibit more load than I'd think it should when powering the boom... There really is very little load on that cylinder since there isn't an auger on the drill... I will have to do some more testing there with a load on the arm. Something just seems off... I guess I ought to check the flow direction on the PTO valve again just to make sure I'm not running backwards...
2) I need to add a couple live swivels, and short hoses at the pivot point at the end of the arm... It seemed like the hoses would be ok, but they're putting a pretty good twist on the JIC fittings on the motor... They're now on the way.
Overall, I'm happy so far... Would have been nice not to need those live swivels since they're not cheap, but just seeing the motor turn was a nice sight...
And Another...
No, really, I didn't kick off... Just haven't had time...
So, today I pulled the digger back out, because spring is looming, and there are 3 fences on the schedule this summer somehow...
I had mounted one of the live swivels back in late January, and wasn't happy with it, plus the short hose I got to run from the swivel to the motor was too short... Getting disgusted, I ordered 2 of every length from Surplus Center, so I wouldn't have an issue when I got back to it...
Today, I cut new brackets to mount the swivels from some 1/2" aluminum plate I had. They work great. Ran the new lines, and connected up the existing ones. Got it mounted back on the tractor, and it all seems happy. I even have an auger for it now, so it looks a lot more like it ought to. I'll have to get some photos soon. Just didn't take the time today.
So, I need to deal with the telescopic feet next. At least I have a plan for that, and all the material is in house... Also need to make a weight bracket for the front from a surplus mower mule... Then hopefully 1 test hole, and if successful then I would love to get it painted. If I run out of time, I'll just use it raw, and send it to the sandblaster at the end of the season...
I sure hope this thing performs as expected... I'll never hear the end of it if it's a dud...
Weeks are between many of these posts...
Still no photos... I've been busy... But...
I finished the outriggers and made a front counterweight last week. Then over Saturday, and Sunday, I ran it out to my folks place in PA, and punched 33 holes with the rig. For those not from PA, the "ground" in the eastern portion of the state is rock, shale, and clay... Its murder to dig, but, to my surprise, it did a tremendous job. Yes we had to work some of the rocks with a bar, but it made the job pretty easy overall.
Observations... I need to straighten and reinforce the two angles that the lower 3 point arms attach to. They bent outward, but that should be simple enough. I also need to add a crossbar up by the head so I can swing the motor up and over the arm to get it out of the way when you need to work in the hole with a bar. Also need to do some work on the sway chains as the unit will swing enough for the arms to catch in the lug tire bars.
We're pretty busy at my shop now, so pictures may not come quick, but they will... I couldn't be more pleased with how well the rig works!
And then there were pictures...
Back again...
Ok... I just wrapped up the modifications/tweaks... I should be ready to go next time I need a hole...
Here are the outriggers I mentioned.

Then, this is the counterweight... These plates are normally used in theatres to counterweight the scenery that is flown overhead. They also are used to counterweight elevators apparently... I had a pile I don't use frequently, so they'll live here... 20# per plate, for 180# total... I had to add another 100# when I was working on a really obnoxious slope to prevent wheelies... All this is welded to a spare mower mule bracket that was reinforced a bit.

Next I straightened the lift pin angles. After that, I didn't really like their position, so I ground them off, and moved them in a bit so the lift arms are parallel. With a length of 1.25"x .25" angle, I tied the two together once they were in their new location. Welded things up, and that should work nicely now, and keep the arms away from the tire lugs.

Finally, I added this piece of angle out on the arm. It lets me swing the motor up and over the arm, without the hoses or plumbing taking the stress of that weight. When having to clear a rock or some such from a hole, its real easy to pop the auger out, swing the head up, and work in there without having to screw around repositioning the tractor.

Next step... Paint... Still one more show in my business season, so that will have to wait a bit...
Finally...
Well here we are...
I mentioned these at one point, but never really documented them... I had to make these brackets to hold the swivel connections out on the end of the arms. That was made more difficult, because the swivels are pretty narrow, and they have grease fittings that get in the way of a wrap around clamp... I had some 1/2" aluminum plate hanging around, and bandsawed these out. I didn't see any reason to paint them as I like the raw aluminum look for them.

But now the good stuff...


Done.
Cheers!
-Tim


