PM932-PDF Arrival And Questions

Jamespvill

Active User
Registered
Joined
Feb 4, 2014
Messages
185
WhooHoo! After lurking through all the threads on Precision Mathews machines, I decided to go with the PM932-PDF after selling my Grizzly G0705. I was not a big fan of the round column on the G0705, the accuracy just wasn't there, and belt changes were a drag...

After exchanging an e-mail or two with Matt (Who is just as pleasant as everyone says he is) I called up and ordered the mill plus a 4 inch precision vice. 7 Working days later and I had this...

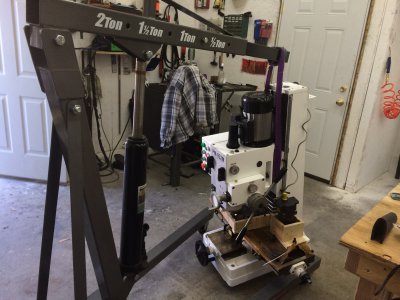
Fortunately, I live on a farm and we have tractors and fork-lifts readily available. So I saved my $45 for lift-gate service. I was able to dangle the mill from one of the forks and poke it through my shop door. From there, the Harbor Freight super coupon bargain 2-ton cherry picker took it the rest of the way.
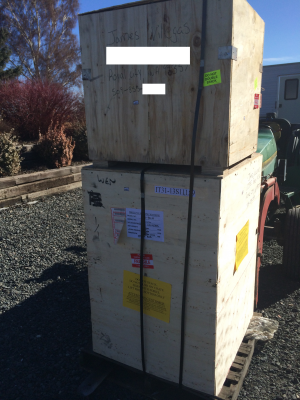
image-1.png
After a quick cleaning, I wired a plug to the machine and function checked everything. As expected, everything worked top notch. Needless to say, I am a very happy customer! I've got a few gun smithing projects coming ups and plenty of other random stuff that has been stacking up while I was in mill limbo. So hopefully I'll be able to post a few of those fairly soon.
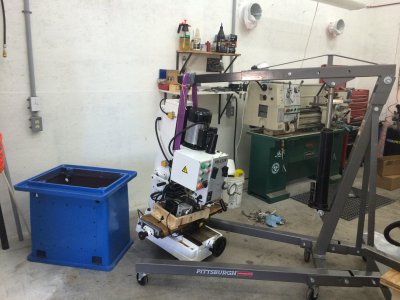
image-2.jpegimage.jpegimage-3.jpeg
I also ordered a few Igaging Dros from Davidh here on the forum, they arrived nicely packed and without a ding. I'm going to be installing those on the mill and my G4003G lathe.

Now for the questions that I hope the combined knowledge of the forum can help me with (Help Please!!!!) First, my forward/backward (Y) is out of tram. What is the best way of getting this trammed? Obviously I want to retain as much rigidity as possible, and Im not sure if shims are going to cost me a whole lot of rigidity.

Secondly, Inside the spindle, the keyway indexer (Little metal tab) for the R-8 collets' keyway broke off the first time I went to tighten a collet up in it. Unfortunately, this makes things very difficult to tighten up without spinning like a monkey on crack. So has anyone else had this problem? And more importantly, does anyone know how to replace the indexer? I don't want to go ripping things apart until I have some idea of how to do it!

Thanks Gentlemen!

image-1.png image-2.jpeg image-3.jpeg image.jpeg
 
I don't suppose there's any way I could use your forklift... I have a PM45CNC that needs to overcome gravity soon. I went into the garage this morning and looked at the mill sitting on the floor with the base right next to it. Oh, it just seems so heavy right now...


If it makes you feel any better, most people remove the R8 alignment pin because they're a nuisance most of the time. I'll also post a few pictures on how to tighten the drawbar with a double nut so that won't happen again should you decide to make a new R8 pin.

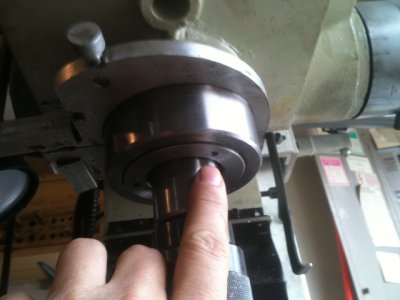
It's pretty easy to remove the spindle collar to get the old pin out. See the photo and look at the spindle spanner holes I'm pointing at. You'll need a wrench to align with those holes to unscrew that collar. Once you do that, the spindle can be lowered and the pin is then visible. Some people use a brass rod to tap the collar around -that's up to you. Off the top of my head, I cannot recall if that is a left hand or right hand thread so, if it doesn't loosen, try the other direction. Whatever you do, don't go berserk on it. We had someone wail on the thing and damage the spindle. It is not hard to remove. I've never done it but, from all accounts, it is not a difficult process.

Also, before we get into tramming, please show us with pictures the method you used to check alignment. We've had countless cases of people thinking it was out of alignment when in-fact, it was their first time using a dial indicator to perform such a measurement... Let's take it one step at a time...

Spindle Spanner Holes.JPG

Ray

Spindle Spanner Holes.JPG
 
When I got my new PM32PDF last summer I found that the R8 collet indexing pin was too thick and most of my collets would not fit. I removed the cover that Ray pointed out with a pin type spanner wrench and the pin was just a short threaded set screw with a slotted head. I was able to remove it with a small flat blade screw driver. I find it much easier to use with no pin but the threads on all your accessories have to be perfect so they can be threaded all the way on to the draw bar with fingers or it becomes a struggle. After an early problem caused by loose connections my mill has been trouble free. I'm pretty sure the loose connections my machine had are now being double checked by Matt's crew but it wouldn't hurt to check them on your machine. They are shown in this post.

http://www.hobby-machinist.com/showthread.php/17547-Anotrher-new-PM32PDF-mill

I also got dro's from David and the install is shown in this post.

http://www.hobby-machinist.com/showthread.php/20585-Accuremote-DRO-s-on-a-PM32PDF-mill

I think you are going to like your new mill, I sure do enjoy mine.

Cheers,
:drink2:
John
 
congratulations! Looking forward to seeing the chips fly (and the DRO installation). Ingenious way of keeping the chips off the table, although you must have used really big bolts to attach the mill to the wall like that :)
 
Congrats!

Yep, I removed that R8 guide pin as well. The ring on bottom is normal RH thread. On my PM45 there were 2 set screws, the pin was secured in place with another set screw behind it. So much easier & quicker to use without that pin.
 
Ray,
I think theres about 2,600 miles between you and I, So if I leave now, I might be able to make it to you on the forklift by the end of March! Of course I have to take backroads, so that may add some time to the overall trip.

That does make me feel much better that most people remove the alignment pin, I don't like being the only one with a problem...makes me question my sanity. Thank you very much for the description on how to remove the collar. I'll be off to remove it as soon as I finish writing this... I would prefer to keep it out, But I use a Tormach 3/4" R-8 adapter and ER20 collets. This makes it a little hard to get everything jammed up tight enough to create enough friction to stop the R-8 from turning.

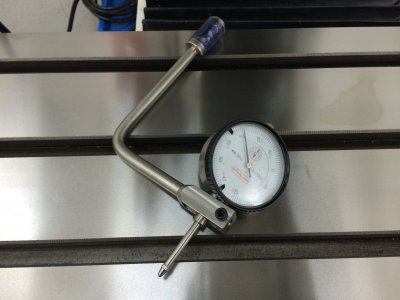
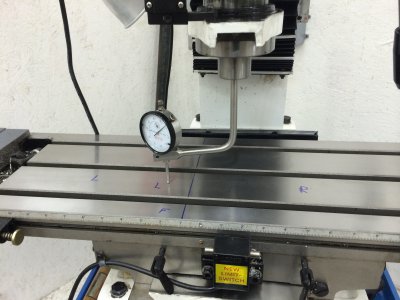
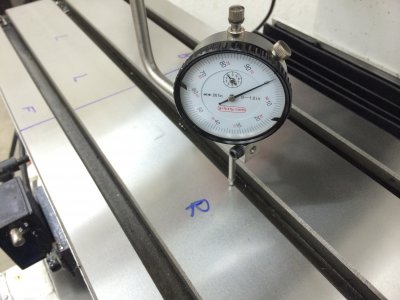
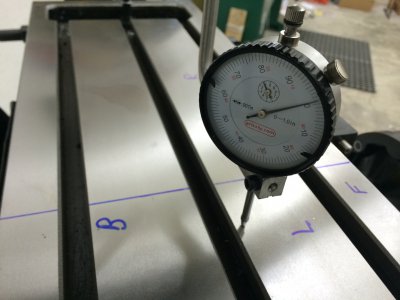
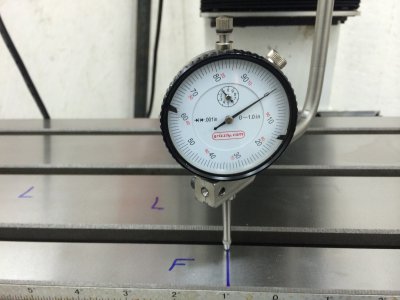
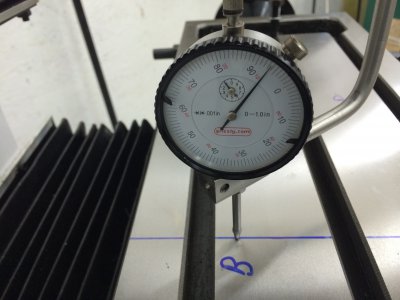
As for the tramming, I use a homemade spindle mounted indicator holder...here are the goods..

image-5.jpegimage-4.jpeg

My X (left to right) was successfully trammed within a thou over 8 inches.

image-6.jpegimage-8.jpeg

My Y (forward/backward) seems to be about 7.5 though out of tram

image-7.jpegimage-9.jpeg

Does this all look about right to you? When I was 16, I bought a Harbor Freight Mini Lathe, that was 4 years ago. Since then I have taken zero classes and have never held a job in a machine shop. Basically Im 100% self-tough and sometimes get things right, but more times than not, learn from doing them wrong. So I really love forums like these and really appreciate the help that they provide.


John,

I had the same problem with my indexing pin, except that mine was too long. I ended up having to file down the keyway on one of my tools to make it fit properly. I'll make sure and double check all the connections on my machine soon, I remember seeing your post on that!


Matt,

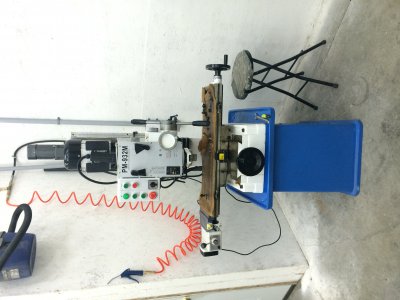
There are new studies coming out that suggest a few lag bolts in some OSB board has the capability of holding up to 2 tons. Also, I ended up removing the space-age table protecters after I realized that once I had the mill mounted sideways, I wouldn't have to worry about chips resting on it!


darkzero,

Thanks for in information on the thread type and the set screws!


Thanks All!
James


image-4.jpeg image-5.jpeg image-6.jpeg image-7.jpeg image-8.jpeg image-9.jpeg
 
Nice machine.

For what it's wroth, we use a old bridgeport or two in school with out the pin in it. I push the collet up in the tapper till it holds on it's own.

Our current project in school is actually a collet handle. t has 3 blades that fit in the 3 slots in the face of a r8 and a screw driver type handle.
 
OK, you got a handle on things... Hope you weren't PO'd about my question but, we've had situations where the "collective" spent days trying to help someone based on verbal descriptions and it was all for naught because the poster was confused and doing things improperly...

Couple things... Make sure the table ways are lubed and run the table back and forth a bunch of times to get it seated. Make sure you lock the jibs on the table and on the gearhead. Also lock the spindle collar. Do this each time you check the machine so you're comparing apples to apples. Always adjust your X-direction using the head swivel bolts.

For Y-direction adjustment, yes, shims are the way to go -and it won't take much. To save yourself some trouble, use a torque wrench when you tighten the bolts after you've installed some shims. If you don't use a torque wrench, you'll be chasing your tail. A good torque value is 60 ftlb.

Stainless steel foil used for heat-treating wrap makes a good material for shim stock.

Ray


PS: Ditch the R8 pin...
 
James, not sure if this would work with your tramming tool, but if you could find a quality bearing race of a suitable diameter and lay it on the table, it would be an easier surface for reading your indicator. No dropping into the slots as you sweep. My holder is adjustable, so any good size race works fine for me.
-Ryan
 
Success! Spindle collar removed and the set screw and broken pin were removed. It was then sealed up to never be opened again...Goodbye pin

Ray,

I completely understand you wanting to see exactly how I have my set-up. Too many times have people called me with gun questions and say that "this or that" is the problem, but when I finally get the gun, it turns out they were using the wrong caliber of ammo.

I'll head all of your advice and follow it to a tee. I've got my handy-dandy torque wrench on hand, and now I just have to find the appropriate shim material.


Ryan,

I've been keeping my eyes open for a nicely ground precision bearing race. Unfortunately, anything local is covered in rust... Oh well, the search continues!
 
Back
Top