New PM-1228VF-LB

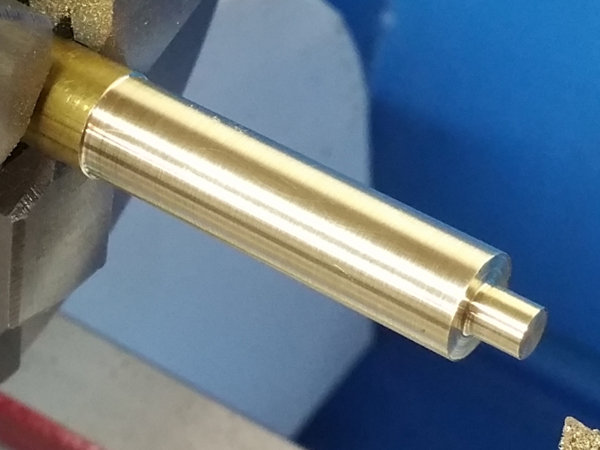
Finished my first quick tune-up, got it all back together, and snugged up the gibs a little bit. Here's a quick cut in some soft brass. This was at 2000 RPM with a used carbide insert. Looks pretty good. Diameter is within 0.001 (or the resolution of my Mitutoyo calipers) from end to end. Surface finish is very nice near the chuck and just a little rough out at the end of the part. I'd say that's certainly a good start!

Cut.jpg
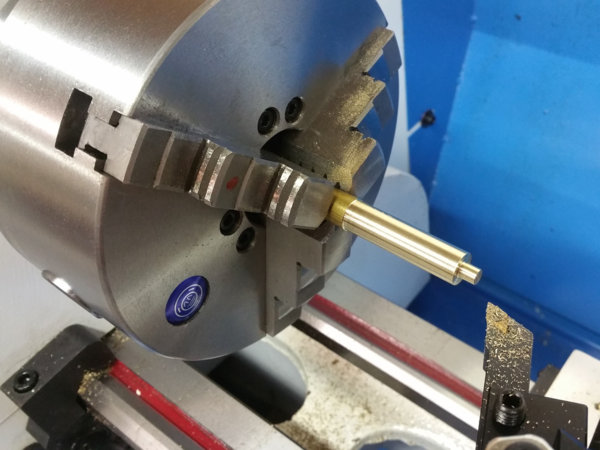
Finish.jpg
 
The machine is very quiet and very smooth compared to most machines I've used. Quite a bit louder at 2000 RPM than it is at 500 RPM though.
 
Runout and tailstock alignment seem pretty good -- at least within the limits of my setup. I'm seeing something like +/- 0.00075 " when running the carriage from one end to the other and about +/-0.001 when I spin the chuck with the indicator in the middle of the bar (of course, that probably just means the bar isn't straight...).

All suggestions for a better way to check this are welcome!

TailStock.jpg
 
To check the spindle, indicate on the internal spindle taper while you turn the spindle. Measure what you want to measure directly whenever possible, adding additional stuff just compromises and confuses the results.
 
Thanks Bob! That's a good approach. I also like this setup exactly because it (more or less) checks the whole stackup all together. Then if I see a problem I go back and check individual components. Although I suppose my approach could just show two different errors canceling each other out! :)
 
Two unknowns used together randomly will always be an variable unknown. If you are searching for truth, you need to account for and test every thing that can affect the results, and keep track of it all. Sometimes errors can work for you rather than against you. If your spindle is out .001" and the mounted tool is also out .001", you can mark the high spots and then place them opposite each other to cancel the error. Lack of keeping track of things potentially causes larger errors, while keeping track of them helps to eliminate errors. "Faith" is not a word used by true metrologists and fussy machinists. In general, it is assumed that errors stack up. Simplicity is bliss...

Edit: By far, most work simply does not matter very much. Close enough is close enough. When testing your new lathe to see if it meets specifications, now we are talking important. If you don't, you will never really know what you have there. It is a good plan for you to test it.
 
Last edited:
To check the spindle, indicate on the internal spindle taper while you turn the spindle. Measure what you want to measure directly whenever possible, adding additional stuff just compromises and confuses the results.

+1 to Bob's recommendation. It is really important to know what the concentricity of your spindle is because it affects whatever is bolted onto it. Just to expand on Bob's recommendation, I suggest the following:
  • Set up your DTI with the arms of your indicator holder folded fairly close to the magnet. The more extension, the more flex you have. Even the old style two bar holders can be more rigid than a Noga-style holder.
  • Mark the spindle somewhere with a Sharpie and if you can, rig a pointer to align with the mark.
  • Clean the spindle taper - twice at least to be sure its clean.
  • Bring the DTI into contact with the taper at 6 O'clock just inside the taper, preload it by about 0.015" and zero the dial. Be sure your Sharpie mark and pointer are aligned.
  • Turn the spindle 360 degrees and realign the pointer with the mark and be sure the indicator returns to precisely zero. If it does then your set up is "repeatable".
  • Turn the spindle 360 degrees but this time, watch for any deviation from zero. The largest deviation is your spindle TIR. Concentricity is NOT checked under power.
  • Repeat this in one or two more places inside the taper to be sure the taper isn't the issue. If you get the same results then you can be sure that the TIR is really the TIR of the spindle. THEN you can see if it falls within specs.
Once you have a baseline on your spindle run out then you can pretty much rely on it. For example, if you had zero spindle run out and slapped a 3 jaw chuck on it with an accurate ground rod loaded then whatever run out you see on that rod is due to the chuck, the rod, headstock alignment, saddle alignment or whatever. This allows you to eliminate one thing at a time until you minimize any issues. But you need a baseline first and that begins with knowing how concentric the spindle is.
 
Mike gave you the long and correct version of testing the spindle taper. Thanks, Mike. By checking it at four clock positions and three depth locations and mapping the errors you can find out if any measured errors describe
1. Out of round
2. Out of alignment with the spindle axis (skewed taper axis)
3. Turned accurately to a center that is parallel to the spindle axis
4. Some combination of the above
5. Perfection (hopefully!)
That is a 3D look at the internal spindle taper with just a few simple measurements written in graphical format on a piece of paper.

Agreed, Bob. Anal now avoids being confused later! Nothing is more stupid looking than a confused Hawaiian!
 
Back
Top