New Lathe Bench

Smudgemo

Active User
H-M Supporter Gold Member
Joined
Nov 2, 2012
Messages
415
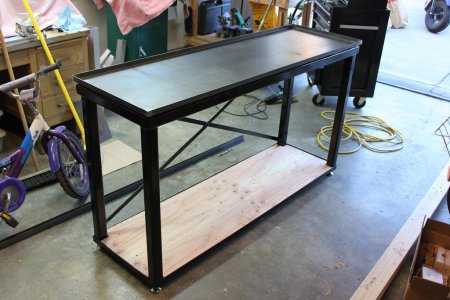
I decided to replace the wood desk my 12x36 was mounted to, so I fabbed up a new steel bench.
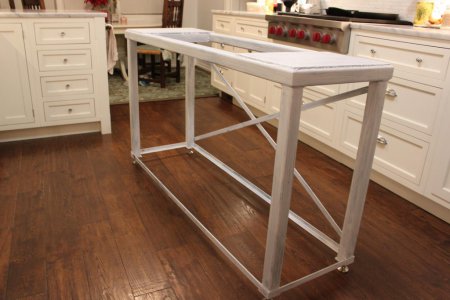
Bench.jpg

It's spending the night in the kitchen to help dry the primer for a coat of black tomorrow, and hopefully I can get a drip pan made this week before mounting the lathe next weekend.

Any suggestions on mounts? I've got some shim stock, but I like the idea of jack-screws but don't don't know where to get them. I also seem to recall reading something about rubber mounts for the drip pan. Necessary?

For the actual layout of holes, I figured that I'd slide the lathe on this bench, mark the holes, slide it back off and drill them, but if anyone has a better idea, I'm open to it.

Best,
Ryan

Bench.jpg
 
Looks good. Did you size the frame to drop a specific tool box/chest in there for tooling storage?
 
I built one very similar for one of my small Atlas lathe. I just used some homemade feet attached to fine thread 1/2 bolts on the bottom of the stand. I found the best way to level it was to get the base as close as I could (using a good carpenter level) then shim up the legs of the lathe on top of the bench. Gave much more control and made it able to reverse any bed twist. Don't do the mason mount thing with it. It is too light for them to work properly.
 
I've got a couple of Craftsman tool chests that will juuuuuuuuuust fit when the casters are removed, so the storage options underneath should be super. A couple of sheets of 3/8" plywood will make a shelf because I didn't try to make the space perfect for fitting the chests, just big enough to contain them. I'll have a couple of inches of space between them if I want to hang anything bulky, but thin. I'm kind of a visual person, so I'm waiting until I fit them to decide how things will shake out.

And the feet are indeed adjustable, so my intention was to level the bench first as suggested, then the lathe.
 
Ryan,

AFAIK, the rubber grommets under the drip pan that I mentioned earlier are there to seal the four mounting holes in the drip pan. If they had been intended as shock mounts or vibration isolators, there would be two of them at each corner. If you are never going to run a pump driven coolant system, I don't guess that they are necessary.

But if you think you might one day, I would go ahead and put them in now. There will never be a better time to do it. If you call Clausing tomorrow and order four, they should arrive before the paint on the drip pan cures. The hole diameter for the seals is 1/2".

And as I told someone else, be sure that you braze or weld a fitting to hold a drain plug to the bottom of the right front or right rear corner of the pan. I would do that whether or not you install the seals. At some time in the future, you are probably going to want to wash out the drip pan and it will save a lot of sopping if you can just drain the cleaning fluid.

Robert D.
 
Last edited:
I placed this tool box under mine. The added weight was an unexpected bonus.
However, be careful to ensure the drawers get shut all the way or you'll be picking out swarf.

IMG_0397[1].JPG
 
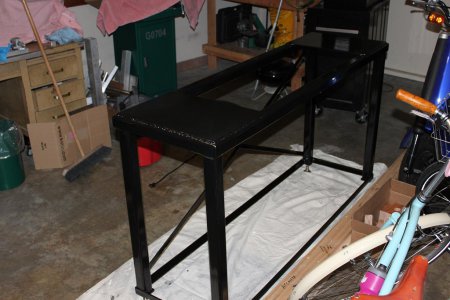
Well, I got a coat of black paint on it and it looks good, but at 50*ish in the garage, it's gonna be a few days to dry. The wife is actually home, but she's cool. Art major in college that handled an arc welder pretty well from what I hear. Maybe I should invest in TIG one of these days for my bicycle building and introduce her to it...

Black Bench.jpg

And I do hope the added weight of the tooling underneath is a benefit for me. Great shot -thanks. Makes me think round tubing would have been a good choice, too.

Black Bench.jpg
 
Back
Top