[Newbie] Need Help With Soldered Tinplate Model Ship Project

My idea for the rivets was to tin the metal and then go over the cooled surface with the tip of the iron making little raised solder bumps. Too much heat/time and they'll flatten out, too quick and they'll be pointy like Hershey kisses (which I'd soften with a little sanding or Dremel wire brush for uniformity). Just an idea... wear a mask for that!

And I often marvel at what was accomplished with "crude" methods a few 100 years ago. I've read some brilliantly clever methods of machining and layout in some of the old handbooks that have long been cast aside and forgotten.
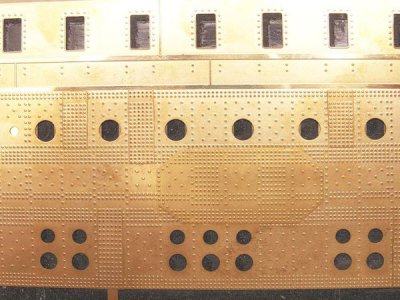
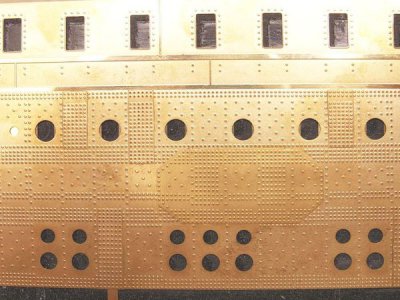
Here's a picture of some photo-etched brass that a very talented and dedicated builder produced for his model. I like the idea for the "tinned" rivets but would probably go mad if I tried to replicate this. Ain't this beautiful though?
oLZOiaf.jpg

oLZOiaf.jpg
 
What about drilling a SMALL HOLE & INSERTING A STRAIGHT PIN HEAD & THEN SOLDER ON THE INSIDE
 
What about drilling a SMALL HOLE & INSERTING A STRAIGHT PIN HEAD & THEN SOLDER ON THE INSIDE

That is likely how I'd do it if that didn't call for thousands of such rivets. I'm just not determined enough to get that level of detail if it requires that much work. But that's a solid idea! Thanks.
 
I don't have a pin handy,but I don't think they have flat bottoms on their heads,and thus would not snug up flat against the ship's hull. And,they would be too large anyway,unless you were building a pretty large model,several feet long.

Here's a hint: Don't float your model Titanic in the bath tub. It might sink!!:)

My model will be about 74" long at the scale of 1/144. 1" = 12'. I just don't think I have it in me to hand place thousands of rivets on this model!

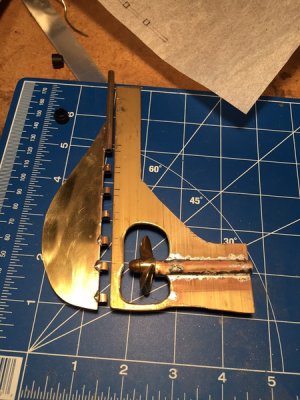
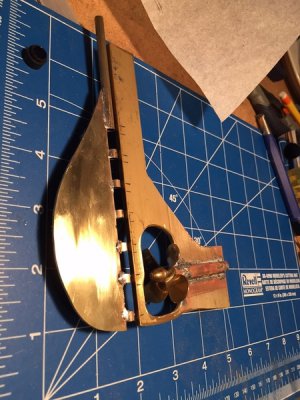
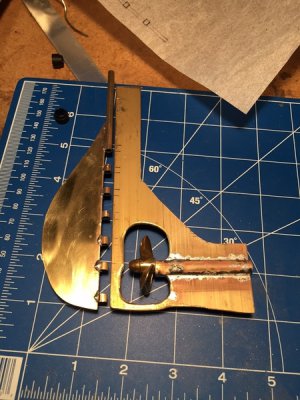
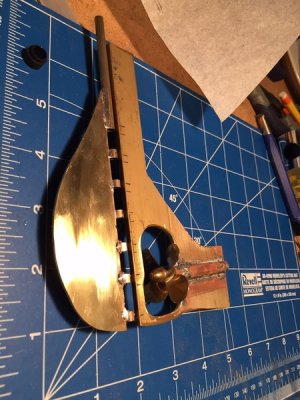
Here's my progress so far.
IMG_2695.jpg

IMG_2696.jpg

I still need to grind off the excess solder and clean everything up but I'm pretty optimistic so far.
-Tyler

IMG_2695.jpg

IMG_2696.jpg
 
That is likely how I'd do it if that didn't call for thousands of such rivets. I'm just not determined enough to get that level of detail if it requires that much work. But that's a solid idea! Thanks.
Here is an idea. Drill small depressions in your plate to accept micro ball bearings. Drop the ball in the depression and fix with glue or solder. Drilling the depressions gives you the advantage of being able to perfectly place the locations of the faux rivets on your model. You have not given dimensions for the rivet heads but this source has brass balls as small as .2mm which, at your 1:144 scale would be just over an inch.

http://www.salemball.com/inventory/brassInv.htm

The project will probably drive you nuts before you are finished but, hey, it's a hobby, right. The satisfaction will come in the end when you show your completed model with its perfectly formed rivet heads and people ask you how on Earth did you do that?

Good luck!

Bob
 
I really like what you are doing. When you you get it finished, you'll have a masterpiece. Can't help you with the soldering part but for the rivet detail, I can help. I'm a N scale model railroader (1/160th scale) and I use Archer rivet detail sheets. They are decal sheets with plastic dots on them for the rivet head and apply like any other decal.

Here is the link for one of their sheets.
http://www.archertransfers.com/AR88089.html

Here is all the rivets sheets. For your model, I would use the N scale sheets.
http://www.archertransfers.com/SurfaceDetailsMain.html
 
Back
Top