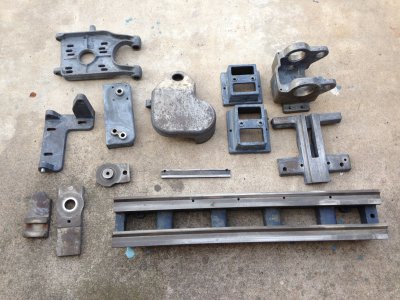
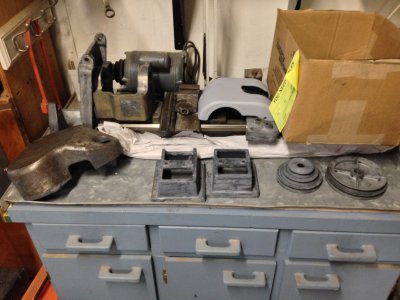
Logan 400. Headstock. (Total Logan 400 Rebuild)

mjhenks,

Thanks for the kind words. It does take quite a bit of tedious work to bring these old machines back to life, but it's rewarding. Every time you look at it you will remember what it USED to look like and all the work you put into it.

I can't confirm the paint 100% but when I was researching it the info I found indicated it was the SW Baby Seal BLACK.

The wipers are wool felt. I bought mine from Mick Finch at Blue Chip Machine Shop - he's a good guy. He sells a small sheet of the good stuff and it's just a matter of cutting something close to the shape of your wiper covers with a razor blade or xacto knife. The old ones probably look like leather because they're saturated with old, hardened oil and yuck. Here's a link to Mick's site: http://bluechipmachineshop.com/bc_blog/welcome-to-bcms/felt-wiper-pad/

He also sells small bottle of the correct Mobile Vactra and Velocite oils you will need.

I want to say that the compound nut has left hand threads, but don't remember for certain.

Hope that helps.

Steve
 
Thanks Steve.

So it turns out in Orange County, Ca you cannot get oil based paints any more. Not at least ones that are tintable. They outlawed the tints or something like that. Fortionatly for me i work with a good friend who lives in San Diego County who is also restoring a Lathe. He is going to pick up my paint and primer and bring it in next week. Paint may start to fly next week. I am going to use Benjamin Moore Alkyd Gloss Enamil in Baby Seal Black.

Other activity for the day was to spin my main thread shaft and the cross shaft on another lathe to clean them up. Years of gunk. Nice to be able to spin it to clean it up. Turned out great. Will post pictures later.
 
Hey;

But, all I wanted to do was give it a quick degrease?..... Honest! :rofl:

Yes, it is Baby Seal Black. I see that I erroneously referred to it as Grey in my thread. SURE WISH WE COULD EDIT!!!!!!!

The compound rest screw bushing on the 200 (LA-748) is a right had thread.

I bought thick felt pads - something like 2x4" - intended for furniture. Got them at Home Depot, and I see Lowes has them as well. As someone else commented when they recommended this idea, "they are only wipers. Not worth over thinking it." $1.298 and done.

That yellow compound looks somewhat similar to a 200, but I can't swear to it.
 
Long day of de-greasing and stripping paint. Got everything done except the tail stock. All waiting for paint now.

IMG_0699sm.jpg IMG_0702sm.jpg
Cleaned up the drive shaft and cross shaft. I drilled each for a center and checked them up in a lathe. Then went to town cleaning the thread and the shaft. Turned out nice.

IMG_0667sm.jpg

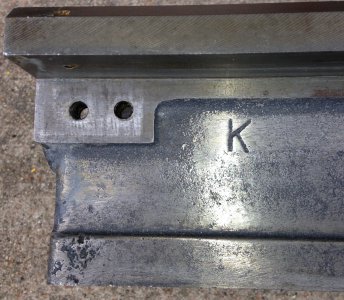
The Bed has a few ID items on it. Any idea what these are? First one is a "K" at the headstock end where a QCGB would go.

IMG_0683sm.jpg

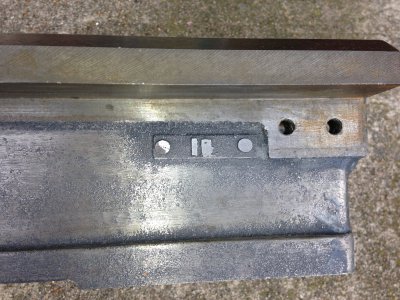
Second is what looks like a riveted tag that says "1B" maybe. Looks like it may be part of the casting and not actually riveted in place. It is also ground down.

IMG_0684sm.jpg

Took the motor drive system apart as well. Looks like I will be making a new idler shaft and likely having to re-bush the bushings. I was shocked at how trashed the shaft was and how sloppy the bushing was. Probably .05" of radial play. I also do not think I have the original pulley on this. Not sure if I will try and find one. Afraid of what it might cost.

IMG_0695sm.jpg

What chemicals have you all used to kill shallow rust pockets. For a car I would bead blast it but I no longer have access to one.

IMG_0681sm.jpg

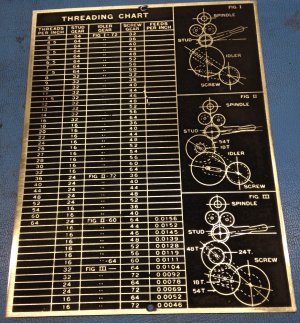
Last for today I restored my gear train tag from inside the gear cover. Thankfully this tag is held on with drive nails that have a hole all the way thru so they can be driven out from the outside. (Unlike the ID tag) I repainted the flat black and then sanded off the top to reveal the pretty brass letters. I am working on the ID tag as well. Waiting for the red to dry.

IMG_0717sm.jpg

Getting to the point where everything is clean and ready for paint or re-assembly. Coming from a car background I am tempted to see what it would cost to get all the fasteners re-plated. Ya, overkill but it makes it so pretty.

Looked over my cross shaft and compound nuts today once I got them cleaned. The compound is fine. The cross I am not sure. Is it supposed to be brass or steal? Mine is steal. The compound is brass. For that matter my half nut is also steal.

Questions....
- I see some guys painting the sprockets of the gears. Was that how it was done?
- I see some guys accent painting the knots and hand wheels with red. Was that how it was done?
- My compound nut is tight on the thread both axially and radially. My cross shaft nut is tight axially but is loose radial. That is more in the yaw/pitch it has a lot of freedom. How should it feel and should it be brass or steal?

That is all for today.

IMG_0681sm.jpg IMG_0683sm.jpg IMG_0684sm.jpg IMG_0695sm.jpg IMG_0699sm.jpg IMG_0702sm.jpg IMG_0717sm.jpg IMG_0667sm.jpg
 
Looking good so far. Paint will be in on Tuesday :)

I think the #18 tag was probably the ID tag for the pattern.
 
Looking good, MJ;

In looking at all those bits, I can see that the change gear guard is probably the same as a 200. The only other piece that might be is the saddle. Maybe the cross and compound as well, but I'm not sure. Everything else is different.

I would also blast the guard, without question. If you have air, it might be worth getting a simple blaster and giving it a going over. Barring that, a heavy knotted wire wheel on a 4" grinder. Certainly some naval jelly would not hurt, but that takes a lot of time to sit and work. Your tag looks GREAT. I don't even have one and have not seen one for sale yet. Might have to buy a cover to get one. I'm betting the countershaft sprocket could be had cheaply off of ebay, and that it might be the same LA-912 as used on the 200. Like this;

http://www.ebay.com/itm/Logan-10-La...440?pt=LH_DefaultDomain_0&hash=item58a688dd40

I do not think they used any contrasting colors at all, anywhere. I also doubt very much whether the gear centers were painted. I doubt they would take the time. I could be wrong. I personally think you have to be VERY careful about two toning this stuff, from a style point of view. It is something I myself have toyed with, but will probably reject. The beauty in these machines is in their design, and although I think the original Logan blue/grey is very handsome, it is largely so because of the subtle and complex nature of the hue. No offense to anyone, but I think the bright red stuff is really garish. If I were to try it, it would be with a very subtle contrast, like a grey that was a shade or two lighter than the original. Perhaps a VERY deep blue-hued maroon. Otherwise, it starts looking tacky pretty quickly. Just my personal opinion.
 
You're making great progress!

I see you got the compound apart. Did you do anything special?

I like Evaporust. For those shallow pockets I would give it a liberal coat of Evaporust, let it sit till I got antsy, then hit it with a stiff wire brush (hand brush). Sometimes you can take an awl or similar and just pick / scratch around in it and you'll get a lot of the big stuff loose. I wouldn't seat it too much. I assume you're going to prime before finish paint?

The best method I've found for cleaning lead screws is with a piece of fuzzy yarn. You can just saw it back and forth in the grooves and it will clean and shine. If you have another lathe you can mount the screw in the lathe and get it done in no time. Works great.

The original Logans had no two tone paint - all one color, and the sprockets you refer to were not painted. I think the sprockets look good if you paint the inside cast portion. Personally I don't like the two tone paint jobs. My approach was to leave anything that your hands touch (levers, wheels, knobs, etc.) bare metal and try to polish them up as best I can. If you use your machine those pieces will not rust. They will pick up oils from your hands as you use them.

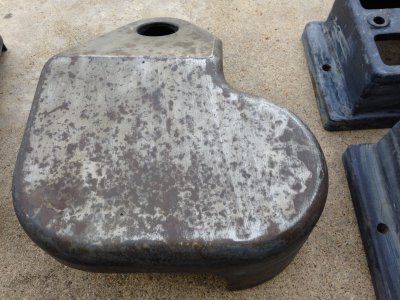
Most guys paint their chip pans 100%. I chose to only paint the bottom and sides and leave the top bare metal. I spent quite a bit of time cleaning the top so it looked decent. Seems a shame to paint a surface that you're constantly throwing a wrench or chuck key or other tool onto. I'm happy with it and I think it looks good. Just FYI.

To my knowledge all of the lead screw and halve nuts are bronze, but maybe some models were different, can't say.

Hope that helps.

Steve
 
Last edited:
Thank you for the feedback and info.

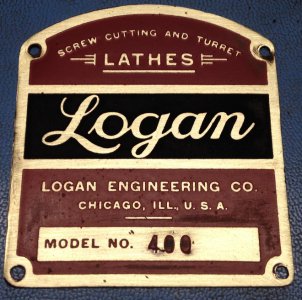
Here is the Logan tag. My shade of red is not totally accurate but I am OK with that. I may go pick out the paint from the "400" as I am sure that was stamped in after things were painted. Will see. Also the corners where the drive nails go of course are bent down but will be covered by the nails.

IMG_0720sm.jpg

Will weigh accent colors and let you all know what I choose.

I know I will have to replace my cross nut so will figure out what is correct. If metal was I bet I will have a hard time finding a good one. Also, the Logan 400 did not have the fancy stand like the 200. What I have is a galvanized sheet metal pan that my grandfather bent and brazed together. It will be getting a goat of paint as it is otherwise unattractive.

I was wondering how many parts are common. I would think as many as possible. If I had the parts book for the 200 I could probably tell. From pictures I think the 9B-28 is VERY close to the 400. In fact that is where I am trying to get a QCGB from to adapt. I am also getting info from a 10" as so far I think it is adaptable too. If I find that the adaptation is possible i will document that process as well. I could not help but wonder if a powered cross could be adapted but honestly I do not see a huge need for one on my lathe.

Today I will tackle the tail stock and I think that will be all for prepping.

Will Figure out what I can easily do to get the rust out of the few parts that show it. Wish I had room for a blaster. I do plan to prime any parts that have bare metal. Many of them still have a good layer if factory grey on them as I did not strip totally down to bare metal. Will prime what makes sense and paint it all.

IMG_0720sm.jpg
 
Steve,

The compound came apart by removing the collar that the dial sits against.

It is left hand thread. It has a hole for a pin to try and get it off but neither of mine were going anywhere. (There is one on the saddle as well) I had to vice grip it off with a rag to protect the parts. I ended up marking it a little but nothing bad. Once that was out the whole thing can be unscrewed from the nut. The nut is pressed into the housing.
 
Hey;

Your tag looks a lot better than mine. Yes, the red is quite dark, but it looks better than old and crappy. I forgot about Evapo Rust. Works ok for most stuff. My 200 is a pretty early example, and both the cross and compound nuts are cast. I'd like to have the skill to make new ones... some day. I'd like to paint the hubs of my change gears a slightly contrasting color. A slightly lighter gray, perhaps. We'll see. There is enough of my lathe still apart that I'd be glad to measure things for you. It would be good to have some sort of a database on which parts are shared by various models, and there has been consistent if occasional talk of it elsewhere. Let me know.

If anyone had the Woodruff key from their tailstock quill handy for a measurement, I'd appreciate it. I manage to lose mine! :angry:

Think I'll go and see about starting to assemble the saddle. Part of me thinks it would be a good idea to scrape it in a little, but the other part says Git'r Dun!
 
Back
Top