- Joined
- Feb 8, 2014
- Messages
- 11,144
Today I had to machine a couple of eccentric weights for a concrete vibrator. The vibrator was way too violent for what I am using it for, so I needed to reduce the offset mass of the weights.
So how to hang onto the part and machine the OD? The weights already have a hole through for the motor shaft, and I want to machine concentric with the shaft. I went to the miscellaneous bolt archive and found a bolt that fit the hole nicely, and had just the right amount of shoulder (a Toyota flywheel bolt, 11mm). Then went looking for a nut to fit, I couldn't find a metric nut to fit, turns out a 7/16 -20 fit perfectly. And the bolt has a nice thick flange on it, so I didn't have to use a washer between the part and the chuck to get tool clearance, this also keeps the bolt head from pushing back into the chuck. Normally I would use a washer and a jamb nut to prevent this the push back into the chuck and to get working clearance.
I could have built a proper arbor to do this, but I'm lazy, and I didn't need extreme accuracy for this job. For accurate work I would have built an arbor.
Grab the hex in the chuck, tap it around until it running pretty true, center drill the end for support by the tail stock.
Mount the part, tighten the nut, start making chips. There is enough friction this way for most machining operations. The torque required for many operations is much less than you would expect. In this case, the nut will tighten it's self if it is too loose, but I don't think it did.
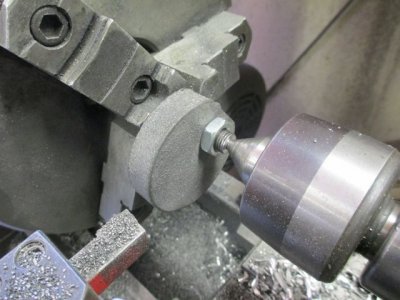
Material = Chinese Mystery Cast Iron
Depth of Cut = 0.050
Feed = 0.003 / rev
Spindle Speed = 190 RPM
Tool Bit AR6 (C-2?)brazed carbide from Harbor Freight. It's only fair to use Chinese tool bits on Chinese cast iron, besides that's what I had in the tool holder. Yes, you can use carbide for an interrupted cut if you don't get too greedy with the material removal rate.
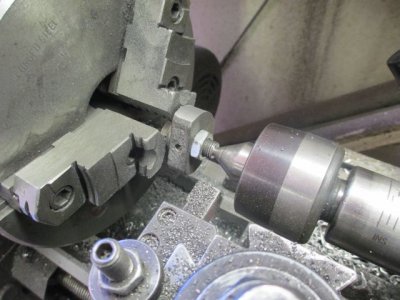
About half way through the first one. I'm impressed with my little point & shoot Cannon camera, the spindle is turning 190 RPM in this photo. It doesn't look like there is any motion blur at all.
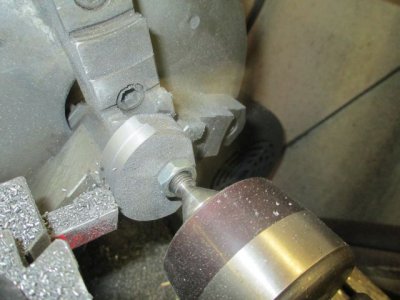
I took about an inch off of the OD total.
The finished part is ready to come out.
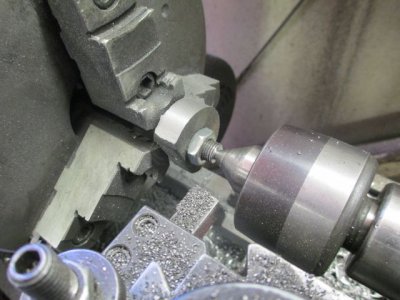
Next one is ready to go in
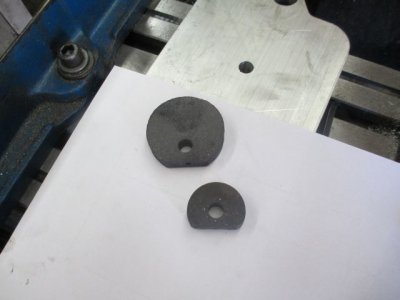
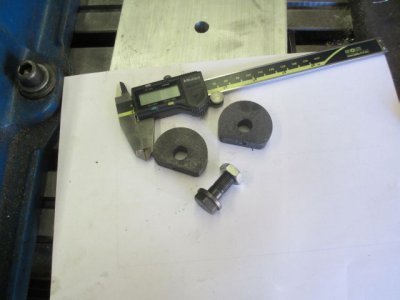
The finished parts and the ''arbor''
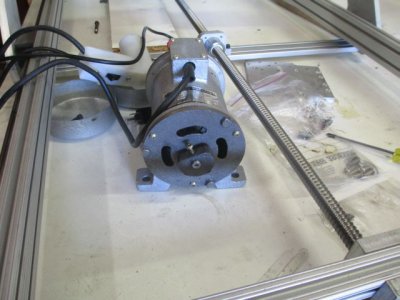
Mounted on the motor, I think it has the correct vibration now, if not, I can add some screws to adjust the mass.
I hope this helps someone.



So how to hang onto the part and machine the OD? The weights already have a hole through for the motor shaft, and I want to machine concentric with the shaft. I went to the miscellaneous bolt archive and found a bolt that fit the hole nicely, and had just the right amount of shoulder (a Toyota flywheel bolt, 11mm). Then went looking for a nut to fit, I couldn't find a metric nut to fit, turns out a 7/16 -20 fit perfectly. And the bolt has a nice thick flange on it, so I didn't have to use a washer between the part and the chuck to get tool clearance, this also keeps the bolt head from pushing back into the chuck. Normally I would use a washer and a jamb nut to prevent this the push back into the chuck and to get working clearance.
I could have built a proper arbor to do this, but I'm lazy, and I didn't need extreme accuracy for this job. For accurate work I would have built an arbor.
Grab the hex in the chuck, tap it around until it running pretty true, center drill the end for support by the tail stock.
Mount the part, tighten the nut, start making chips. There is enough friction this way for most machining operations. The torque required for many operations is much less than you would expect. In this case, the nut will tighten it's self if it is too loose, but I don't think it did.

Material = Chinese Mystery Cast Iron
Depth of Cut = 0.050
Feed = 0.003 / rev
Spindle Speed = 190 RPM
Tool Bit AR6 (C-2?)brazed carbide from Harbor Freight. It's only fair to use Chinese tool bits on Chinese cast iron, besides that's what I had in the tool holder. Yes, you can use carbide for an interrupted cut if you don't get too greedy with the material removal rate.
About half way through the first one. I'm impressed with my little point & shoot Cannon camera, the spindle is turning 190 RPM in this photo. It doesn't look like there is any motion blur at all.

I took about an inch off of the OD total.
The finished part is ready to come out.

Next one is ready to go in

The finished parts and the ''arbor''

Mounted on the motor, I think it has the correct vibration now, if not, I can add some screws to adjust the mass.

I hope this helps someone.


