- Joined
- Dec 20, 2012
- Messages
- 9,422
This is a discussion about tool grinding, which can be a dangerous business. I highly recommend safety glasses, leather gloves, dust mask and hearing protection. I also use an apron in case something comes apart and hits me. Please be careful and wear your safety gear.
Lathe tools are some of the most misunderstood and under-appreciated tools in the shop. The tip geometry on a HSS tool is hard to visualize, let alone understand, and grinding them accurately is even more confusing. It’s no surprise that so many hobby guys go to carbide tools, HSS insert tools or tangential tools – HSS tools can seem to take too much work.
Now here’s the reality: grinding lathe tools is actually really simple. You’re just grinding three flats at the tip of the tool, that’s all. Yeah, they’re all angled and they have confusing names but they’re still just flats. The cool thing is that even when you modify your tool geometry the grinding process is the same – 3 flats - it really isn’t any harder than that. And I'm going to attempt to show you how.
To grind a tool you need a good grinder; either a bench grinder or belt sander will do. I prefer the latter because it is easier for me to use and it cuts much cooler and much faster but I can use a wheel just as well. Your grinding media should be a coarse grit. I prefer a 24 grit Aluminum Oxide belt. I use some stick wax applied lightly to the belt before grinding each face.
Once the tool is shaped, I typically follow up with a 80 grit belt to remove coarse grind marks before honing on a coarse, then fine, then extra-fine diamond stone.
Your grinder should have a good tool rest. Mine is steel and is quickly settable to precise and reproducible angles. A good rest is very important, especially if you need to modify your tool geometry because you may be making changes of only a few degrees and a good rest will allow you to do that quickly and precisely.
Another very important tool is a push block. Mine is a 7” long X 1-1/2” wide X ¾” thick piece of plywood. It allows me to push directly into the belt and if there is a “top tip” in tool grinding it is this: push straight into the belt or wheel. The tool may be angled but your line of force into the cutting media is straight into it, and the block allows you to do that. It also helps you to stabilize the tool bit and move it side to side.
Other than your safety equipment, that’s it. Okay, let’s get to grinding!
My order of operations is to typically grind the side face first, then the end and then the top. While there are no rules on the order to take I follow this sequence because each face serves as a reference for the next. After grinding the side, it serves as a reference for the angle of the end face. Grinding the end forms the tip of the tool, which is used to tell me when to stop the top grind. This makes it easier for me to plan and control things as I progress so this is the sequence I prefer to use.
I am going to grind a general purpose right hand turning tool with a modified tip geometry that is not optimized for any one material but will work for most stuff we cut in a hobby shop. All the tool angles are 15° - side and end relief and side and back rake – so I call it a Square Tool. It will have a 1/32” nose radius that will produce a very good finish on most materials.
The general process is the same for all turning tools since they will all have the same three flats. The specific angles may differ, depending on the desired geometry but you will grind them the same way.
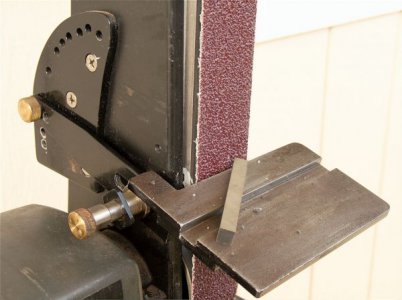
Shown above is my belt sander. The tool rest is set at 15° and will not move for this tool. Should I need to change an angle, the rest will precisely set it in just a few seconds. I also use a ceramic glass platen liner to provide a long-lasting flat surface for the belt to run on; you cannot grind a flat if the platen itself is dished. Of all the mods you can do to a belt sander this platen liner is THE most important one. These liners are available from knife making suppliers, often under the name Pyroceram.
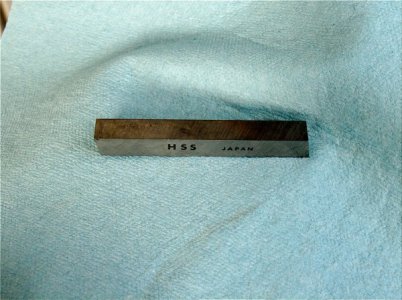
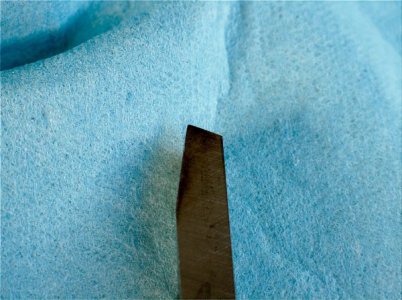
This is our blank, a high quality 3/8” HSS bit from Japan. Initially, I suggest you practice on mild steel key stock from the hardware store and switch to HSS when you are confident in your ability to grind what you intend.
The Side
The first face to be ground is the side of the tool. I normally make the length of this face 1-1/2 to 2 times the size of the bit; in this case ~ ¾” long. For a general purpose tool I will angle the tool bit so that about 50-60% of the end of the tool is ground off when the side is done.
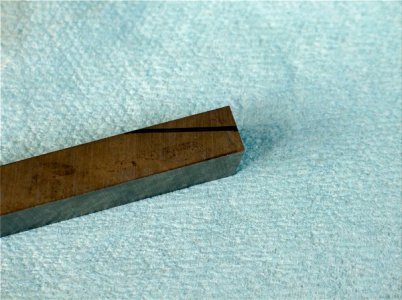
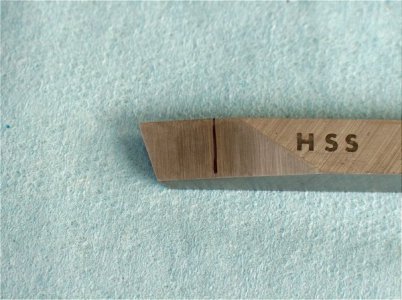
For illustrative purposes, I have drawn a line to show what I mean. It is useful for new guys to do this as it helps you to align your tool bit to the grinding media. As you get used to grinding you won’t need this line.
To be very clear, as we grind the side we are grinding the side cutting edge angle (represented by the inked line) and the side relief angle (set by your table angle) at the same time. Don’t let the labels bother you; although you’re grinding a flat the result will be these angles.
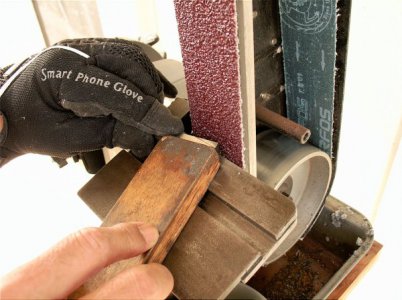
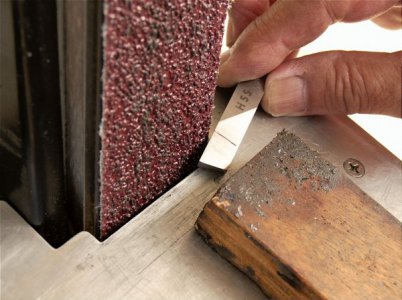
This is how it looks as I grind this side face. The push block is angled in the picture because I wasn’t paying attention when I took the picture but it is perpendicular to the platen in use. As I grind, my force is straight into the belt. You can see the ceramic glass platen liner in the picture above.
The inked line on the bit parallels the face of the belt. My left hand simply helps to move the tool back and forth across the entire surface of the belt. The block provides all the pressure straight into the belt to keep it cutting continuously and also aids in moving the bit side to side. As you grind, the tool will heat up; just dip it in cold water and move on. Now we just grind to the line, pushing into the belt and using its entire width to grind a flat even surface.
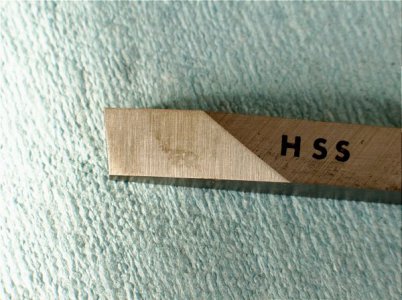
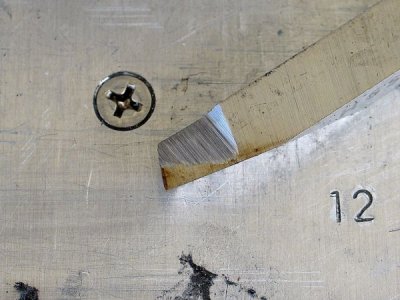
Below is the finished side face. To recap, we have created the side cutting edge angle by grinding along that line we drew on the top of the tool. We have also ground the side relief angle of 15° at the same time because that is what our tool rest was set to. If you want more or less relief angle on the tool then just change the tool rest angle … got it?
The End
Now we will grind the end face of the tool. The angle it forms relative to the side edge is called the end cutting edge angle and the clearance angle under this end edge is called the end relief angle, which is set by the angle of the tool rest.
For most tools I recommend that the end relief angle be kept the same as the side relief angle; in this case, 15°. Just this alone will reduce cutting forces and cutting temperatures versus standard geometry and you give up very little in terms of strength.
Since this tool is a general purpose tool, meaning it can turn, face or finish, it must be able to cut into a shoulder and then be able to face out. To accomplish this we will make the end cutting edge angle less than 90° so it can access corners without rubbing. I normally set it at 80°, which is represented here by an inked line:
The table angle remains at 15° and I set up like this:
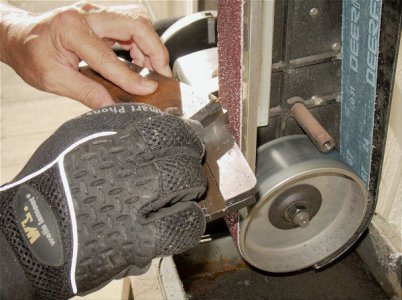
For the end, the push block is moved up near the tip to provide both lateral support and some force to move the bit back and forth across the belt. My other hand holds that black line parallel to the face of the belt and provides the cutting force into the belt and also moves the bit side to side. The end face cuts fast – just grind it to the line.
We have now ground the majority of the tool angles. If this were a tool for brass/bronze all we would need is to hone it, put a nose radius on it and the tool would be ready for use. For our tool, however, we have the very important rake angles to grind next.
The top of the tool houses the two most influential angles on a turning tool – the side rake and back rake angles. While they might seem hard to grind they are actually the easiest, as you will see.
I normally make the depth of the top grind about 1 to 1-1/2 the dimension of the bit. Here, I have marked the side of the blank at ½” from the tip. I will line this up with the right edge of the belt to serve as a reference, as seen below.
My steel table will not provide adequate support for the tool on the right side of the belt so I have an auxiliary table that drops on top of my standard table that does have a support area. This auxiliary table has some angled lines scribed on its top that allows me to choose from a variety of angles. In this case, I am using the 15° line and the bit is brought to the belt without changing this angle. You can also ink a line on the tool rest, up near the belt to help you align if you need to. Once the bit is angled the inked line on the side of the tool bit is brought to the edge of the belt and the support block is brought into contact with the tool bit. I am now ready to grind the top rake angles but before I do that …
Note that the table angle sets the side rake angle; in this case, 15°. The angle I am holding the bit at as I feed it into the belt sets the back rake, also 15°. As I feed the tool into the belt I am cutting both rake angles at the same time.
Also note that if you use a belt sander you need to track the belt off the right side of the platen about 1/16” to avoid cutting the belt. This also creates a nice radius into the back rake.
To grind the rake angles all you do is use the push block to push the bit straight into the belt (or your wheel) – that’s all, a straight push. You do not move side to side here.
I visually align the front edge of the push block with the flat face of the platen and just push straight into the belt while my other hand maintains the 15° tool angle. The block really helps to direct your force – I would use one if I were you.
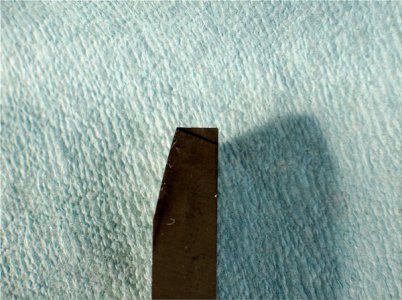
To orient you, the top of the tool is facing the belt. The side cutting edge is facing up, the back of the tool is touching the table and the bottom of the tool contacts the push block. Due to the angle of the table the belt will start to cut at the right rear of the top surface of the bit and as you grind, the ground surface will approach the side cutting edge and cut into it; then it will approach the very tip of the tool. Your goal is to stop the grind at the exact moment it reaches the tip. How do you know when the grind is getting to the tip? Just pull the tool away from the belt and look, and you’ll see something like this:
You can see that I’ve got a ways to go yet. To resume grinding, re-establish your tool angle and push. The flat that is currently ground into the tool will register itself on the platen if your right hand is relaxed. Now just keep grinding and checking until the grind reaches the tip of the tool, then stop.
You’ll see this:
If you have done this right the grind will extend all the way to the tip and there will be a nice curve ground into the rear of the top face of the tool. The tip of the tool will also be at the same height as the shank of the tool.
We are done … almost. I normally use an 80 grit belt to redo each of the faces on the tool to remove the coarse shaping marks. This makes honing much easier to do. For this tool, I did not have a fresh 80 grit belt and had to hone a lot more than I normally would. Anyway, hone each face of the tool and put a nose radius on it.
I usually form the nose radius with my diamond stones as it is easier for me to control the size and shape that way. I hone a tiny flat with my stone at the very tip, being careful to follow the angle of the tip of the tool so that the flat is even, top to bottom. Then I gently round the edges of the flat so it blends into the side and end faces. I normally use coarse, fine and then extra fine stones to hone with.
Your goal as you hone is to remove all grind marks. If you use the same stones I use you will achieve a near mirror finish on your tool and the tool will be razor sharp so be careful with it.
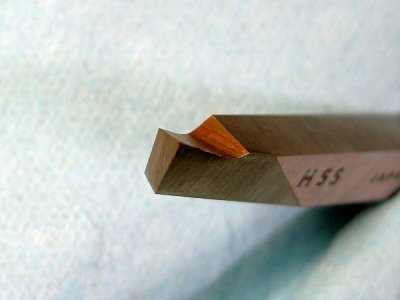
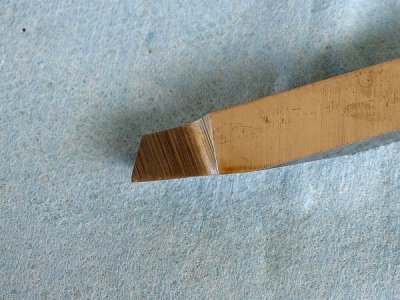
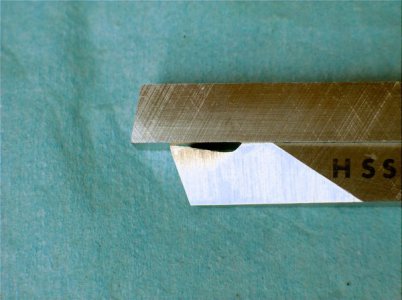
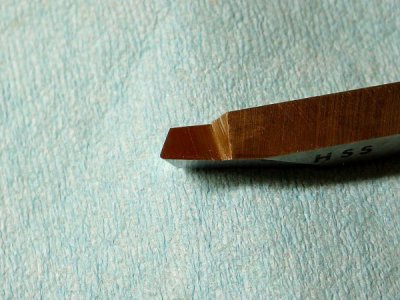
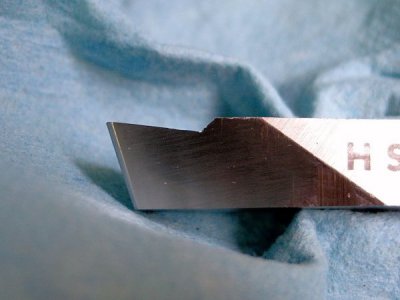
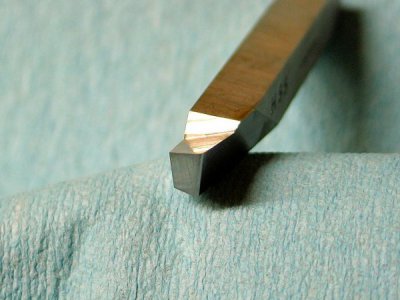
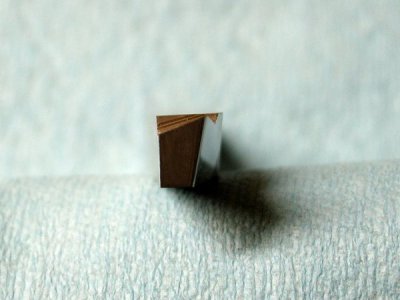
You should have this when you’re done:
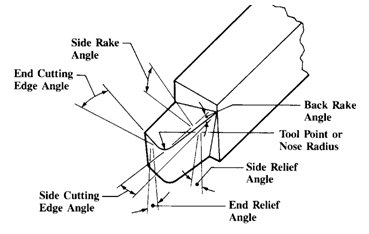
You now know how each of the tool angles in the typical textbook illustration is ground. Sorry if I took the mystery out of it for you.
You also know how to change each of those angles to suit your needs – change the tool rest angle and the angle of your bit as you grind it. You can find these standard angles in any tool angle table on the net or Machinery’s Handbook. It is just as easy to grind a modified tool as it is to grind a standard tool and I hope this gives you the confidence to experiment.
Lots of guys think you need a jig of some kind to grind a good tool. As you can see, this is not true. In fact, jigs restrict your ability to alter your geometry and I personally think this is a deal breaker. The only instance I can think of where a jig is useful is for grinding threading tools.
Total actual grinding time for this tool was about 4 minutes. Honing takes a few more minutes. If you hone it after each use it will likely last you a decade or more and not require a re-grind so making one like it is a skill well worth learning. I hope this helps you to do just that.
Give tool grinding a go and remember … you’re just grinding three flats.
Mikey
Addendum: Here are some links that will provide more information on tool grinding:
- http://www.machinistblog.com/grinding-lathe-tools-on-a-belt-sander/
- http://www.machinistblog.com/grinding-lathe-tools-on-a-belt-sander-part-2/#more-5888
- http://www.machinistblog.com/grinding-lathe-tools-on-a-belt-sander-part-3/#more-5897
http://hobby-machinist.com/threads/turning-tool-and-facing-tool-questions.36687/


