How does 12 speed SB 10L work?

gard

H-M Supporter - Silver Member
Joined
Oct 16, 2021
Messages
167
I have been working away at restoring a SB 10L lathe, SN 146767 with marks W.E.F. and L.Q.R. cat #8187AN. There is also a lightly stamped circle with some sort of symbol in it. I removed the motor mount by lifting the cabinet off. I assume there should be a 2 step pulley on the motor to match the 2 step pulley on the countershaft.
From the SB parts catalog, the South bend pulley part number PT2131NR1 has OD of 3.408" and 2.093" I have heard this was used on lathes of this vintage. I did some calculations based on the countershaft and spindle pulleys and this will result in a maximum speed of around 1200 RPM, The 1943 catalog lists 1357 RPM as max speed so I am not sure this is the correct pulley? This machine has segmented CI headstock bearing in not great shape.

Does the belt tension need to be adjusted when switching from low to high speed at the motor pulley?

What is the width of the belt (1/2 or 5/8")? Any type of V belt that does or does not work well (standard cut, notched or fabric)?

Was there ever a manual for these specific machines or just the general brochures like how to run a lathe or keeping your lathe in trim.

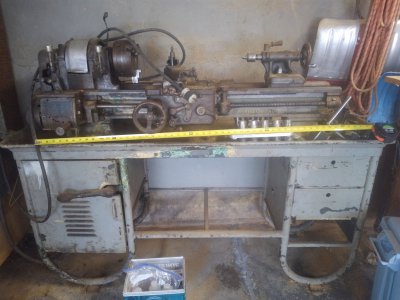
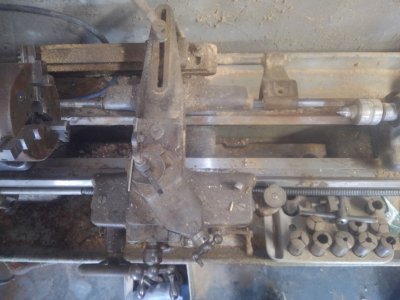
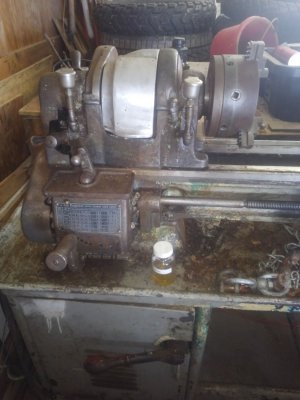
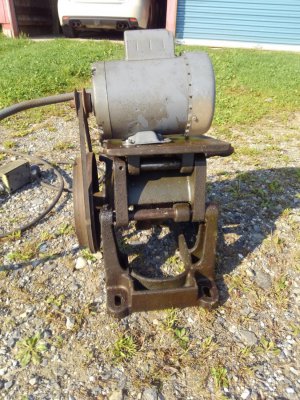
Photo of replacement motor and mount removed from lathe. Also lathe as I got it over a year ago.
KIMG1431.JPG

KIMG0768.JPG

KIMG0777.JPG
KIMG0861.JPG
 
As I understand it the motor pivots in the mount and "hangs" from the belt when installed. Your picture of the motor is not the same orientation as installed is it?

Different motors I have seen have different RPM's listed on the data plate. Some will say 1700, some will say 1734 and some 1800. I think the 1734 is a function of the windings and 60Hz electricity. I am not sure if the motors with different speeds are wound differently or if the just generalize the RPM.

You definitely want a 2 step pulley on the motor. You can experiment with different diameters to get the speeds that you want. I would say that the width of the belt is primarily determined by the width of the motor pulley since it is just running on the flat of the counter shaft pulley. Usually you want the entire belt to be seated in the pulley without bottoming out or sitting too deep. I think there is a lot of leeway on this for our older lathes.
 
Yes the assembly is upside down from the way it is in the lathe bench. There is an adjustment bolt for tension. I suspect the tension bolt may be more about holding the motor and plate up than pushing it down, this thing is heavy. The lathe came with a 1/2" wide belt but the pulley width at top is 0.63" so could use a 5/8 belt, which is probably what I will go with unless I hear otherwise.
 
In that position, 1/2 or 5/8 belt is not important. The flat belt is the one that will slip.
 
Once the tension of the motor pulley is set, you can change the speed by simply moving the V-belt. Your pulley isn't the correct part - it should be a double grooved pulley. And your V-belt is too narrow, or your pulley too wide. The number of V-belt I use on my 10L is 5L420.

You need to remove the oiling system that has been retrofitted and return to the stock system. This retro system will just waste oil, as its level (when full) is above the felt-spindle contact zone. This would just allow the oil to slowly drain out by gravity, until it is once again at the proper level - which is where the original system would be.

The 12 speeds are obtained by:

3 positions on the flat pulley x 2 positions of the back gears x 2 steps on the motor pulley, or 3x2x2=12.
 
Thanks for the info, I have a double 3.75" OD grooved cast iron pulley, I will turn one side down close to the 2.1" then adjust those diameters until I have good tension in both positions using a 5L wide belt. I am not sure what size the original double grooved pulley was but I think this will be workable.
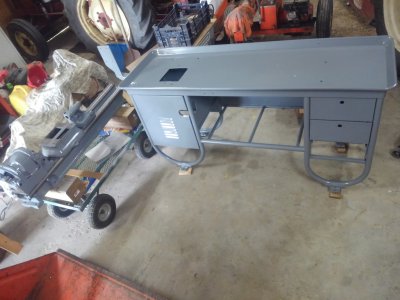
Those pictures from over a year ago were fun for me to lo look at. I have disassembled and painted almost the entire lathe and cabinet. Have had to make or repair numerous parts (including those oilers). Still need to do the gearbox and apron. Once I get the motor mount working I can start reassembly of the parts then scraping the newly planed bed, turcite on the saddle. Perhaps in another year I will be making chips. It has been a fun project.
 
An up to date photo of some of the partsKIMG1459.JPG
 
Back
Top