How Are "slots And Slits" Cut For Bushings?

EmilioG

Active User
H-M Supporter Gold Member
Joined
Jul 20, 2014
Messages
1,386
I would like to learn to correctly cut slits and slots, down to 1/32", (width of slots (.794") in steel to make bushings, sleeves,
etc... Like the slits that you see on R8 collets, grinder collets, reducing sleeves, etc...?

What type of tooling is used to make this fine straight cuts?
 
Last edited:
If I might slightly hijack, er, I mean add to this thread;), I would like to make some split sleeve bushings for boring bar shanks. What is the work flow sequence for getting from round stock to an accurate thin wall bushing with a full length slit?
 
If I might slightly hijack, er, I mean add to this thread;), I would like to make some split sleeve bushings for boring bar shanks. What is the work flow sequence for getting from round stock to an accurate thin wall bushing with a full length slit?
i'd imagine the rod is drilled and bored, then slit
 
I would like to learn to correctly cut slits and slots, down to 1/32" (.794") in steel to make bushings, sleeves,
etc... Like the slits that you see on R8 collets, grinder collets, reducing sleeves, etc...?

What type of tooling is used to make this fine straight cuts?
Thanks so much.

Yup, Slitting saws


If I might slightly hijack, er, I mean add to this thread;), I would like to make some split sleeve bushings for boring bar shanks. What is the work flow sequence for getting from round stock to an accurate thin wall bushing with a full length slit?

I can think of a couple of ways to do this. In both cases, turn the bushing to the correct dimensions and part off.

Then over to the mill and put the bushing on a stub arbor, secure with a screw and washer, use a slitting saw and cut right into the washer and the arbor.......OR

Drill a bushing sized hole in a piece of scrap, drop in the bushing, the cut the slit with a band saw right through the scrap and bushing.
 
When I used to make them in work. I drilled the ID undersize then turned the ID and OD at same time to be concentric. Then I would hold the part in a vise end against the jaws and just a slight bit of ID visible at side of jaws. Then using a slitting saw I would mill a slot. If multiple slits are needed I would them put a shim in the 1st slot and use a sign bar or angle block to position the part at the right angel to cut next slot.
 
(snip)
Then over to the mill and put the bushing on a stub arbor, secure with a screw and washer, use a slitting saw and cut right into the washer and the arbor...
(snip)
I like the stub arbor idea.
 
Indexer may also work. band saws are too wide. I would need slits 1/32" wide.
 
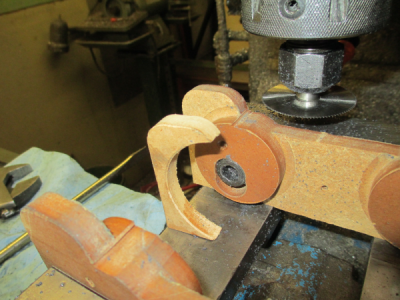
Here is what I used for a slitting saw. It turns out that Harbor Freight has a little tiny chop saw that has a 2 inch blade on it. The chop saw is not useful to me, but the blades are, and they sell 3 packs of replacement blades. The blades are 2 inch dia, and 0.027 thick, made of M2 HSS, or so the package says. Nice little slitting saws, about $10 for a 3 pack.:) Whipped up a quick arbor and started making slots.

upload_2016-12-18_14-47-34.png
 
If I might slightly hijack, er, I mean add to this thread;), I would like to make some split sleeve bushings for boring bar shanks. What is the work flow sequence for getting from round stock to an accurate thin wall bushing with a full length slit?

I usually drill and ream the stock, then turn the OD profile I want. I put some layout dye on the end of the sleeve and use my center gauge (the V-shaped head on a combination blade) to mark a center line. Then I put the sleeve in a vise so the marked line is even with the top of the jaw and the bore is sticking past the end of the jaw about half way. A spacer is used on the other end of the jaws to balance the clamping forces, then I use a slitting saw to cut a through slot. I almost always cut an expansion slot 180 degrees from the through slot so I just turn the work piece over, line up the layout line to the top of the jaw and cut the partial slot about 1/2 way through the wall.

This has worked well for me and I've made a number of sleeves this way.
 
Back
Top