- Joined
- May 23, 2014
- Messages
- 100
Hi,
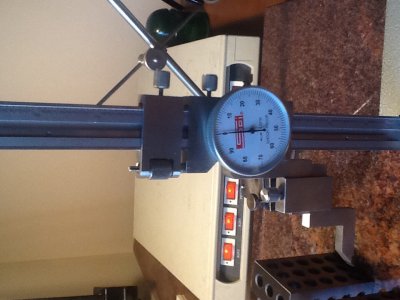
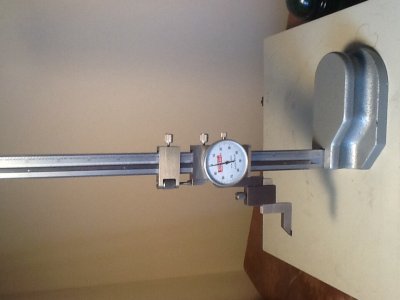
I finally bought a height gage off of ebay. I think I got a decent deal. At least I hope I did. I tend to over analyze my tool purchases. Now that I have it I have some questions on its proper use. I haven't found any good resources on my style of height gage. The first question I have is about the fine adjust. I think I may be missing a parts. There is a threaded stud sticking out of what I think is the fine adjustment section. Is this supposed to have a nut or something on it? As you can see from the second pic when I rotate the wheel that section just separates from the bottom section. Is it supposed to be like this? Does anyone know where to find the manual for this? Its a spi 11-175-7. It came with a calibration certificate. I paid $70. Deal or dud?


I finally bought a height gage off of ebay. I think I got a decent deal. At least I hope I did. I tend to over analyze my tool purchases. Now that I have it I have some questions on its proper use. I haven't found any good resources on my style of height gage. The first question I have is about the fine adjust. I think I may be missing a parts. There is a threaded stud sticking out of what I think is the fine adjustment section. Is this supposed to have a nut or something on it? As you can see from the second pic when I rotate the wheel that section just separates from the bottom section. Is it supposed to be like this? Does anyone know where to find the manual for this? Its a spi 11-175-7. It came with a calibration certificate. I paid $70. Deal or dud?


