- Joined
- Nov 5, 2016
- Messages
- 1,420
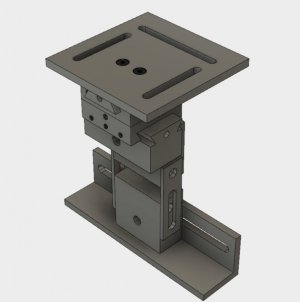
Although I just recently finished up his simple grinding rest, I decided to make the advance rest now. Two reasons: 1) I really like the simple one and the capabilities that it has, but know that the advanced rest would be easier to set angles and be a little nicer to use. 2) I was looking for a nice mill project to do to test out and use my new to me milling machine!
So, as with the simple rest, I started drawing things up in Fusion 360 and started making chips. I usually draw things up as I go and mainly try to keep ahead of the machining. Started with the table, but put that on hold until I receive the flat head hex head screws I ordered so I could fit the countersinks with the actual screws I will be using (#8-32). Today, I squared up and dovetailed the two female slide parts (upper and lower). I'll drill/tap these for the gib screws tomorrow and post pictures of the parts I have so far as long as I don't get too tied up watching football!
So far, I've been happy with the mill. Runs nice and it's a lot easier to crank around than my B&S 2B mill!
Ted


