Got My First Lathe, Need A Little Help Please

brownac1983

Registered
Registered
Joined
Feb 6, 2015
Messages
45
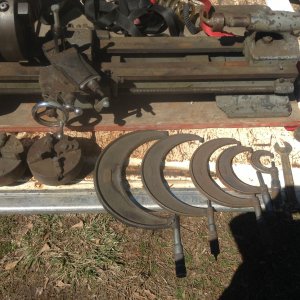
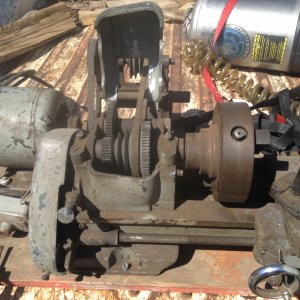
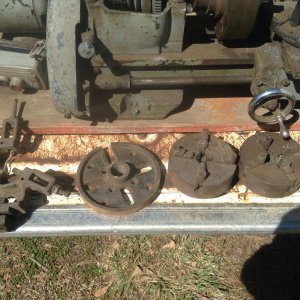
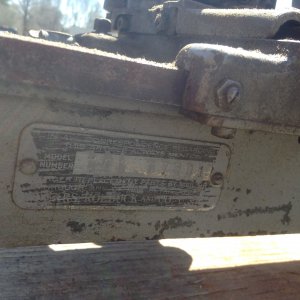
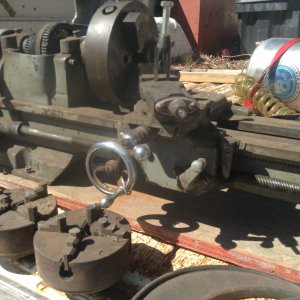
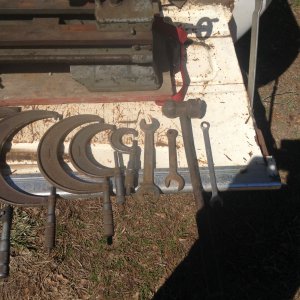
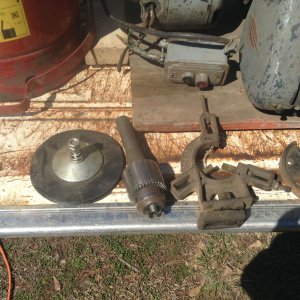
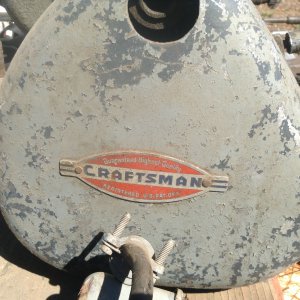
Hey guys, this is my first post other than my intro post so please forgive me if I ask anything stupid. I bought a lathe yesterday, it needs a little cleaning up but it runs and seems true. It's a Craftsman 101.07301. From what I've found on the internet this seems to be equivalent to an Atlas 618 Mk1. It came with a steady rest (missing 1 finger), 2 four-finger chucks, a 3-finger chuck (installed), a face plate (what do I use that for?), a drill chuck that looks too large to be used with this lathe, a set of micrometers and a few wrenches. There are no change gears or other tooling included.

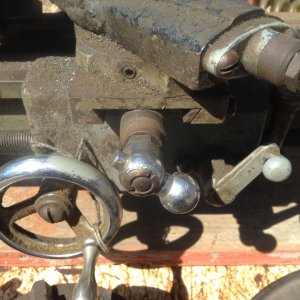
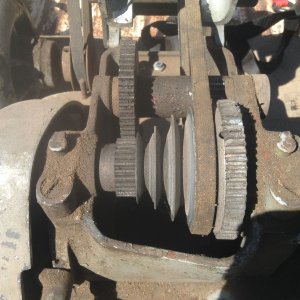
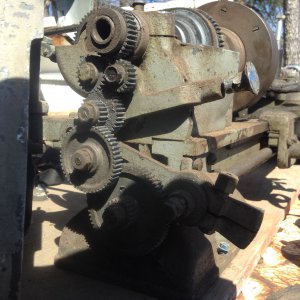
The problems I've found with it are the bull gear teeth are chipped (looks like somebody tried to engage the back gears while running), the crank handles on the cross-slide need replacing (one broken, one missing) and someone replaced the tool holder tower bolt with one that doesn't look correct. Also, the tool holder tower (is that the right word?) seems loose, is there a way to tighten it?

I am planning to clean it all up, paint it and attach it to a sturdy metal table in my garage. I know I'll probably have to find the bull gear, crank handles and change gears on eBay. Are there any other possible sources? What change gears would I need for most workshop applications? I would like to be able to thread.

What else do I need to begin using this lathe? I assume at a minimum I'll need some tool holders and tools. Are there generic tool holders that will fit? Can anyone recommend a list of startup tooling?

Is there a downloadable owner's manual available?

I would also like to have a milling attachment. I've seen the M6-500 attachments for sale online, and I've also seen mention of a collet-type milling bit holder that was apparently available for the lathe, is the bit holder necessary or could a milling bit be chucked in a lathe chuck?

Pictures attached. Thanks in advance for any advice.
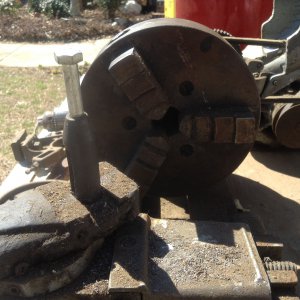
IMG_0766.jpg IMG_0768.jpg IMG_0756.jpg IMG_0760.jpg IMG_0755.jpg IMG_0763.jpg IMG_0759.jpg IMG_0757.jpg IMG_0761.jpg IMG_0754.jpg IMG_0762.jpg IMG_0770.jpg
 
That's a good little lathe, you can do nice work with it when it's running well. In fact, many people have done some amazingly precise, detailed work with a 6 inch Atlas. But, as a beginner, you do penalize yourself immensely by starting out with a machine that's not in good operating condition. Your best bet IF it is possible, is to locate a nearby experienced mentor that can work with you on the spot, getting the machine back into good condition before learning to use it.

You have a decent set of tooling and the lack of change gears isn't a disaster provided that the gears that are currently on the lathe provide reasonably fine feed. Single-pointing threads on a small lathe isn't the most fun way of spending time, it's WAY more efficient to make or buy a simple chasing head for the tailstock that accepts standard dies. This reduces a twenty minute single-pointing operation (for a small lathe) into a twenty second die chasing operation with the additional benefit that the threads are likely to be more precise and of better finish.

There are several good, simple publications from which you can begin to learn the basic operations of the lathe but refurbishing the machine isn't quite as easy a learning process. Very best wishes and good luck !

PS I'm sure that you know that you have a LOT of rust cleanup before you can even begin refurbishment. You may want to consider one of the electrolytic or chemical rust removal processes. In that respect, having a small machine that can easily be disassembled is a real asset !
 
Your tool holder is in need of well maybe the scrap heap ....maybe not at the very least it is missing the bottom two pieces. You should have enough gears to get you started. I have two of those lathes and for their size they are decent enough. I upgraded mine.... collets made a drawbar for it,quickchange tool post assorted bits ,milling attachment(they are high now)...then I got a 14 1/2" south bend ....the craftsman doesn't get much use....I'm sharing this because once the bug bites you, you may be surprised what follows you home....I'd get it up and running and see if the bug bite you.....
I made a holder for the cutter ...not a good idea to chuck them...i'd get that lantern toolholder squared away and get a few highspeed steel cutting tools and start making chips ....clean it up and oil it first ...watch a few videos and be careful ...SAFETY FIRST I think I have a tool post if you are interested send me a message
 
Thanks guys. I'll be cleaning the surface rust from the accessories, most likely chemically. Luckily there is almost no rust on the lathe itself. What looks like rust in the pictures is a combination of dust and some type of cosmoline-like substance that the last guy apparently coated it with before storing it. I'm soaking it in WD-40 and everything is wiping clean with a rag. The ways look really good now.

Rafe, I'll send you a PM about the tool post. I looked up a few pictures online and see what you're talking about missing from mine.

I'm sure I'll eventually want to go bigger, I honestly wanted something along the lines of a South Bend 10", but this setup came along for $40 and I figured it would be fun to play with at the least until something bigger came along. It seems like every time I think "if I only had a lathe handy" the work is fairly small.
 
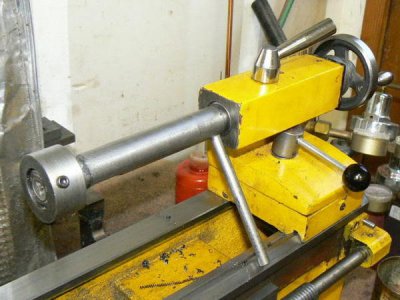
A die chasing head doesn't have to be very complicated, by the way. This one is just a piece of pipe welded to a couple of steel scraps of appropriate diameters/lengths. One end fits the tailstock Morse taper (the compound slide was used to cut the taper).

A slot is milled through the wall of the pipe; it's not visible because it is on the far side of the chasing head when this photo was taken. The purpose is to easily remove chips from the thread cutting process.

The other end is bored to accept a standard die. Both round dies and hex dies fit the bore diameter. Three set screws can adjust the die on center but I usually leave them fairly loose and allow the die to float. The rod at the tailstock end prevents the chasing head from rotating.

In operation, the tailstock is loosened on the ways and manually pushed toward the headstock during the thread chasing process. The lathe is usually adjusted to the lowest spindle speed and the workpiece is liberally lubricated (I prefer pipe threading oil, it's readily available).

Note that, when reversing the motor to withdraw the chasing head, the restraining rod needs to be rotated so that it bears on the far side of the ways.

P1020159.jpg
 
That looks great Randy, that would definitely be easier than single-pointing threads. I do want to learn to single point in order to be able to cut Acme screws, but this would be best to start with.
 
That looks great Randy, that would definitely be easier than single-pointing threads. I do want to learn to single point in order to be able to cut Acme screws, but this would be best to start with.

Good plan if you can locate the change gears. I have very fond memories of my 6 inch Atlas, my first lathe. I decided very early on that die chasing was preferred to single-pointing but I was too stupid to build a die-chasing tool like the one shown above until decades later.

I used a normal die-stock for threading on the Atlas back then, resting the back of the die against the tailstock ram to square it with the work when starting the threading. But the finished threads were sure to "wander" a bit and there was often interference problems between the carriage and the die-stock.

A die chasing head - made carefully - keeps the die aligned with the spindle axis. It should have sufficient length to pass over the carriage to prevent the interference problem.

It will take a while for you to outgrow that lathe and in fact you may NEVER outgrow it if your work envelope is small. And there is no need to limit workpieces to non-ferrous material - the Atlas can take on harder material by changing spindle RPM and depth of cut.

As I mentioned in a previous post, much precise work has been produced using these neat little lathes ! I wish that I had another one :)
 
Last edited:
Dear Brownact1983,

You have what I call a nice "project lathe" which will need some cleaning up and repairing before you will be able to use it. By overhauling it completely and maybe even giving it a fresh coat of paint, you will get to learn how the lathe works. By that time you will most probably have also sourced a user and spare parts manual and the broken or missing parts to the lathe on E-bay or from one of the members on this site.

The lantern type tool holder sitting on the compound slide of your lathe not only went out of use in machine shops more than 50 years ago but is a pain to set up and also has to be re-adjusted every time the centre bolt is loosened. You will also need lathe tool holders when using the lantern type tool holder. You are well advised to look out for a quick change tool post that will fit the lathe and go with that. A second hand quick change tool post sure beats a lantern type tool holder hands down.

On the subject of lathe tools, buy yourself some high speed steel lathe tool blanks and learn to sharpen them yourself. By going this way you will learn about the geometry of lathe tools, which is what you will need to learn anyway. The pre-welded and sharpened tungsten carbide lathe tool bits that are available may be a quick fix just to get going, but really need a higher operating speed and a more rigid lathe than what you have to get any sort of decent finish out of them. (IMHO.)

The two chucks with the 4 jaws on them are called 4 jaw chucks and each jaw is adjusted one at a time to hold material being machined. A dial indicator is used to assist in the centring of the workpeice. The chuck with the 3 jaws on it is called a 3 jaw chuck and it is self centring. There is normally a second set of jaws for the 3 jaw chuck which are used to hold work in the outward direction. (Such as a large diameter pipe.) The face plate you have is used to hold irregular castings and other material being machined, which is not able to be held in the 3 or 4 jaw chucks. Parts are bolted onto the face plate. The face plate is useful when turning parts between centres as it is used to give a dog, which is tightened onto the material being machined and driven by the face plate, the same rotation as that of the spindle. (Did I get that right???)

Your Jacobs chuck Morse taper looks a little large for your lathe in the picture, but it may fit into the taper in the spindle, so don't "chuck it in the bin just yet. While a Jacobs chuck is not really designed to be used as a lathe chuck, I have found it useful to hold small items been machined. It will be a good idea to fit a reversing switch onto the late drive motor. The one in the picture looks as if it is only an on / off switch. A good quality one at that, though. Look for a strong wooden or steel bench to mount the lathe on.

You can have a look at the website www.lathes.co.uk of Tony Griffiths, in the U.K. to find out more about your lathe, as well as for spare parts and other information. Tony's site is a real hive of information on all machine types.

I'm hoping that you will keep this thread alive by posting lots of pictures of your lathe refurbishment as it happens. There are many guys with a wealth of information to help and encourage you through your lathe clean-up and refurbishment into a useable lathe. We are all picture junkies. Always remember that even if the machine bug has not already bitten you, as it has most of us on this site, you will have something to sell later on, so your time will not be wasted.

Enjoy, Geoffrey.
 
Back
Top