- Joined
- Jan 2, 2014
- Messages
- 8,853
lunch break, so time for an update......
This morning I booked the day off work as vacation.
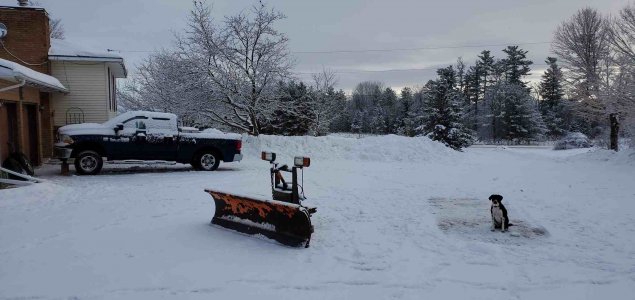
It looks like a beautiful day to get this project complete:

Not only is this vehicle my daily driver, but it is also the plow vehicle.
10-20 cm (4-8 inches) of fresh snow is forecast for Wednesday.
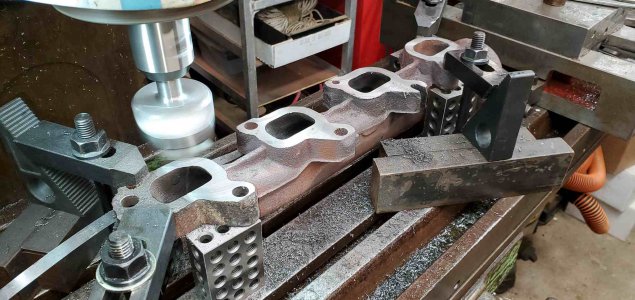
So into the shop to finish the milling.
Three ports done, one to go....... nothing can slow me down now........right?

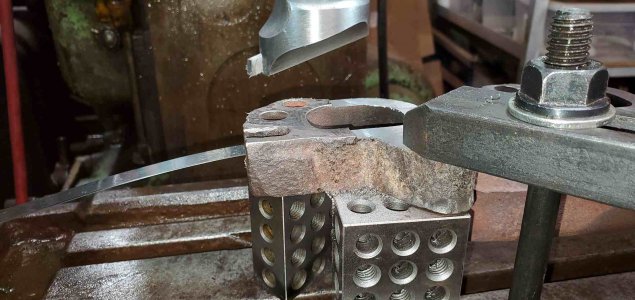
It is NOT shown well in this photo, but I am out of y-axis travel....there would be a ~1/2" strip uncut!

So I had to loosen all the clamps, vacuum the table to avoid chips getting in the way, slide the manifold down the table (just enough room without removing the vise), replace the four 1-2-3 blocks (and my stack of shims under that one corner) and clamps and finally finish the milling.
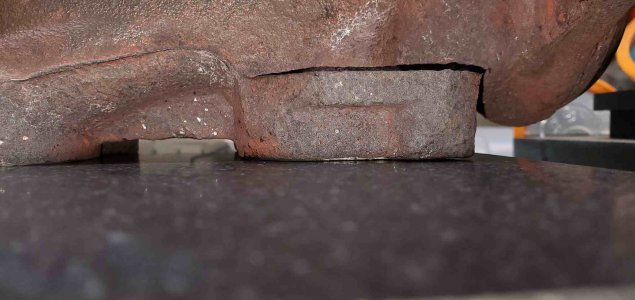
Back on the surface plate, same view as before - except no gap!

there is a shiny bit there from cleaning up the machining burr, but the only gap is slight and under the bolt flange only; there is a wide ring of flat face all around the port.
I checked around with a feeler gauge and at one place on the far end a 0.002" blade will fit, but not a 0.003" blade.
Not perfect, but a way better than original.
I started by taking off a full 50 thou. (10 thou. per cut) but that did not allow much cleaned up face at the lowest port.
I bumped it up another 30 thou. and so removed about 80 thou. from the highest spots.
This afternoon is all about assembly.
Once it's all back on I'll be able to start it up and hear how bad the drivers side is....... I might get to do this all again next weekend!
Brian
This morning I booked the day off work as vacation.
It looks like a beautiful day to get this project complete:

Not only is this vehicle my daily driver, but it is also the plow vehicle.
10-20 cm (4-8 inches) of fresh snow is forecast for Wednesday.
So into the shop to finish the milling.
Three ports done, one to go....... nothing can slow me down now........right?

It is NOT shown well in this photo, but I am out of y-axis travel....there would be a ~1/2" strip uncut!

So I had to loosen all the clamps, vacuum the table to avoid chips getting in the way, slide the manifold down the table (just enough room without removing the vise), replace the four 1-2-3 blocks (and my stack of shims under that one corner) and clamps and finally finish the milling.
Back on the surface plate, same view as before - except no gap!

there is a shiny bit there from cleaning up the machining burr, but the only gap is slight and under the bolt flange only; there is a wide ring of flat face all around the port.
I checked around with a feeler gauge and at one place on the far end a 0.002" blade will fit, but not a 0.003" blade.
Not perfect, but a way better than original.
I started by taking off a full 50 thou. (10 thou. per cut) but that did not allow much cleaned up face at the lowest port.
I bumped it up another 30 thou. and so removed about 80 thou. from the highest spots.
This afternoon is all about assembly.
Once it's all back on I'll be able to start it up and hear how bad the drivers side is....... I might get to do this all again next weekend!
Brian

