- Joined
- Sep 22, 2010
- Messages
- 7,223
Site is dead. This is from archive.org
South Bend Heavy 10" Lathe
02/16/02
A couple months ago I started looking for a Southbend lathe. I caught the bug a few months before that when I purchased a small Asian 7” lathe. As I learned on the smaller lathe and started collecting projects and ideas I found that many of the things I wanted to make would require a somewhat larger lathe. After putting out the word I soon heard back from a friend about a 9” Southbend that was unused and unwanted. The lathe was too far away for me to easily get out to examine it so I relied on my friend to make the arrangements. All I knew was that it was a 9” lathe missing the tailstock & drive assembly but it had a quick-change gearbox and a power crossfeed. No accessories except for a faceplate frozen to the spindle. Sight unseen the $400 price was agreed upon and the adventure began.
Knowing that I was in need of a tailstock and drive assembly (at the very least) I decided that I’d be better off buying another lathe to use as a parts donor. While I awaited delivery of my newly acquired 9” I decided to start getting what I needed. A quick look thru the local Want ads turned up several Southbend lathes but very few that met my particular needs. I lucked out towards the end of my search when someone who had just sold the lathe he advertised mentioned that he had another for sale as well. I got the directions, hopped in the minivan and drove 120 miles to go get my parts lathe. With help at the loading dock we got the lathe into the van and off I drove for the 120-mile return trip. I arrived home tired but satisfied, I had everything I needed now and was just awaiting the arrival of my diamond in the rough.
Finally a week or so later the big day arrived and my “new” Southbend lathe was brought over. My friend brought it over on a small trailer and as I looked at it through the porch window the first thing that struck me was that it sure looked bigger that the 9” that I’d brought home a few days earlier. Now I live in a condo with a large basement storage room that has become my shop, and while it’s a bang-up storage room as a shop it leaves a lot to be desired. Access being my biggest complaint. Nonetheless with the help of three neighbors the four of us managed to lug the beast downstairs to the shop. Once I had it indoors and sitting nest to the 9” parts lathe I’d just bought, it became quite obvious that me new 9” Southbend was anything but. It was larger in every respect and clearly not a 9” machine. A few minutes with some WD-40 and brass wool had cleaned up the tag on the gearbox to reveal this.
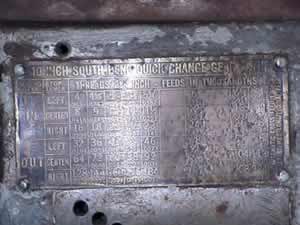
Lo and Behold, a 10-inch lathe it was. A little more examining and it became obvious that this was a Heavy 10” and not a Light 10”. I wasn’t quite sure how to feel. I was pleased as could be to have found a Southbend Heavy 10” for $400 but I was really bummed out in a major way about having driven 250 miles and spend a fair sized wad of cash on a 9” parts lathe that was not completely useless to me. What else can you do other than to just acknowledge and move on? I had to console myself with the simple fact that I now had a Heavy 10” and could boast about having a couple of Southbend lathes while at cocktail parties. When we got everything off the trailer it looked pretty pitiful and I clearly had a project on my hands.
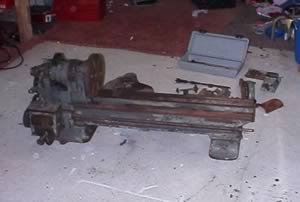
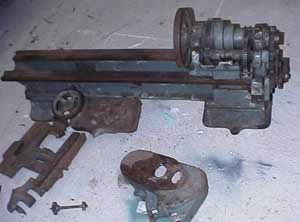
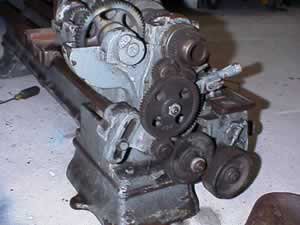
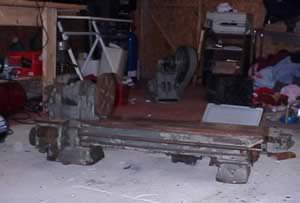
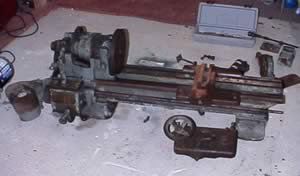
One of the real disappointments I uncovered while cleaning the lathe up was that the ways appear to have been reground. I had been hoping to take serial numbers stamped on the end of the way and contact Southbend for information about the origins of the machine. At the very least I would have know how old it is. Unfortunately when I got the surface rust off and cleaned everything up there was absolutely no trace at all of the serial number. None. I can’t imagine Southbend let one get out the door unnumbered and the only other explanation would be that the ways were reground at some point in the machines history. There’s no evidence of hand flaking anyplace along the ways anymore. I’m not sure what to make of it; I wonder how badly the ways were for someone to have had the bed re-ground.
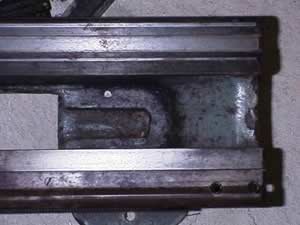
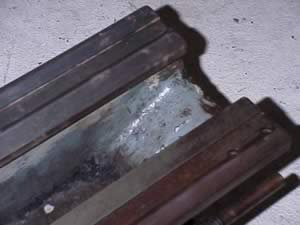
I wish I had some means of identifying this lathe. If anyone can date the machine for me from the photographs here I sure would appreciate hearing from you.
03/04/02
This is a picture of the headstock; this is an underdrive machine with a single lever gearbox. Know the single lever boxes are the earlier models but I though the underdrive machine were later models. Any guidance is appreciated. Seen in this picture is the tumble reverser for the leadscrew but the detent handle is broken off, a new assembly was located cheaply and awaits installation.
The apron was in pretty poor shape having been disassembled at some point in its career. If I had to guess from what I see of the lathe there was probably some sort of problem in the apron, which caused the lathe to be mothballed. The half-nuts have been removed along with the clutch assembly for the power crossfeed. Not having any information at all from the previous owner I can only speculate that the disassembled parts were causing problems.
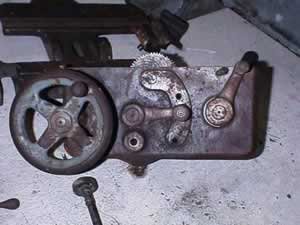
Rather than delve into apron repair right away I took a shortcut and just threw money at the problem. Purchased a used apron assembly online and was done with it. I also picked up the leadscrew support that it had been missing and in stroke of good luck ran across a mostly complete Southbend underdrive cabinet for Heavy 10” with a 3.5” bed. A tailstock was located at a used machinery dealer and cost me just slightly less than the lathe itself. Along the way I’ve also picked up a steady rest, micrometer carriage stop, 6” & 8” chucks and a driver plate.
Now I finally had everything that I needed to make this a working lathe. The next item on the agenda was a through cleaning, degreasing and stripping of the paint. After consulting as many websites as I could find I decided to use TriSodiumPhosphate (TSP) and strip everything at home. I went to Wal-mart and bought a turkey frying kit, which came with a large heavy-duty propane burner and stand plus a huge 40gal pot. I set everything up out on my patio and went to town. I mixed the TSP and water, fired that baby up and started boiling my lathe piece by piece. Everything fit into the pot easily except for the bed, which had to be swapped end for end ½ way thru, but even that cleaned up nice. The TSP worked as advertised and removed all the grease, oil and paint from everything. It turns the paint into a kind of powder, which is easily rubbed or brushed off when the part becomes cool enough to handle.
With all of the castings cleaned to bare metal it was time to start putting it all back together. I haven’t decided on a paint color or method of painting yet so I’ve left that part alone for now. I used a zinc-based self-etching primer on everything destined to see paint. I’ve been priming and test-fitting the parts as I go along. This is where I’m at with it so far.
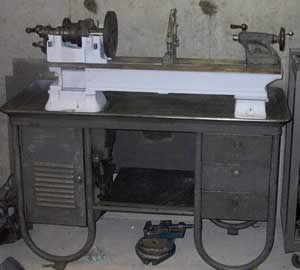
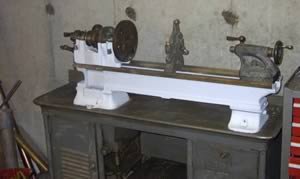
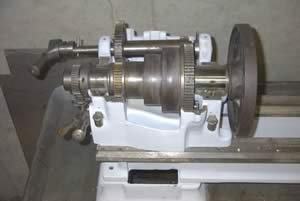
Slowly but surely it’s getting there. I’m having a lot of fun and I’m learning a great deal as I rebuild this classic old machine. I’ll continue to add photos and updates as I progress through the rebuild and hopefully someday soon I’ll be posting pictures of it painted, spinning and making lots of hot blue chips <G>
05/23/02
As you can see in the pictures, I haven’t been able to get the faceplate off of the spindle, there’s just no telling how long it’s been on there. I took removed the back-gears for a better cleaning. Both gears are in great shape but there was some surface rust on the shaft between them and I wanted to clean it up. After taking the worst of the rust off with a brass wire wheel I mounted the gears between centers on the 7x20 and polished the shaft on the lathe. I was pretty happy with the results.
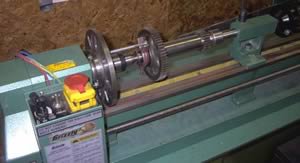
I was so pleased with the way it came out I plan to use the same method to clean up the spindle and cone pulleys which also need attention before being reassembled.
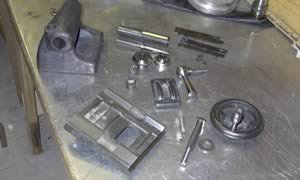
Before I started painting I still had some detail work to do. The tailstock was completely disassembled before painting. The ram was polished in the lathe and all of the unpainted parts were cleaned and polished. The casting was primed and then painted. Here’s the disassembled tailstock.
After more work with a wire brush and some self-etching primer I was finally ready to start putting some color back on this machine. I caved in to tradition and went with Machine Tool Gray. I gave Dark Ford Blue some thought but just couldn’t picture it. These are pictures of the headstock, tailstock and foot castings. The bed is next.
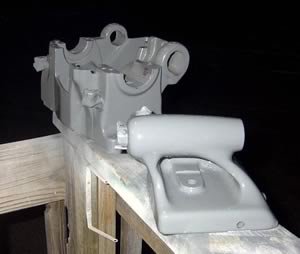
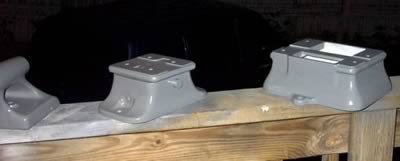
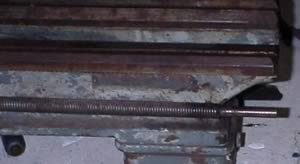
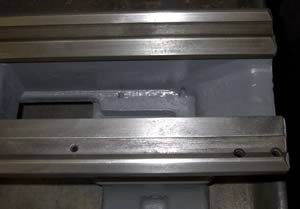
With the bed painted I went at it with a scuff pad and penetrating oil to scrub the ways. After about an hour you can see the difference in the before and after photos or at least I hope you can for as much work as it was.
Here’s the headstock partially reassembled after painting.
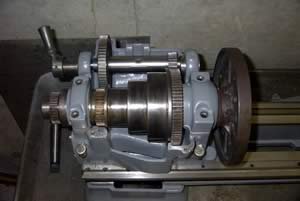
In the picture above you can see the polished back gears and the cleaned up spindle. Once I get the faceplate off the spindle I’ll clean it better and polish it between centers. I just couldn’t wait when I started seeing everything lying there painted. I just had to set some of the parts where they needed to be. Nothing is screwed down yet and there’s an awful lot missing but it’s good to see it starting to take shape. Sometimes I need to piece my projects together like this when I start to lose interest or become distracted with other projects (I always seem to have 3 or 4 things going on in the shop).
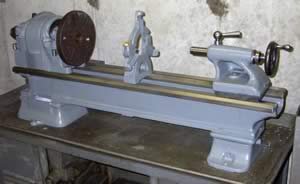
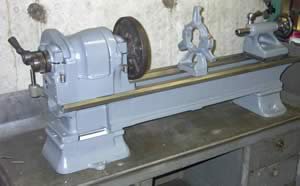
Some closer pics.
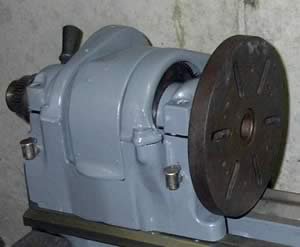
I haven’t actually put the tailstock back together, just partially for the photos, same with the steady. The difference in the ways can be seen more clearly at this angle.
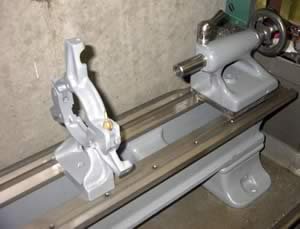
The ways look pretty good compared to it’s original condition.

Slowly but surely I’m getting there. I have a few more pieces to clean, prime and paint. The gear cover for the back of the lathe had a small crack running through the casting. It really wasn’t that bad and could probably be brazed but as it turns out I have another cover that’s better. I have the mounting arm for the cover but need to find the hinge for it. Here’s what’s left.
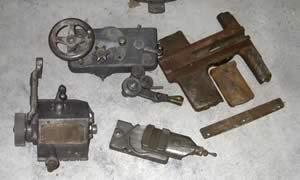
You can see that the saddle is in pretty rough shape. The apron and tumble reverser are replacement pieces and the gearbox is in good shape as is the compound. I have a large dial feedscrew and a new nut to rebuild the crossslide. The dovetails are a real mess, might have to clean them up on the mill, I’ll wait and see.
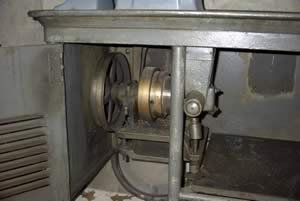
I also need to start working on the cabinet. I haven’t seen any pictures showing the motor placement. I also need a handle for the belt tensioner. I have the stub but that’s it. I’m looking for a good way to clean and paint the cabinet in place. It was by far the hardest single item to bring into the shop and I just cringe at the thought of moving it outside and then back in just to paint it, especially in light of my plans to relocate in the next several months. I also haven’t decided yet just how I want to paint the chip pan. This is the drive assembly that I need to learn more about.
I’ve really been enjoying this project. I’ll continue to update this page as progress continues.
South Bend Heavy 10" Lathe
02/16/02
A couple months ago I started looking for a Southbend lathe. I caught the bug a few months before that when I purchased a small Asian 7” lathe. As I learned on the smaller lathe and started collecting projects and ideas I found that many of the things I wanted to make would require a somewhat larger lathe. After putting out the word I soon heard back from a friend about a 9” Southbend that was unused and unwanted. The lathe was too far away for me to easily get out to examine it so I relied on my friend to make the arrangements. All I knew was that it was a 9” lathe missing the tailstock & drive assembly but it had a quick-change gearbox and a power crossfeed. No accessories except for a faceplate frozen to the spindle. Sight unseen the $400 price was agreed upon and the adventure began.
Knowing that I was in need of a tailstock and drive assembly (at the very least) I decided that I’d be better off buying another lathe to use as a parts donor. While I awaited delivery of my newly acquired 9” I decided to start getting what I needed. A quick look thru the local Want ads turned up several Southbend lathes but very few that met my particular needs. I lucked out towards the end of my search when someone who had just sold the lathe he advertised mentioned that he had another for sale as well. I got the directions, hopped in the minivan and drove 120 miles to go get my parts lathe. With help at the loading dock we got the lathe into the van and off I drove for the 120-mile return trip. I arrived home tired but satisfied, I had everything I needed now and was just awaiting the arrival of my diamond in the rough.
Finally a week or so later the big day arrived and my “new” Southbend lathe was brought over. My friend brought it over on a small trailer and as I looked at it through the porch window the first thing that struck me was that it sure looked bigger that the 9” that I’d brought home a few days earlier. Now I live in a condo with a large basement storage room that has become my shop, and while it’s a bang-up storage room as a shop it leaves a lot to be desired. Access being my biggest complaint. Nonetheless with the help of three neighbors the four of us managed to lug the beast downstairs to the shop. Once I had it indoors and sitting nest to the 9” parts lathe I’d just bought, it became quite obvious that me new 9” Southbend was anything but. It was larger in every respect and clearly not a 9” machine. A few minutes with some WD-40 and brass wool had cleaned up the tag on the gearbox to reveal this.

Lo and Behold, a 10-inch lathe it was. A little more examining and it became obvious that this was a Heavy 10” and not a Light 10”. I wasn’t quite sure how to feel. I was pleased as could be to have found a Southbend Heavy 10” for $400 but I was really bummed out in a major way about having driven 250 miles and spend a fair sized wad of cash on a 9” parts lathe that was not completely useless to me. What else can you do other than to just acknowledge and move on? I had to console myself with the simple fact that I now had a Heavy 10” and could boast about having a couple of Southbend lathes while at cocktail parties. When we got everything off the trailer it looked pretty pitiful and I clearly had a project on my hands.


One of the real disappointments I uncovered while cleaning the lathe up was that the ways appear to have been reground. I had been hoping to take serial numbers stamped on the end of the way and contact Southbend for information about the origins of the machine. At the very least I would have know how old it is. Unfortunately when I got the surface rust off and cleaned everything up there was absolutely no trace at all of the serial number. None. I can’t imagine Southbend let one get out the door unnumbered and the only other explanation would be that the ways were reground at some point in the machines history. There’s no evidence of hand flaking anyplace along the ways anymore. I’m not sure what to make of it; I wonder how badly the ways were for someone to have had the bed re-ground.


I wish I had some means of identifying this lathe. If anyone can date the machine for me from the photographs here I sure would appreciate hearing from you.
03/04/02
This is a picture of the headstock; this is an underdrive machine with a single lever gearbox. Know the single lever boxes are the earlier models but I though the underdrive machine were later models. Any guidance is appreciated. Seen in this picture is the tumble reverser for the leadscrew but the detent handle is broken off, a new assembly was located cheaply and awaits installation.
The apron was in pretty poor shape having been disassembled at some point in its career. If I had to guess from what I see of the lathe there was probably some sort of problem in the apron, which caused the lathe to be mothballed. The half-nuts have been removed along with the clutch assembly for the power crossfeed. Not having any information at all from the previous owner I can only speculate that the disassembled parts were causing problems.

Rather than delve into apron repair right away I took a shortcut and just threw money at the problem. Purchased a used apron assembly online and was done with it. I also picked up the leadscrew support that it had been missing and in stroke of good luck ran across a mostly complete Southbend underdrive cabinet for Heavy 10” with a 3.5” bed. A tailstock was located at a used machinery dealer and cost me just slightly less than the lathe itself. Along the way I’ve also picked up a steady rest, micrometer carriage stop, 6” & 8” chucks and a driver plate.
Now I finally had everything that I needed to make this a working lathe. The next item on the agenda was a through cleaning, degreasing and stripping of the paint. After consulting as many websites as I could find I decided to use TriSodiumPhosphate (TSP) and strip everything at home. I went to Wal-mart and bought a turkey frying kit, which came with a large heavy-duty propane burner and stand plus a huge 40gal pot. I set everything up out on my patio and went to town. I mixed the TSP and water, fired that baby up and started boiling my lathe piece by piece. Everything fit into the pot easily except for the bed, which had to be swapped end for end ½ way thru, but even that cleaned up nice. The TSP worked as advertised and removed all the grease, oil and paint from everything. It turns the paint into a kind of powder, which is easily rubbed or brushed off when the part becomes cool enough to handle.
With all of the castings cleaned to bare metal it was time to start putting it all back together. I haven’t decided on a paint color or method of painting yet so I’ve left that part alone for now. I used a zinc-based self-etching primer on everything destined to see paint. I’ve been priming and test-fitting the parts as I go along. This is where I’m at with it so far.


Slowly but surely it’s getting there. I’m having a lot of fun and I’m learning a great deal as I rebuild this classic old machine. I’ll continue to add photos and updates as I progress through the rebuild and hopefully someday soon I’ll be posting pictures of it painted, spinning and making lots of hot blue chips <G>
05/23/02
As you can see in the pictures, I haven’t been able to get the faceplate off of the spindle, there’s just no telling how long it’s been on there. I took removed the back-gears for a better cleaning. Both gears are in great shape but there was some surface rust on the shaft between them and I wanted to clean it up. After taking the worst of the rust off with a brass wire wheel I mounted the gears between centers on the 7x20 and polished the shaft on the lathe. I was pretty happy with the results.

I was so pleased with the way it came out I plan to use the same method to clean up the spindle and cone pulleys which also need attention before being reassembled.
Before I started painting I still had some detail work to do. The tailstock was completely disassembled before painting. The ram was polished in the lathe and all of the unpainted parts were cleaned and polished. The casting was primed and then painted. Here’s the disassembled tailstock.

After more work with a wire brush and some self-etching primer I was finally ready to start putting some color back on this machine. I caved in to tradition and went with Machine Tool Gray. I gave Dark Ford Blue some thought but just couldn’t picture it. These are pictures of the headstock, tailstock and foot castings. The bed is next.


With the bed painted I went at it with a scuff pad and penetrating oil to scrub the ways. After about an hour you can see the difference in the before and after photos or at least I hope you can for as much work as it was.


Here’s the headstock partially reassembled after painting.

In the picture above you can see the polished back gears and the cleaned up spindle. Once I get the faceplate off the spindle I’ll clean it better and polish it between centers. I just couldn’t wait when I started seeing everything lying there painted. I just had to set some of the parts where they needed to be. Nothing is screwed down yet and there’s an awful lot missing but it’s good to see it starting to take shape. Sometimes I need to piece my projects together like this when I start to lose interest or become distracted with other projects (I always seem to have 3 or 4 things going on in the shop).


Some closer pics.

I haven’t actually put the tailstock back together, just partially for the photos, same with the steady. The difference in the ways can be seen more clearly at this angle.

The ways look pretty good compared to it’s original condition.

Slowly but surely I’m getting there. I have a few more pieces to clean, prime and paint. The gear cover for the back of the lathe had a small crack running through the casting. It really wasn’t that bad and could probably be brazed but as it turns out I have another cover that’s better. I have the mounting arm for the cover but need to find the hinge for it. Here’s what’s left.

You can see that the saddle is in pretty rough shape. The apron and tumble reverser are replacement pieces and the gearbox is in good shape as is the compound. I have a large dial feedscrew and a new nut to rebuild the crossslide. The dovetails are a real mess, might have to clean them up on the mill, I’ll wait and see.
I also need to start working on the cabinet. I haven’t seen any pictures showing the motor placement. I also need a handle for the belt tensioner. I have the stub but that’s it. I’m looking for a good way to clean and paint the cabinet in place. It was by far the hardest single item to bring into the shop and I just cringe at the thought of moving it outside and then back in just to paint it, especially in light of my plans to relocate in the next several months. I also haven’t decided yet just how I want to paint the chip pan. This is the drive assembly that I need to learn more about.

I’ve really been enjoying this project. I’ll continue to update this page as progress continues.
Last edited by a moderator:

