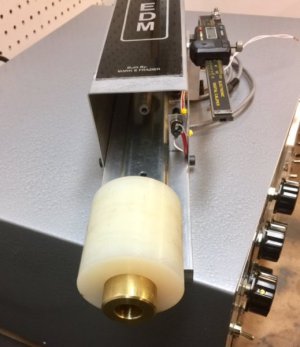
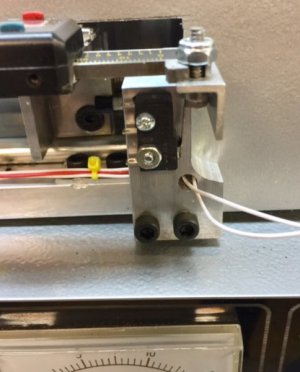
I got an email with a reply but it isn't showing here. The email mentions losing the thumb screw on the DRO. Actually I tapped it out and put a bigger thumb screw. The thumb screw is needed. This is a depth stop. Once the electrode is in place, you put the switch on the ram in "setup" and move the DRO to trip the depth switch by watching the depth LED. Then zero the DRO and move it to set the depth to burn. Then lock the thumb screw so it can't move. When the ram reaches the depth, it trips a limit switch and stops the burn.
-
Welcome back Guest! Did you know you can mentor other members here at H-M? If not, please check out our Relaunch of Hobby Machinist Mentoring Program!
You are using an out of date browser. It may not display this or other websites correctly.
You should upgrade or use an alternative browser.
You should upgrade or use an alternative browser.
Building a Pulse EDM machine
- Thread starter Mark_f
- Start date
- Joined
- Jun 27, 2016
- Messages
- 378
I really like your build, first class all the way! When your done it will look and work like a commercial purchased unit.
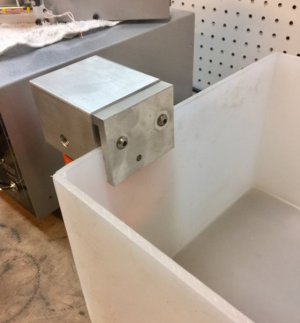
The photo here is the "depth stop switch" Shows the switch mounted for the depth stop. I mounted a third limit switch in series with the down limit switch. (the diode across the down limit switch goes across both switches).
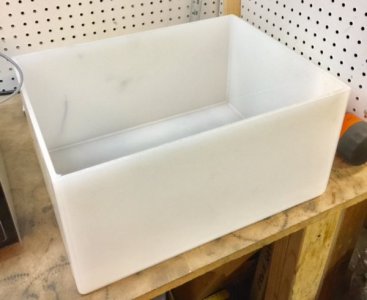
This photo "Plastic Work Tank" is my new plastic work tank. I got it from U.S. Plastics. It is 16" W X 12" D X 8" H with 1/4" wall and bottom thickness. It is made of polypropylene. I chose this because it will stand up to EDM fluid and also kerosene.
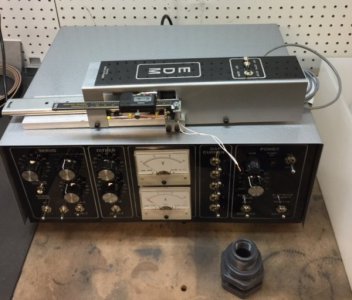
The next photo "ram and control is the two units as is right now. The ram is almost finished.
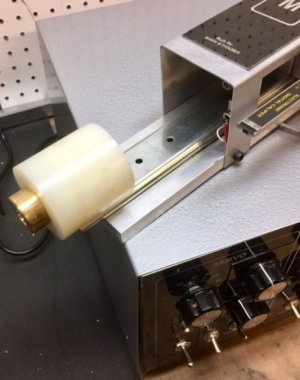
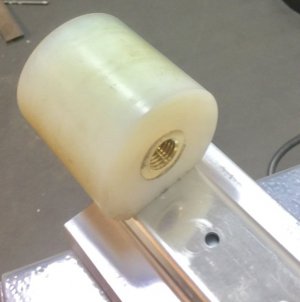
The next photo "ram assembly 8" is the ram assembly to date. The only thing left to do is the electrode holder. I am still working on the design for it. I an leaning towards a bronze holder mounted in a nylon block. it will be similar to what Ben describes for electrode orientation and will have through the tool flushing.
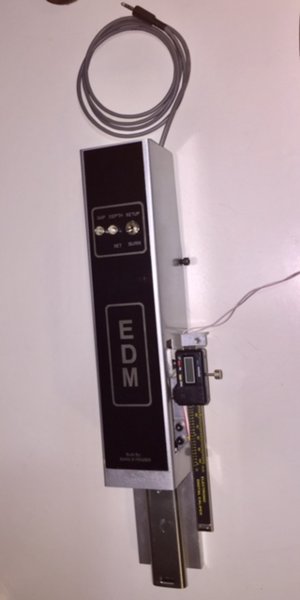
The photo "ram cover" is the cover I had engraved to match the control panel.

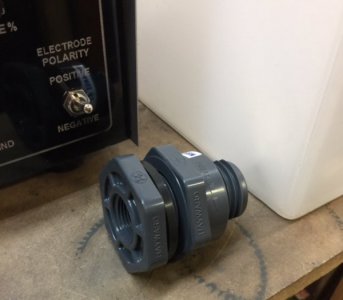
The last photo is the bulkhead fitting for the work tank drain. It is made of PVC with a Viton seal. It has threads for 3/4" pipe fittings.
I chose this machine to build for its quality. I also chose to order everything new (instead of scrounging for parts) and order the parts list provided by Ben Fleming. My reason was to see what the cost would be to build Ben's machine as he designed it. My conclusion so far is that even buying everything new, this machine is a bargain. At this point I have About $600 invested plus $150 worth of custom engraved panels. These were for looks and not a necessity. The total cost with the rest of the materials will about $1000 including $125 for 5 gallons of EDM fluid.
I searched machines to buy (new and used) and a machine of this caliber runs $5,000 to $10,000, therefore, in my opinion making Ben's machine a bargain.

This photo "Plastic Work Tank" is my new plastic work tank. I got it from U.S. Plastics. It is 16" W X 12" D X 8" H with 1/4" wall and bottom thickness. It is made of polypropylene. I chose this because it will stand up to EDM fluid and also kerosene.

The next photo "ram and control is the two units as is right now. The ram is almost finished.

The next photo "ram assembly 8" is the ram assembly to date. The only thing left to do is the electrode holder. I am still working on the design for it. I an leaning towards a bronze holder mounted in a nylon block. it will be similar to what Ben describes for electrode orientation and will have through the tool flushing.

The photo "ram cover" is the cover I had engraved to match the control panel.

The last photo is the bulkhead fitting for the work tank drain. It is made of PVC with a Viton seal. It has threads for 3/4" pipe fittings.

I chose this machine to build for its quality. I also chose to order everything new (instead of scrounging for parts) and order the parts list provided by Ben Fleming. My reason was to see what the cost would be to build Ben's machine as he designed it. My conclusion so far is that even buying everything new, this machine is a bargain. At this point I have About $600 invested plus $150 worth of custom engraved panels. These were for looks and not a necessity. The total cost with the rest of the materials will about $1000 including $125 for 5 gallons of EDM fluid.
I searched machines to buy (new and used) and a machine of this caliber runs $5,000 to $10,000, therefore, in my opinion making Ben's machine a bargain.
The work tank will mount on an X Y table (from Grizzly) to move the tank into position. The ram will mount on a column behind the tank so it can be adjusted up and down.Hi Mark, Great Build!
Out of curiosity.... How will you be centering the electrode on the Part? Will the Ram assembly be mounted to a X-Y slide assembly?
Best,
Chris
I drilled a hole .125" off center for an electrode alignment pin. All electrodes and holders will have a .125 pin through the center to go against this pin. this is so an electrode can be removed for repair or replacement and put back in the exact same position. I make make several .500" shafts with a .125 pin for making electrodes.
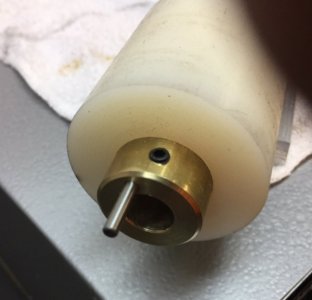
Every electrode will mount to a .500" shaft that goes in this chuck. The shaft can be drilled to accept an electrode or one can be soldered to the shaft. There will be a few shafts with a fixture on the end to clamp or hold electrodes. One will look like a miniature machinist vise. another will have a square slot with set screws to hold square electrodes. There will be a third one that has a miniature V block on the end to hold round, square or other shaped electrodes.

Every electrode will mount to a .500" shaft that goes in this chuck. The shaft can be drilled to accept an electrode or one can be soldered to the shaft. There will be a few shafts with a fixture on the end to clamp or hold electrodes. One will look like a miniature machinist vise. another will have a square slot with set screws to hold square electrodes. There will be a third one that has a miniature V block on the end to hold round, square or other shaped electrodes.


