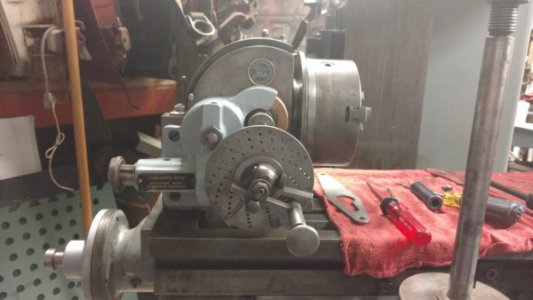
BROWN & SHARPE UNIVERSAL DIVIDING HEAD

The Direct Indexing Pin is clocked just right for the latch 'bullet' to catch. The added springs do aid in the turning. It feels much better now, so the handle received a good polishing.
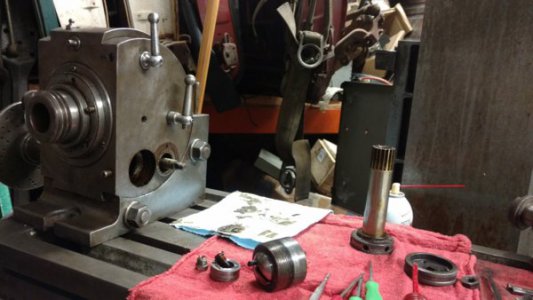
IMG_20170618_203652815.jpg

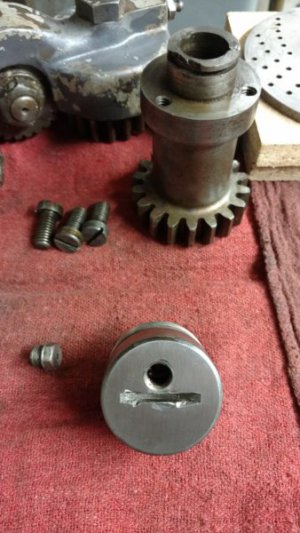
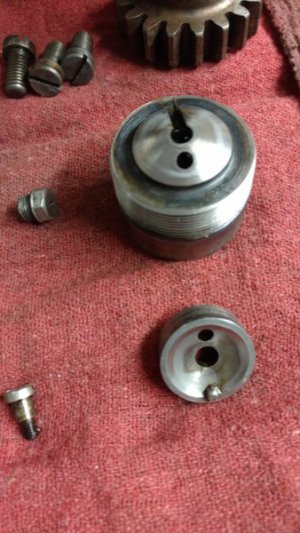
Our mystery bolt in the Worm Shaft Adjusting Screw (703) turned out to be another Zert type grease fitting with the nipple milled off. Perhaps this was a good idea on paper that went south?
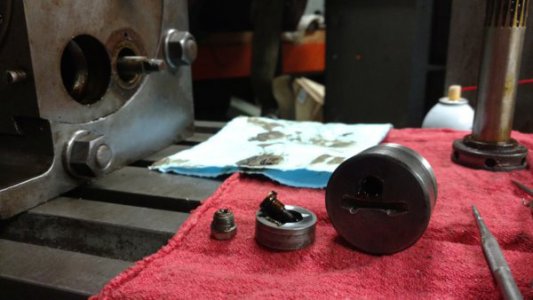
IMG_20170618_203617661.jpg
 
Last edited:
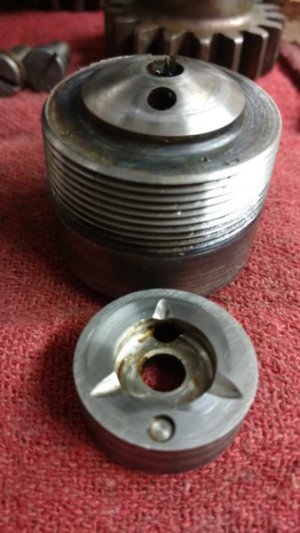
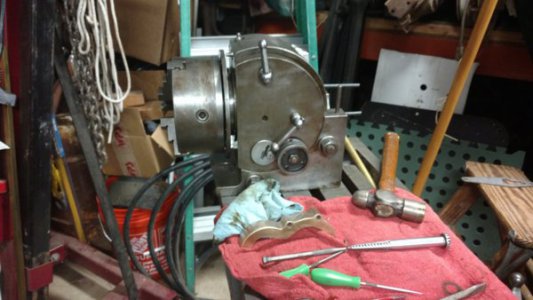
Keith Rucker shows disassembly / function & adjustment of various parts / reassembly of an early clone of the B&S 2 in the link below. In it he mentions that his direct indexing pin lever has 2 detents - engaged & disengaged. Of course he doesn't take that apart. This was my reason for starting this thread: addressing the parts that get taken for granted. In part 1 the Simple Indexing Lock Pin was reviewed & repaired. Now, in part 2 the direct indexing pin assembly is disassembled, examined & corrections implemented successfully. I have my disengage detent working pretty good as it holds the direct indexing pin back against the pressure of the engage spring that is directly behind the direct indexing pin. This part 3 will be about the Worm Shaft Adjusting Screw assembly - nobody ever takes it apart. Pic 1 above shows a dark column of grease ejected from the Zert grease passage. It also shows that the handles for the main body lock & the simple indexing lock are swapped. Waiting on an Allen Wrench that fits the replacement lock screw to correct that.

Keith's link:
 
Wondering what to do about this. Thinking about welding up the slot, reslotting & trying out the zert. What would you do?
IMG_20170620_010629752.jpg IMG_20170620_011443503.jpg IMG_20170620_011513347.jpg
 
So, I listened. Put all that part back together & tuned it all in just fine. This is the more modern version with the roller / thrust bearings. Though I tried, I have No clue of how to break it down as far as you see in videos of the earlier design. I think the key to getting it all completely broken down lies in the removal of the Spindle Clamp Screw Plug (2060). Here it is now:
20170624_073615970.jpg

It is very easy to take offense when told to just leave it alone. I work with electrical equipment measuring up to 500KV to supply power to a thriving community. Some have lost limb & some have lost life (thankfully, not on my watch). Whether electrical or mechanical: these forces we are dealing with do not take prisoners. The fact that results are permanent has to be present in every operation. In my business we each reserve the right to stop any & all work until any doubt concerning the results is resolved. Here: I got stopped. Appreciated! I hope to learn why.

Not happy with the Worm Shaft Adjusting Screw (703), but will worry with making another later. The front gear guard is just about polished & all that is left is cleaning up the Spiral Gear Guard (2052).
 
There are many ways to say it:

Don't let perfection stand in the way of good enough.

Confucius: Better a diamond with a flaw than a pebble without.
Shakespeare: striving to better, oft we mar what's well
Shakespeare: Were it not sinful then, striving to mend, To mar the subject that before was well?

Satisficing: https://en.wikipedia.org/wiki/Satisficing

I believe that knowing when to stop is a tough lesson.
Like when to quit spray painting before you get a drip/run, even though you want to finish it today. (my most recent personal example...from today!)

-brino
 
So, I listened. Put all that part back together & tuned it all in just fine. This is the more modern version with the roller / thrust bearings. Though I tried, I have No clue of how to break it down as far as you see in videos of the earlier design. I think the key to getting it all completely broken down lies in the removal of the Spindle Clamp Screw Plug (2060). Here it is now:
View attachment 236251

It is very easy to take offense when told to just leave it alone. I work with electrical equipment measuring up to 500KV to supply power to a thriving community. Some have lost limb & some have lost life (thankfully, not on my watch). Whether electrical or mechanical: these forces we are dealing with do not take prisoners. The fact that results are permanent has to be present in every operation. In my business we each reserve the right to stop any & all work until any doubt concerning the results is resolved. Here: I got stopped. Appreciated! I hope to learn why.

Not happy with the Worm Shaft Adjusting Screw (703), but will worry with making another later. The front gear guard is just about polished & all that is left is cleaning up the Spiral Gear Guard (2052).

Yeah, I know, I said to leave it alone.

Will say, you knew what you were doing, and you did a superb job on rebuilding your dividing head!

I eat my words!

Thanks for sharing
 
The 2052 Spiral Gear Guard was originally painted. Black or gray could have been correct - I don't know. Those are the only 2 colors I found when cleaning it up. I went with Winter Gray (which doesn't seem to be correct for anything I have).
20170802_115602391.jpg
 
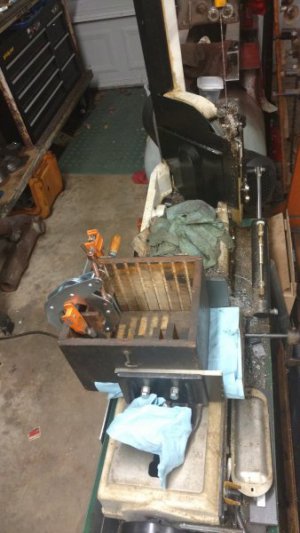
Kudos to our member John York for his help in getting me parts & information on these wonderful dividing heads. His information is so complete that the rest of the parts could simply be machined as needed! I did find a set of the change gears, though & decided to buy them. This cut down on what all I had to make. The gear set, by design is: 100, 86, 72, 64, 56, 48, 44, 40, 32, 28 & 24 (2 of the 24s) tooth count. The set I received in the original box is not quite complete & the box suffered gears shifting around in shipping, so.... it needs some reassembly. Few know that I, temporarily have back issues & just can't really do what I want. I felt well enough today that sitting down to this jigsaw puzzle of a box seemed doable. I quickly realized that it's construction relied on glue at least in some of it's fitment. Not my longest clamp, but handy: Here is the beginnings of box reassembly using a horizontal band saw vise!
B 20180514 01.jpg
 
I'm not sure if this is the correct place to post this question. If it is not I will start a new thread.
The question is has anyone adapted or seen a adaptation of the B&S number 2 dividing head to a Bridgeport mill?
I think I know what to do, just haven't pulled the plug to start. To many OPP, (Other Peoples Projects) to do.
Any and all ideas and comments accepted with gratitude.

Brockwood your restore is going well. Having back problems is not fun. I know from experience. Moving your B&S is for someone else do do until you get better.
 
Back
Top