- Joined
- May 10, 2012
- Messages
- 995
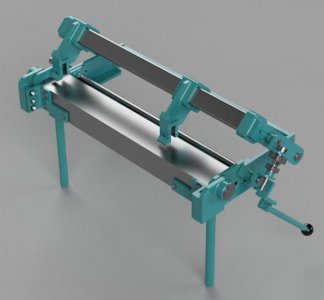
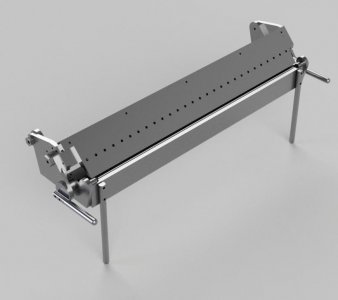
I have had a desire for a box and pan brake for some time. I'm not looking for a huge one, I don't have room. I previously built the Gingery brake, which I have used on numerous occasions, but it is a bit limited in size, and doesn't have the box and pan feature. It also has no adjustment for the sheet metal thickness, meaning you have to build it to handle the maximum thickness you intend to bend, with anything thinner being bent in a sub-optimal way. So I've started looking around at some plans that I've found in various places. I have one set from some old issues of Hobby Machinist, and there is one in either book one or two of the Metalworking series from Village Press. There is a set available at Mr Wellwoods Shop of Horrors. There is also a set available from Machineryplans.com, which is rather unique in design. I decided to start with that one and purchased the plans. I proceeded to build it out in Fusion 360. Overall the plans and instructions for it are pretty good, I think a video overview and demonstration of it would have been nice, but after the Fusion build I have a good idea of how it operates and some likely pros and cons. Here is a render of it:

I didn't bother with the stand, as I didn't really need to for the purposes of this study, but it looks to be quite a nice stand. For those of you looking to purchase these plans, be warned that they are metric, as it is based out of Australia. So I'll go into some of the things I like about it as well as what I don't. I like the bending leaf attachment method, as it does away with the need to machine the bending leaf itself, one could just use a piece of cold rolled and call it a day. Overall the machining required on this is fairly simple, although you may need to machine the entire bed if the welding warpage is too bad to use as welded. It does require quite a bit of welding. The unique finger setup is rather interesting as it eliminates the need to have a large number of fingers and allows radius bends with minimal extra equipment. I believe that one could get by without making a lot of mandrels, as the author calls them. I did not model the mandrels, by the way, so one is not shown in the render. One thing I don't particularly care for in this design is the method of adjusting for the sheet metal thickness, which involves set screws in the pressure beam fingers to move the mandrel towards or away from the bending leaf. I think I would look to add an eccentric mechanism to the pressure beam pivot in order to make this a bit less fiddly. While I'm at it I might change the pressure beam adjusters to a turnbuckle to reduce fidling there, as well. Of course, I have to redesign it anyway, as I will be using imperial sized material. The capacity on this is around 2 feet in width. I will be looking at the other designs at some point in the future, but don't hold your breath, it may take me some time to get around to them all.

I didn't bother with the stand, as I didn't really need to for the purposes of this study, but it looks to be quite a nice stand. For those of you looking to purchase these plans, be warned that they are metric, as it is based out of Australia. So I'll go into some of the things I like about it as well as what I don't. I like the bending leaf attachment method, as it does away with the need to machine the bending leaf itself, one could just use a piece of cold rolled and call it a day. Overall the machining required on this is fairly simple, although you may need to machine the entire bed if the welding warpage is too bad to use as welded. It does require quite a bit of welding. The unique finger setup is rather interesting as it eliminates the need to have a large number of fingers and allows radius bends with minimal extra equipment. I believe that one could get by without making a lot of mandrels, as the author calls them. I did not model the mandrels, by the way, so one is not shown in the render. One thing I don't particularly care for in this design is the method of adjusting for the sheet metal thickness, which involves set screws in the pressure beam fingers to move the mandrel towards or away from the bending leaf. I think I would look to add an eccentric mechanism to the pressure beam pivot in order to make this a bit less fiddly. While I'm at it I might change the pressure beam adjusters to a turnbuckle to reduce fidling there, as well. Of course, I have to redesign it anyway, as I will be using imperial sized material. The capacity on this is around 2 feet in width. I will be looking at the other designs at some point in the future, but don't hold your breath, it may take me some time to get around to them all.


