

-
Welcome back Guest! Did you know you can mentor other members here at H-M? If not, please check out our Relaunch of Hobby Machinist Mentoring Program!
You are using an out of date browser. It may not display this or other websites correctly.
You should upgrade or use an alternative browser.
You should upgrade or use an alternative browser.
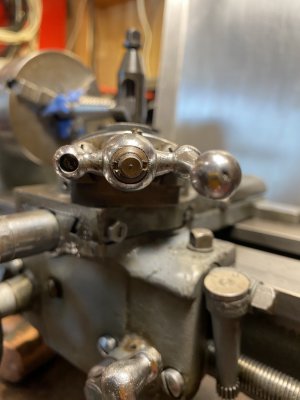
Atlas 618 - Compound Slide “Nut”
- Thread starter JRT
- Start date
- Joined
- May 27, 2016
- Messages
- 3,469
I think it works exactly as you might think. It's on a threaded thing, so it unscrews. Look hard to check whether the thread is left-handed, as that can happen on stuff that have handles to rotate shafts. It may be the handle just slides on, and the two-slot nut is a locking nut. Alternatively, there may be thread in the handle. Either way, the nut retains it.
I tried to slacken mine using the pins on a circlip pliers tool, but it kept slipping out, so I found a stray piece of sheet metal offcut, and filed a slot on the edge wide enough to straddle around the central thread end, to fit into the slots enough to be a flat custom spanner. Another approach is to file up a makeshift tool onto the end of a piece of pipe that fits easy over the threaded end, leaving a couple of nubs that will fit the nut slots.
Basically, hang onto the handle, or poke a screwdriver shaft or something into the gap between the threaded bit and the handle to give some leverage, and use the tool to undo the nut. It WILL come apart.")
I tried to slacken mine using the pins on a circlip pliers tool, but it kept slipping out, so I found a stray piece of sheet metal offcut, and filed a slot on the edge wide enough to straddle around the central thread end, to fit into the slots enough to be a flat custom spanner. Another approach is to file up a makeshift tool onto the end of a piece of pipe that fits easy over the threaded end, leaving a couple of nubs that will fit the nut slots.
Basically, hang onto the handle, or poke a screwdriver shaft or something into the gap between the threaded bit and the handle to give some leverage, and use the tool to undo the nut. It WILL come apart.
- Joined
- Feb 1, 2015
- Messages
- 9,605
The nut in question serves as a jam nut as well as holding the crank on. There is a second (hex) nut between the crank and the housing. Tighten that nut (clockwise) which will decrease the load on the jam nut. A pair of needle nosed pliers should now be able to unscrew the jam nut.
- Joined
- May 27, 2016
- Messages
- 3,469
OK - so if I understand correctly, in putting it together, the jam nut sets the position of the crank handle near the end, and the actual "tightening" nut is the hex one between the crank and the housing. You hold onto the handle, and tighten up the hex nut.The nut in question serves as a jam nut as well as holding the crank on. There is a second (hex) nut between the crank and the housing. Tighten that nut (clockwise) which will decrease the load on the jam nut. A pair of needle nosed pliers should now be able to unscrew the jam nut.
Thus to take it off, slacken the hex nut. From then on, getting the two-slot jam nut to move can be a fairly gentle business.
If I had known that before, I need not have taken mine apart the hard way, with a special made up "ghetto spanner"!
- Joined
- Feb 1, 2015
- Messages
- 9,605
The inner nut adjusts the preload on the lead screw thrust bearing. You should make that adjustment first. The outer nut doesn't need to be that tight. I checked mine and it was too tight to easily remove. By tightening the inner nut, it puts excessive preload on the thrust bearing but that's OK for purposes of disassembly. It only takes about a half turn of the nut to remove the binding on the outer nut.
- Joined
- Feb 1, 2015
- Messages
- 9,605
If the needle nose pliers don't work, you can make a spanner wrench for your lathe tool kit from a cheap nut driver, 1/4" socket, or 1/4" hex shank nut driver. 9/32". It takes only a few minutes to make and you don't risk damaging the lathe nut using the wrong tool.
Drill the socket with a 5/16" drill to accommodate the shaft on the lead screw and cut the end to form the tabs, as @graham-xrf suggested. Even done by hand filing, it only takes a few minutes and you have a proper tool for the job.
Years ago, I bought cheap socket drive sets to throw into boats and vehicles for emergency use. They can be found at stores like HF or in bargain bins at the big box BIY's. As a result, I have a bucket full of sockets from the decommissioned sets to use for just such occasions. The nut drivers used with cordless drill/drivers are available as individual pieces at a reasonable price. as well.
- Joined
- Apr 30, 2015
- Messages
- 11,307
Needle nose aren't really the "proper" tool but if you are careful it won't mangle the nut too badly
- Joined
- May 27, 2016
- Messages
- 3,469
Indeed!Needle nose aren't really the "proper" tool but if you are careful it won't mangle the nut too badly
My "proper" tool was fashioned, first from a bit of sheet metal, then a much better version cut from a defuct thin circular saw blade. Basically a flat thing with a gap slot to make a sort of "wide screwdriver" blade with a chunk filed out of it. As it turns out, there was a better way!