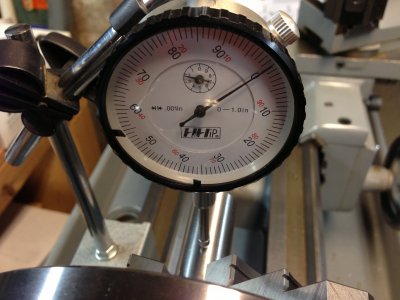
Almost there, one thousanth of an inch

View attachment 62103View attachment 62102

I had my machinist friend make me up1" diameter test bar with a good center drilled at each end

i indicated off the test bar about 1.5" away from the jaws.
Thanks.
Jon


Depending on what you're machining, you're probably close enough.

Do you know how close the centers drills of the shaft are to the OD of the shaft?

If your headstock spindle will take the 1 inch shaft, chuck the shaft up short and measure the runout of the OD and center hole. Try the shaft a couple of different places in the chuck too. (loosen the chuck, rotate the shaft, tighten, check runout.)
 
Hi guys,
sorry for the pic, i do not have a center touching the teat bar , only one end in chuck. It is a new buck chuck adjust tru 6".

I am trying to use the adjustment screw to get it on dead center zero.
I put the test bar in more so only 2 " sticking out, and that made a difference, it was 11 thou out, now it is 1 thou out.
Thanks
jon

Jon

Is this 3 jaw chuck adjustable?
 
Jon

Is this 3 jaw chuck adjustable?
yes, this is a 6' adjust tru Buck chuck..
Thanks,
jon

- - - Updated - - -

Depending on what you're machining, you're probably close enough.

Do you know how close the centers drills of the shaft are to the OD of the shaft?

If your headstock spindle will take the 1 inch shaft, chuck the shaft up short and measure the runout of the OD and center hole. Try the shaft a couple of different places in the chuck too. (loosen the chuck, rotate the shaft, tighten, check runout.)
Thanks,
That is what i eventually did and got it from 11 thou to 1 thou out.
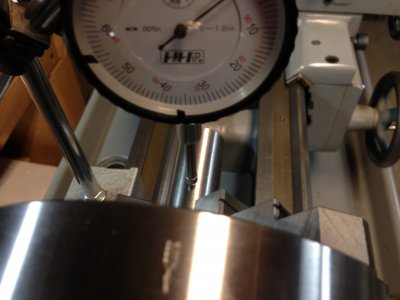
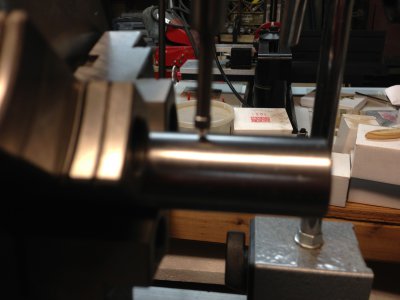
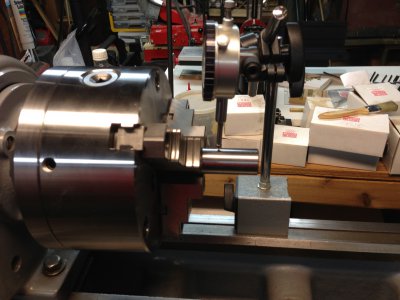
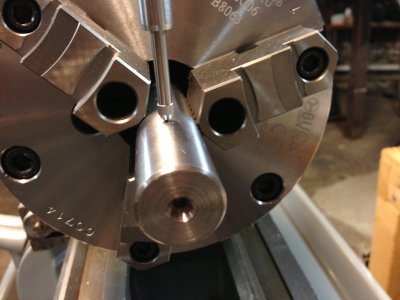
Here are the pics, am i correct?
IMG_6538.jpgIMG_6539.jpgIMG_6540.jpgIMG_6541.jpgIMG_6542.jpg
Is this the correct type of indicator, only cost about 30-40. or should i us my smaller test dial indicator starret with back plunger, not the smaller last word 711?
Thanks again guys. at this point whatever fine adjustments on the chuck i make only seems to get it further out.
I figured out that the jump on the indicator was because i had not snugged up one of the bolts holding the chuck body to the backing plate, once snugged, no more jump!
any other help would be great, this is the first 3 jaw adjustable chuck i have had and/or indicated to zero. I figured i would start with this chuck before going to a 4 jaw independant.
I did find it helpful to use two hex keys at once to adjust the opposite side of the adjusting screws
Thanks
jon

IMG_6538.jpg IMG_6539.jpg IMG_6540.jpg IMG_6541.jpg IMG_6542.jpg
 
ome,

Which chuck is that, the Cushman? Nice looking.

Indeed, as Tony said, a small imperfection will show up in the DI reading. It could be an issue in the bearings or even a chipped tooth in the gears. Try disengaging all the gears. Could even be a problem in the live center bearings. -Which brings-up another issue. I presume you're adjusting your chuck and if that's the case, using a live center is complicating issues. Let us know what you're up to there -what's the end goal? and we'll try to give a push in the right direction.


Ray
thanks Ray,
sorry for the confusion,wrong pic, never had the other end of test bar in the tailstock center, just was out too far.
here are some pics of the setup i am using to try to get to 0. i am 1 thou out now, and any attempts at adjusting the 4 screws make it worse.any help would be great thanks to all
jon

IMG_6542.jpgIMG_6541.jpgIMG_6540.jpgIMG_6539.jpg

IMG_6542.jpg IMG_6541.jpg IMG_6540.jpg IMG_6539.jpg
 
Jon, could be simply lack of practice. Those are very good chucks, and you should be able to get a true rod to show virtually no TIR. As long as you're sure that rod is round, it can be made to run almost perfectly. That indicator would not be my first choice when needing to get something dead true. A test indicator would be better once you get to the sub 0.001 level. I've used a few older Bucks and had little trouble getting them to run within 0.0002/0.0003 or better. In the last few steps, don't stress about tightening the opposing screws, just back off slightly on the "low" side and let the tension relax. You'll get there.
 
Jon, could be simply lack of practice. Those are very good chucks, and you should be able to get a true rod to show virtually no TIR. As long as you're sure that rod is round, it can be made to run almost perfectly. That indicator would not be my first choice when needing to get something dead true. A test indicator would be better once you get to the sub 0.001 level. I've used a few older Bucks and had little trouble getting them to run within 0.0002/0.0003 or better. In the last few steps, don't stress about tightening the opposing screws, just back off slightly on the "low" side and let the tension relax. You'll get there.
Thank You Tony,
I know what you are saying, and that is probably most of the reason. thanks though, for the support. You mentioned using a test dial indicator.
I was thinking of using a starrett model 196, has a back plunger, i just have to get it to fit the larger diameter rods for the mag base.

Thanks,
Jon
 
The resolution .001 on that gage will make it difficult to get to absolute zero the closer you get, the harder it is to see needle movement. You could, in all probability be closer than you think. A .0005 resolution would make the minute moves you need look larger in needle movement. They are harder to get used to but much greater accuracy is seen.

"Billy G"
 
I've never been a great fan of those back plunger indicators. They have their place, but it isn't where you are working, IMO. A dial test indicator would be much better to see smaller movements. That's what they are made for and why they have such little travel compared to the run of the mill 1.000 AGD group2 indicators, although indicators in that style are made in much finer resolution/graduation than 0.001.

While also not a huge fan on the Last Word, they are good indicators when properly maintained and used, and would be better for what you are doing that the larger dial. Give it a try. Remember to always rotate the chuck the same direction during testing. Skip the back plunger indicator.
 
This is my recommendation for a Dial Test Indicator. Brown & Sharpe BesTest .030 range by .0005. Black and White 1 1/2 inch face.

"Billy G"
 
I've never been a great fan of those back plunger indicators. They have their place, but it isn't where you are working, IMO. A dial test indicator would be much better to see smaller movements. That's what they are made for and why they have such little travel compared to the run of the mill 1.000 AGD group2 indicators, although indicators in that style are made in much finer resolution/graduation than 0.001.

While also not a huge fan on the Last Word, they are good indicators when properly maintained and used, and would be better for what you are doing that the larger dial. Give it a try. Remember to always rotate the chuck the same direction during testing. Skip the back plunger indicator.
Thanks Tony,
I also have a B & S best test dial indicator.
Thanks
jon
 
Back
Top