- Joined
- Dec 25, 2015
- Messages
- 214
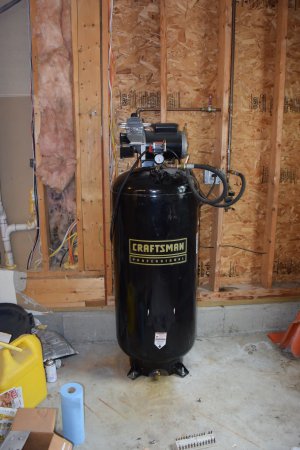
In my garage (not the shop that I am building) I have a 15 year old craftsman 60 gallon compressor. It is an oil-less model made by Devilbliss, with a "2.9" HP motor. Compressor is direct drive.
I have dreams of replacing the motor and pump, as I have a brand new oil pump, but since it is my only compressor at the moment I can't afford to have it out of commission while I monkey around with the upgrade. I have a 5HP Quincy QT on order for the shop, so once that is in and I get the town off of my back for inspections, I can redoing the craftsman.
Anyways the drain at the bottom of the tank stopped turning easily. Too much rust built up and it got jammed because it was always such a PITA to drain it. So, now since I can't close it all the way and it leaks, I had no choice but to address it. I figured I would share as there has to be someone else out there that could use this info.
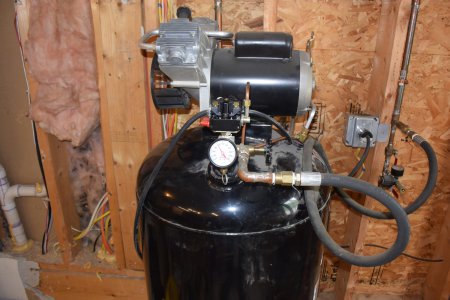
First step was to take the plastic cowling off of the top. Then you see what a bunch of nothing these units are. The plastic cover makes them look a lot more stout than they really are.
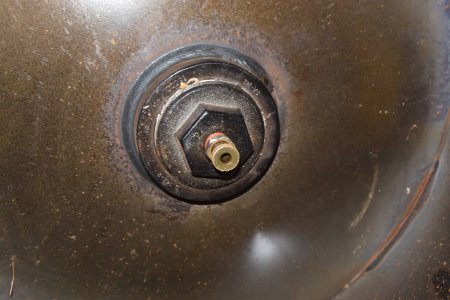
On the plus side, since the motor and pump are such a joke, the thing only weighs about 190 lbs. So with my wife's help we were able to carefully lay it down on the ground and work on it. Here is a shot of the bottom with the drain showing. It is all chewed up because I had to resort to using slip joint jaw pliers to open and close it for the last few months (till that even stopped working 2 weeks ago)
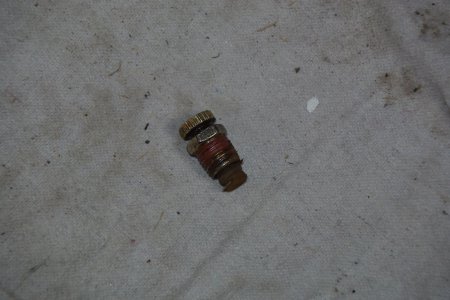
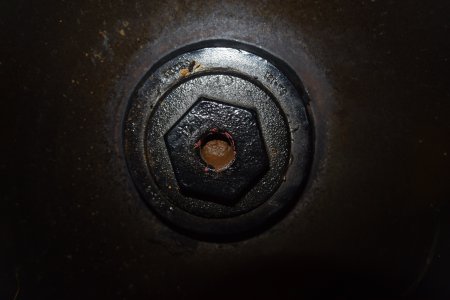
The drain came right out with a box wrench, easy as pie. Wasn't in there super tight. After I removed it I could see silt/rust through the hole. Poked it out with a screw driver. Not sure how long this tank has to live. Below is a shot of the drain after it was removed, and the hold in the bottom of the tank with the sludge showing.
I am replacing this drain with a brass street elbow, 6" brass nipple, ball valve, and another street elbow to redirect the junk towards the ground for safety when I drain/burp it. All parts are 1/4" NPT
The below shots are it being installed. I used pipe dope.
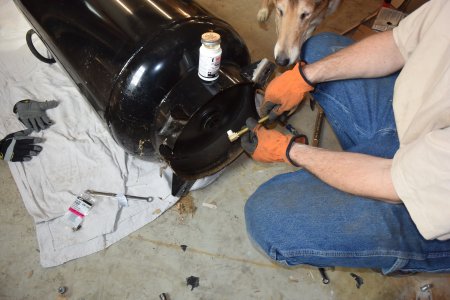
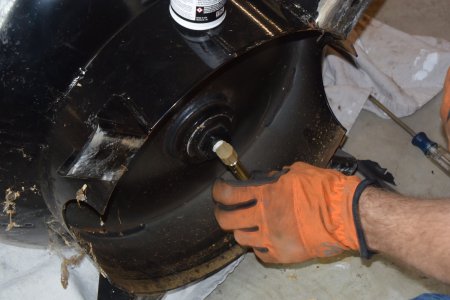
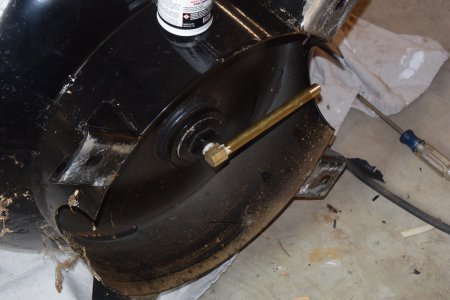
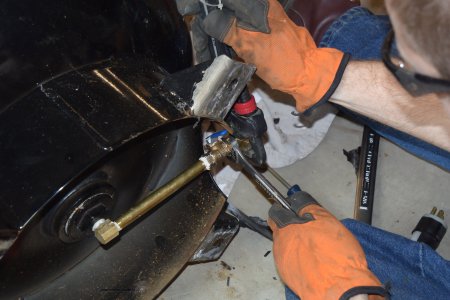
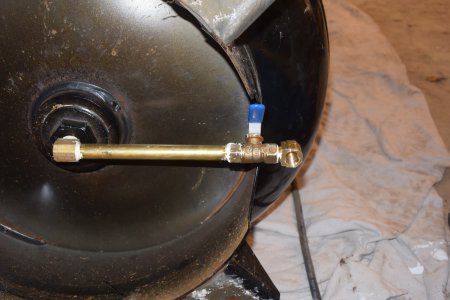
And the tank was stood back up and bolted down, this is the finished product. Nipple could have been another inch longer, but I made it work.
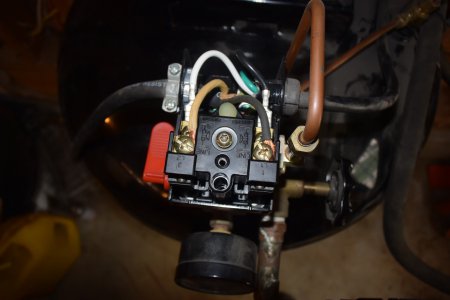
Next problem was to adjust the pressure this thing runs at. It is factory set for a 140ish PSI cut in, 175PSI cutoff. That is a ridiculous pressure for this level of machine and the last 30PSI takes forever. I wanted to lower it down to something more reasonable, and since it is a dual stage, I still get the efficiency advantages of the cooling effect of the compressed air moving between the two stages (through the intercooler, which is nothing more than an extra 12" of tubing bent into a U shape, but it is better than nothing). The pressure switch is 'non adjustable' but a cheap keyed torx bit took care of that. I got it down to a 110PSI cut in and a cutout of about 145PSI. It really couldn't go any lower than that with this pressure switch. I expect this will help the unit perform better overall.
Thought I would share my morning of polishing this turd up a bit, hopefully it will buy some time.
All in all, the brass parts and valve cost me about $20, so I probably doubled the compressors value. That said I should have done this years ago.
I have dreams of replacing the motor and pump, as I have a brand new oil pump, but since it is my only compressor at the moment I can't afford to have it out of commission while I monkey around with the upgrade. I have a 5HP Quincy QT on order for the shop, so once that is in and I get the town off of my back for inspections, I can redoing the craftsman.
Anyways the drain at the bottom of the tank stopped turning easily. Too much rust built up and it got jammed because it was always such a PITA to drain it. So, now since I can't close it all the way and it leaks, I had no choice but to address it. I figured I would share as there has to be someone else out there that could use this info.
First step was to take the plastic cowling off of the top. Then you see what a bunch of nothing these units are. The plastic cover makes them look a lot more stout than they really are.

On the plus side, since the motor and pump are such a joke, the thing only weighs about 190 lbs. So with my wife's help we were able to carefully lay it down on the ground and work on it. Here is a shot of the bottom with the drain showing. It is all chewed up because I had to resort to using slip joint jaw pliers to open and close it for the last few months (till that even stopped working 2 weeks ago)

The drain came right out with a box wrench, easy as pie. Wasn't in there super tight. After I removed it I could see silt/rust through the hole. Poked it out with a screw driver. Not sure how long this tank has to live. Below is a shot of the drain after it was removed, and the hold in the bottom of the tank with the sludge showing.


I am replacing this drain with a brass street elbow, 6" brass nipple, ball valve, and another street elbow to redirect the junk towards the ground for safety when I drain/burp it. All parts are 1/4" NPT
The below shots are it being installed. I used pipe dope.


And the tank was stood back up and bolted down, this is the finished product. Nipple could have been another inch longer, but I made it work.

Next problem was to adjust the pressure this thing runs at. It is factory set for a 140ish PSI cut in, 175PSI cutoff. That is a ridiculous pressure for this level of machine and the last 30PSI takes forever. I wanted to lower it down to something more reasonable, and since it is a dual stage, I still get the efficiency advantages of the cooling effect of the compressed air moving between the two stages (through the intercooler, which is nothing more than an extra 12" of tubing bent into a U shape, but it is better than nothing). The pressure switch is 'non adjustable' but a cheap keyed torx bit took care of that. I got it down to a 110PSI cut in and a cutout of about 145PSI. It really couldn't go any lower than that with this pressure switch. I expect this will help the unit perform better overall.

Thought I would share my morning of polishing this turd up a bit, hopefully it will buy some time.
All in all, the brass parts and valve cost me about $20, so I probably doubled the compressors value. That said I should have done this years ago.
Last edited:


