- Joined
- Sep 20, 2012
- Messages
- 560
I think there is a thread about doing this on here but can't find it, If anyone knows where it is, would they be kind enough to post a link in this thread?
Having read about the Delrin method of making new nuts I thought I'd give it a go, as I had a lump of Acetal handy, my first attempt had alignment issues..
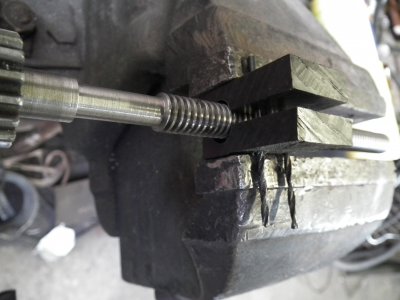
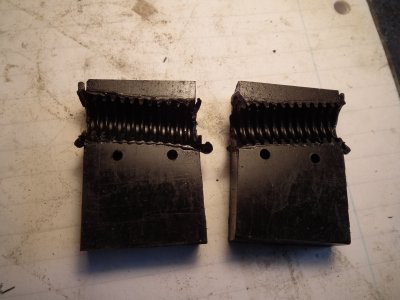
My second idea was to drill the hole, hacksaw the block in half, but stop the cut at a point which would leave the spigot part whole. Then I wound the screw in which forced the halves apart, I was much more careful with the heat this time and it was successful. I used a spare worn screw.
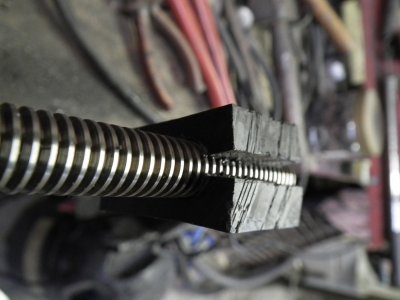
After the melting and taking it off the screw, I tapped a knife into the cut to open it, then used the screw with a ground flat on the first thread to clean the thread so that is turned the full length easily.
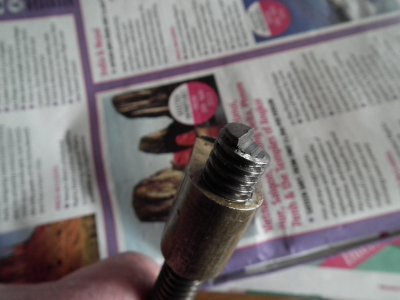
Using a tight fitting drill for alignment I turned the sides and end face to be square with the screw.
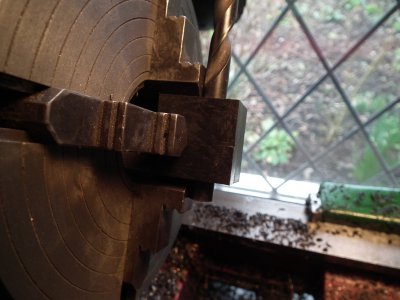
Only very slightly loosening two jaws, I swapped ends it in the chuck, I drilled and tapped the center, I drilled right into the lead screw hole as I wanted to use a much longer fixing screw as I didn't thrust the spigot not to snap off, this way it is just a spacer.
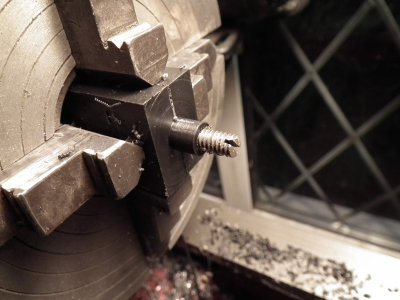
I put a screw in the hole before turning the spigot to stiffen it and avoid flexing, I thought had hacksawed too far but you can see there was just enough uncut left if I made the spigot a tad longer than the original one, more careful measuring here is the only thing I will do differently when I make another for my turret slide.
Two holes then drilled for self tappers, I opened up the top part for clearance, putting a hack saw blade in the slot as a stop to prevent drilling into the bottom half, and countersunk them.
Rounded off the end with an angle grinder and finished it by hand filing.
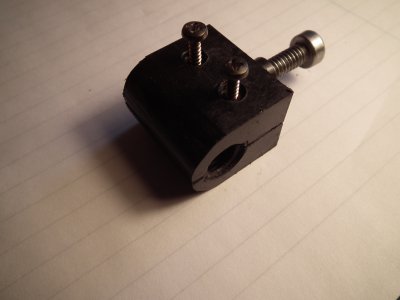
It only took a morning and I now have absolutely zero backlash!
It works OK dry but with lube it's silky smooth...way to go guys, get it done!!!
Bernard


Having read about the Delrin method of making new nuts I thought I'd give it a go, as I had a lump of Acetal handy, my first attempt had alignment issues..


My second idea was to drill the hole, hacksaw the block in half, but stop the cut at a point which would leave the spigot part whole. Then I wound the screw in which forced the halves apart, I was much more careful with the heat this time and it was successful. I used a spare worn screw.

After the melting and taking it off the screw, I tapped a knife into the cut to open it, then used the screw with a ground flat on the first thread to clean the thread so that is turned the full length easily.

Using a tight fitting drill for alignment I turned the sides and end face to be square with the screw.

Only very slightly loosening two jaws, I swapped ends it in the chuck, I drilled and tapped the center, I drilled right into the lead screw hole as I wanted to use a much longer fixing screw as I didn't thrust the spigot not to snap off, this way it is just a spacer.

I put a screw in the hole before turning the spigot to stiffen it and avoid flexing, I thought had hacksawed too far but you can see there was just enough uncut left if I made the spigot a tad longer than the original one, more careful measuring here is the only thing I will do differently when I make another for my turret slide.
Two holes then drilled for self tappers, I opened up the top part for clearance, putting a hack saw blade in the slot as a stop to prevent drilling into the bottom half, and countersunk them.
Rounded off the end with an angle grinder and finished it by hand filing.

It only took a morning and I now have absolutely zero backlash!
It works OK dry but with lube it's silky smooth...way to go guys, get it done!!!
Bernard


