-
Welcome back Guest! Did you know you can mentor other members here at H-M? If not, please check out our Relaunch of Hobby Machinist Mentoring Program!
- Forums
- THE PROJECTS AREA
- PROJECT OF THE DAY --- WHAT DID YOU DO IN YOUR SHOP TODAY?
- Project of the Day Mega-Thread Archives
You are using an out of date browser. It may not display this or other websites correctly.
You should upgrade or use an alternative browser.
You should upgrade or use an alternative browser.
2017 POTD Thread Archive
- Thread starter jpfabricator
- Start date
- Joined
- Mar 2, 2013
- Messages
- 895
The toolholders is the same basic idea everyone has been doing here, I used low profile unistrut, with 1 1/2" aluminium angle iron . Seems to be fine. I screwed the unistrut to the plywoodbox. I think it will hold up just fine. Keeps everything focused in one cabinet.
I was thinking of doing a rack like this above the lathe built to the backsplash... this is far more convient... I think.
Rich
I was thinking of doing a rack like this above the lathe built to the backsplash... this is far more convient... I think.
Rich
- Joined
- Mar 19, 2017
- Messages
- 308
It sounds like you got it right to meI put dro's on my lathe and a homemade yuriys bluetooth, when I go towards the chuck I get negative reading, and when I cut dia. away from me I go negative is that standard or do I have it reversed???
- Joined
- Mar 19, 2017
- Messages
- 308
Good jobA quick small job.
Wanted to fit a lens onto an astronomical camera (http://www.myastroshop.com.au/guides/gstar/gstar-ex4.htm) for a friend.
My first attempt relied upon the expert who knew all about these cameras (not myastroshop) who told us it was a metric thread and checking it out with my thread gauge it appeared to be a 0.8mm thread which I duly cut.
Hmm, must have cut a taper thread as the lens only screwed in half way before binding.
I dug out an sae gauge that I've never used and double checked the original thread, hmm, it looks like a 32tpi thread also fits.
So I bored a hole and cut the 32tpi thread. Success, it screwed in all the way.
I made a mandrel and screwed it on so I could turn it to size and cut the outside 32tpi thread. (it did have the centre in place when I turned and threaded it)
View attachment 239281
Camera, lens and adapter
View attachment 239282
all screwed together
View attachment 239283
This is now a wide angle camera.
This was the very first non metric thread I've cut.
- Joined
- Mar 19, 2017
- Messages
- 308
Good jobTook more than 1 day but I made a holder for my plasma torch to cut wheels on my positioner. I was cutting the wheels on the mill with a slit saw and was taking waaay to long. This way saves me hours per wheel.View attachment 239836View attachment 239838View attachment 239839View attachment 239832 View attachment 239833 View attachment 239837 View attachment 239835View attachment 239834
- Joined
- Mar 19, 2017
- Messages
- 308
That looks greatI bought a couple of those harbor freight tool boxes a couple months back, one of them i placed between the mill and the lathe. I figured i could put the tooling for each in it. It quickly became a bit of a mess to work on it and use it for tool storage. So being i have some time off from work, im taking advantage of it by taking on as many of the shop problems as i can.
View attachment 239921 View attachment 239922 View attachment 239923
Tool holders all in place, I made some boxes and covered them with aluminium diamond plate, the right side will be for lathe tailstock tooling. The left side will be for tooling for the mill. I plan to make a couple dimple dies and punch out the sizes I need in the diamond plate. I'm pretty happy with the way everything has come out so far.
The laptop computer is used for some pipe bending software, converting my old manual tubing bender to hydrallic/Air.
Thanks for dropping by.
Rich
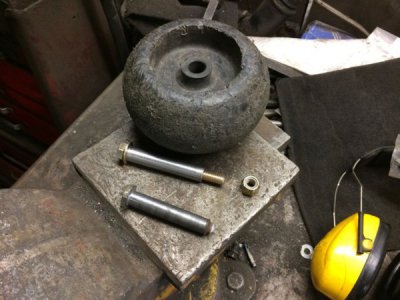
Earlier this week, I hit one of the anti-scalp wheels against something hard, and broke off the shoulder bolt holding it in place. Since I am both cheap and impatient, I decided against ordering a new one, and instead made one out of a 3/8" grade 8 bolt and a bit of pipe I had on hand. For a change, actual machining was involved, I had to get it on the lathe and turn down the outside just a wee bit for the wheel to spin freely on it, and drill out the inside for the bolt to go through.
The original shoulder bolt, along with the new one are pictured:
And just sitting here, I thought of another solution, namely, drilling out the end of the original shoulder bolt, threading the hole, then using a bolt to hold it in place...next time...
The original shoulder bolt, along with the new one are pictured:

And just sitting here, I thought of another solution, namely, drilling out the end of the original shoulder bolt, threading the hole, then using a bolt to hold it in place...next time...
B
British Steel
Forum Guest
Register Today
Haven't watched any TV for at least 5 years. Just eats up too much time. When I do have some downtime, I'll read a book.
OK, end of rant.
And the best thing about books (and radio if you have BBC Radio 4) is the pictures are so much better...
Dave H. (the other one)
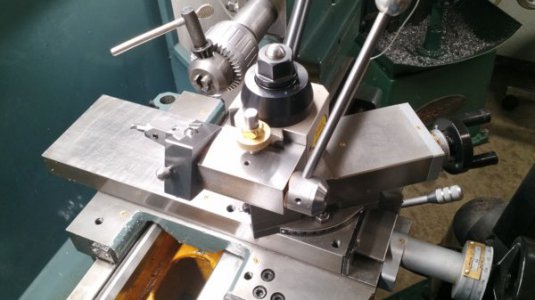
Been working on a Hemingway's kit spherical ball turner after work all week. Finally finished it up. It was a good project and test of my abilities or lack thereof. Made a few mods like a dovetail to sit directly in my tool post and also milled dovetails on the body using one piece of crs instead of milling separate dovetails and screwing them on the body. I also made a gib for the dovetail. Not sure why my balls are egg shaped. Lol.
Also getting the grind right for the cutting tool has been challenging.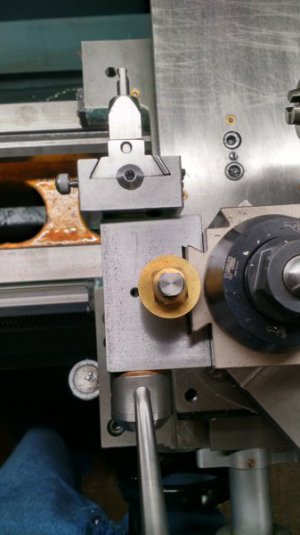
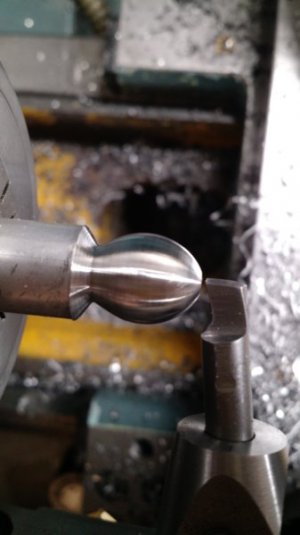
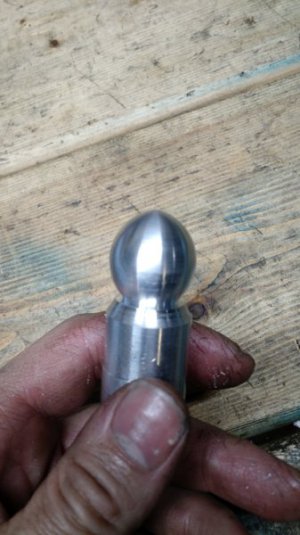
Also getting the grind right for the cutting tool has been challenging.


- Joined
- Oct 20, 2014
- Messages
- 133
Been spending time off and on making a knurling machine based on plans by Mr Harold Hall with some variations of my own.


Finally got to a point where I could try it out on some 10mm aluminium rod. It worked!

There was a pretty obvious shortcoming that I needed to fix!

Now the clamping /adjustment handle cleared the top of the QCTP and the chuck.
This time I tried it on some unknown crusty steel rod, it worked OK.


I have never made anything with this many parts that fit together so it was great practice in working to dimensions.
Every round piece got made at least twice, some three times. The nuts/washers on the wheel pins isn't final, I just wanted something so I could try it out. I will remake them and use external circlips.
There is a fair bit of lateral float because the connection of the upright arm and the cross arm held in the tool holder is too sloppy.
This seemed to help it self align but I will make another cross arm with a tight and rigid fit.
I have got some diamond pattern wheels as well for it.
thanks for looking,
pete


Finally got to a point where I could try it out on some 10mm aluminium rod. It worked!

There was a pretty obvious shortcoming that I needed to fix!

Now the clamping /adjustment handle cleared the top of the QCTP and the chuck.
This time I tried it on some unknown crusty steel rod, it worked OK.


I have never made anything with this many parts that fit together so it was great practice in working to dimensions.
Every round piece got made at least twice, some three times. The nuts/washers on the wheel pins isn't final, I just wanted something so I could try it out. I will remake them and use external circlips.
There is a fair bit of lateral float because the connection of the upright arm and the cross arm held in the tool holder is too sloppy.
This seemed to help it self align but I will make another cross arm with a tight and rigid fit.
I have got some diamond pattern wheels as well for it.
thanks for looking,
pete

