Another buggy

If this was 4 wheel, would it be Ackerman type steering or something else?

With 2 different kinds of motor drive wheels, I can see how it might be a challenge to make them work together unless they had some sort of feedback that could be monitored by a controller. I don't know how they are controlled in the factory units.

Tracks for off road would have to be unaffected by all the clutter they could pick up or be able to plow on regardless. Wheels seem simpler.

Aaron
 
I saw simple build with the frame two motor four wheels. Driven by chains to two wheels and one motor per side . Using the joystick to control the turns like the wheelchair . Solid axles with oversized tires.
Also saw a power chair with tracks mounted over the motor and chain drive to tracks. YouTube has a lot of them . Plus some are sold from $8,000.00 on up .
No reason anyone who lives on $1,000.00 a month can't afford one right.
Ill build one someday I've got three machines given to me to do what I want with use sell or give away.
 
I'm about to get back to this project and hope the thread is OK to continue.
I know it's 2 1/2 years old but things happen and I've been busy.

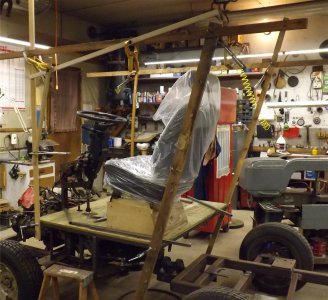
So it took me more than a day just to clear the clutter off of it the other day. It has been sitting in the middle of the shop all the time and SOMEHOW was a good place to set things on. On Friday I took the 1/2s apart and tipped them over or up so I could see/get at and finish welding all joints that were not completed before. Yesterday I put them back together with the floor, seat and steering column temporarily set in place so I could begin laying out the shape of the cab (which is where I was in March of 2017 just before my knee replacement).

Next post I'll update a few pics. I do plan to have this done before winters end!

Thanks for looking
Aaron
 
Well i'll be watching Aaron. Most older folks know and understand "Things happen". Even after a year or two you're doing well to be able to pick up where you left off. Carry on !! :)
 
Yesterday I laid out a cab frame shape with wood furring strips. Requisites were it must be able to fit under a standard 7' garage door lintel, good visibility immediately in front of wheels, proper head clearance and keep front glass to a reasonable size.

Had a bunch of 3/4" x 16 gauge SS sqaure tubing that had never found a use so decided to build it with that. Also found a roll of SS wire for my MIG.

Cut 6 of the 10 tubes using a new angle finder https://www.amazon.com/gp/product/B07N65SSWN/ref=ppx_yo_dt_b_asin_title_o04_s00?ie=UTF8&psc=1 which worked great and set the band saw angle with it.

Thanks for looking, Aaron
DSCF4108.JPGDSCF4109.JPG
 
I'm about to get back to this project and hope the thread is OK to continue.
I know it's 2 1/2 years old but things happen and I've been busy.

So it took me more than a day just to clear the clutter off of it the other day. It has been sitting in the middle of the shop all the time and SOMEHOW was a good place to set things on. On Friday I took the 1/2s apart and tipped them over or up so I could see/get at and finish welding all joints that were not completed before. Yesterday I put them back together with the floor, seat and steering column temporarily set in place so I could begin laying out the shape of the cab (which is where I was in March of 2017 just before my knee replacement).

Next post I'll update a few pics. I do plan to have this done before winters end!

Thanks for looking
Aaron
I just came on to this and I'm glad you are getting back to it. I have similar background and would rather reuse or adapt rather than reinventing the wheel too. I also appreciate your tendency towards simple and rugged like with the truck steering box for articulation. I also admire your drive and energy. I can only seem to complete much smaller projects. I have a feeling it has to do with your winters as I see other guys talk about doing big projects in the winter.

Good job and carry on.
 
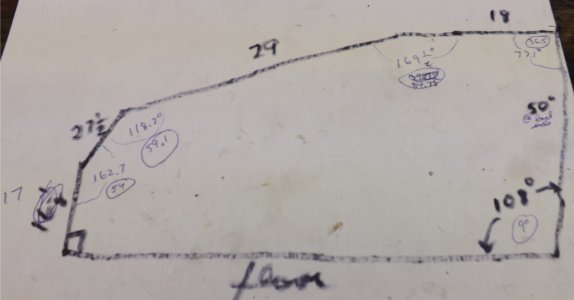
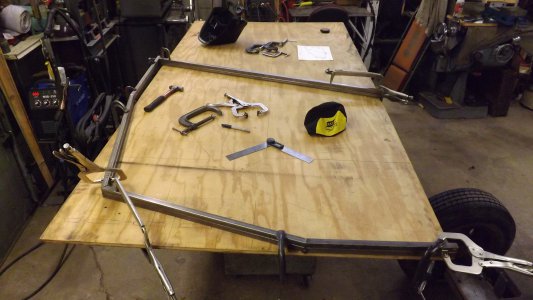
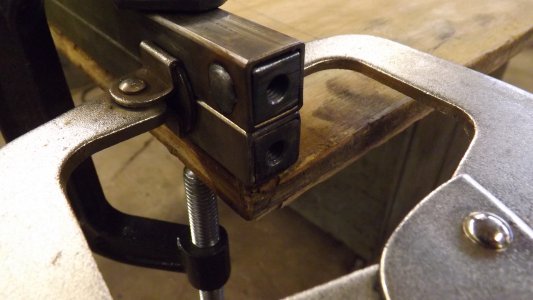
I've completed the cab frame in 4 days among interruptions. With all the bracing and gussets it is very ridged even with 3/4" thin SS tubing. I laid out all the parts on a table with correct angles and measurements, tacked one side of first one and checked it on the buggy floor for fit and then clamped the other side on top of it and completed welding
all joints.
DSCF4110.JPG

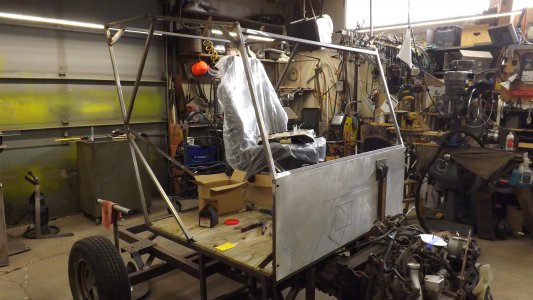
Once it was bolted to floor, all bracing was added after sqauring.
DSCF4122.JPG

It is bolted to the floor so can be removed without cutting anything.
DSCF4112.JPG

The firewall was also fit so some of the things, like heater, WS wiper etc. can be attached to it and cable/wire access holes can be drilled. A trial shape of the engine cowl is drawn on it.

Tentative list of priority items to do:
construct heater
weld brake disks and mount master cylinder
locate WS wiper motor on firewall
construct doors
pre-fit roof sheeting
sort out engine wiring and hoses
 
Slightly off topic. What precautions if any do you personally take when welding stainless? I've been searching for a clear answer, but not finding a clear answer. Some people make allusions to a mask, but I still can't figure out what exactly I should look into.

I'm really enjoying this thread. Can't wait to see the finished product!
 
I just use general common sense. If I see or smell smoke or dust or fumes or farts for that matter I don't stick my head in it and inhale. I sometimes wear things like respirators but more often eye, ear and hand protection. And not having a boss I take breaks outside often.


I remember my dad saying he heard dimes cause cancer. They ground them up a fed them to rats to prove it. They died!
Aaron
 
Back
Top