Looking For Advice On Choosing A Rotary Table Set Up For X2d Mill

MeredithJL

Registered
Registered
Joined
Apr 8, 2016
Messages
31
Hello,

Well, now that I'm getting into this hobby more I see the need for this to be a purchase in the near future. I've been looking at videos on Youtube and trying to find basic information on the web.

I came across this kit and it has good reviews and seems to be a good price for the amount included. Any advice on this set up, or recommendations on others would be appreciated. I would like to use a 6" table so that I have room for bigger projects in the future. I am hoping this is not impossible with the table size of the X2D.

I am also assuming this kit could be used in whole on a mini-lathe.....if I were to purchase one of them down the road, LOL ;)

http://www.grizzly.com/products/6-Rotary-Table-w-Div-Plates/H7527?utm_campaign=zPage

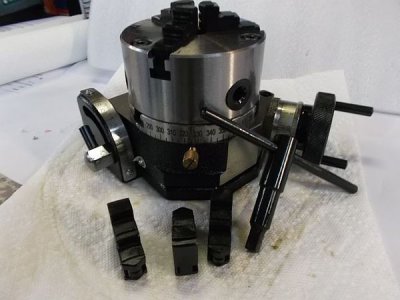
I have a 4" rotary table which is ok until I put the chuck on it, then things get tight...

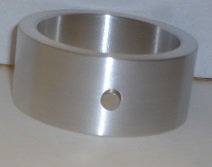
I make these rings for an item I sell, I make them from a piece of pipe, currently my lathe is down for a motor so I bore the inside to size on the mill with a boring bar...
this is 20mm tall...
I have to use a coaxial indicator to center it, because it is round and I want a .001 interference fit I do not want to clamp it in a vice because it will distort so I use a chuck.

With the shortest tool to switch from the indicator to the boring bar I have to separate the bar from the boring head to get the tooling in to the spindle. I can only imagine it would not be better with a 6 inch... But it would probably work well without a chuck. If you need a chuck you may want to keep it small, I may look at a 3 inch just to get that little more I need to switch tools without disassembling them. Where the disassembling of the boring head an bar are a pain in the but is that I can't turn to the same marks on the boring head each time. I have to measure and cut each ring as I approach the final size... If you are talking 2 or 3 parts that's no big deal, when it's 25 or more it starts to burn time.

DSC00886.JPG
My little 4 inch rotary table... Bigger than I thought when it came to how high I can raise the mill head over the table.
rotary.jpg
 
I bought a rotary table for my mill because I thought I really needed it . It's been great the few times I needed to mill a slot on a radius but I use my dro for bolt circles and a 5c collet block for simple indexing. I guess it depends on what you're making. Another option may be a 5c spin indexer.
 
I have that table for my PM-25 and I believe it may be a little large for an X2. My vote would be for a 4" as mentioned above. Just my 2 cents your mileage may vary!
 
I'd still use rotary table if I turned my rings on the lathe for locating the holes. mine adjust from flat "0" to 90 degrees.
I have that table for my PM-25 and I believe it may be a little large for an X2. My vote would be for a 4" as mentioned above. Just my 2 cents your mileage may vary!

I would make a bolt on table to the 4" if I wanted it bigger. Height was not an issue without the chuck.

I do turn it up 90* to index holes on those rings...

I was torn on 3 inch or 4 inch so I figured I run with the 4 inch and save the "I got it too small blues".
 
Hello again,
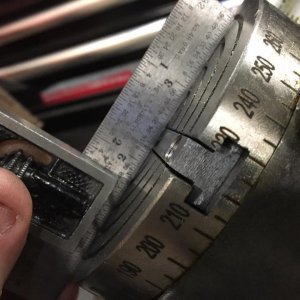
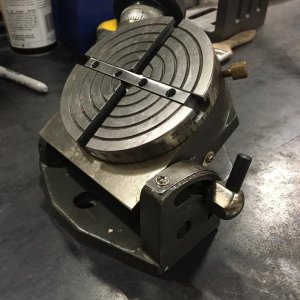
So I decided on this one: a 4" Grizzly that is adjustable. I figured if I make an adaptor plate, I can use it as a stationary tilt table as well as a rotary table. I ordered the wrong size T-nuts for it initially. The description on Grizzly's site said 5/16" slots, so I took a guess and ordered 5/16" T-nuts. This is how I learned that 5/16" does not mean what you think it means, sometimes. The slots were 5/16" wide, and the T-nuts were 5/16" thread. So yeah. Too wide. But not wide enough for me to mill them down without taking the sides off the tapped holes. So I picked up a piece of bar stock at Fastenal and made my own, which are tapped for 1/4" threads. It was a great exercise in thinking through the steps of layout, measuring, planning cuts, etc. So I'm kinda glad I made that mistake. I milled a piece about 4" long and tapped 4 holes, and I was going to cut it apart and make 4 separate T-nuts, but I'm kinda thinking I might leave this one long and make another run that I'll turn into 4 separate nuts.

After I took the picture with the square on top of the table I took a few thousandsths off the top of the slot material so that I'm slightly lower than the surface of the table. I was happy though that my measuring and layout and DRO's were consistent enough to give me a nearly perfect result my first time out.

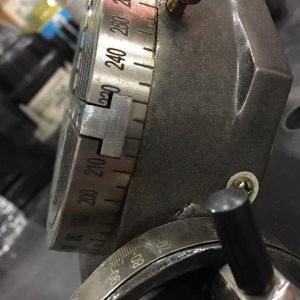
The table rotates very smoothly, and feels solid. There were a lot of similar looking tables on Ebay that had no manufacturer listed--just 'India' as the origin. This one is made in India 'for Grizzly,' according to the sticker on the case. The base is not slotted for easy attachment to the mill table, however. I'm going to have to find some low profile bolts or something -- or mill out the bolt holes and make them slots. But for the price, I think this is a good starting point to learn how to use a rotary table. Thanks for all your feedback!

13332823_1623291231323920_8240581102283040933_n.jpg 13346848_1623291204657256_1143730580431943108_n.jpg 13418818_1623291207990589_5885260223237982579_n.jpg
 
Last edited:
So I'm kinda glad I made that mistake. I milled a piece about 4" long and tapped 4 holes, and I was going to cut it apart and make 4 separate T-nuts, but I'm kinda thinking I might leave this one long and make another run that I'll turn into 4 separate nuts.

After I took the picture with the square on top of the table I took a few thousandsths off the top of the slot material so that I'm slightly lower than the surface of the table. I was happy though that my measuring and layout and DRO's were consistent enough to give me a nearly perfect result my first time out.

It seems that you're learning fast. Congratulations.
 
Meredith,
Looks like you're on your way to being a master machinist. Just wanted to point out one thing about making those T-nuts. Typically T-nuts will have the last thread deformed to keep the threaded studs from going all the way through the nut and bottoming out in the T-slot. I have made my own T-nuts and just used a center punch to deform the last thread. Just a little food for thought.
Keep up the good work.
Ted
 
Meredith, check the t-nuts to make sure that they are below the top surface of the rotary table when they are pulled up by the bolts. Maybe you already did that, but the photos look like the work will clamp to the top of the t-nuts before the shoulders clamp against the slots. There should be plenty of visible space between the top of the t-nut and the work when tightened, so chips cannot interfere with good clamping.
 
Will do, Bob--I'll take a bit more off the top. And yes, talvare, I was wondering about the best way to create a stop in the threads--thanks for that tip! Thanks again, everyone!
 
Back
Top