Ar15 Lower: Jumping In

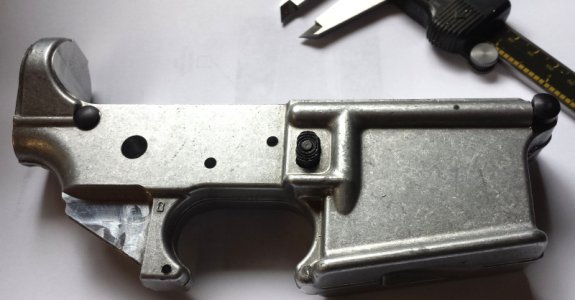
Got the passenger side done today. Everything fits well so far. Even managed to get the mag release right, which seems like the toughest part of this work. A local welding and machining shop will loan the 1-3/16 16 tap to me for the buffer tube, so I don't have to buy an expensive tap I will likely use only twice. A while back I traded a Palmgren drill press vise for about 50-60 endmills, HSS bits, and miscellaneous parts. Good thing I did, because there were endmill sizes in there that I needed for this project (5/16 and 7/16). Next up is boring the buffer plane, drilling for detents, and starting the mag well and FC area. Still having fun. I've decided to have a SN engraved, along with other lettering on the driver's side.
Passenger side.jpg
 
Last edited:
Following as well. I've done a couple of these castings and they are definitely a challenge but Ray's tutorials make it a lot more enjoyable. Check ebay for the buffer tube tap. Search using the diameter and pitch instead of "buffer tube tap" and you'll find some real bargains. (I also got a barrel extension tap the same way.)

What finish are you going for when the machine work is done?
 
What finish are you going for when the machine work is done?
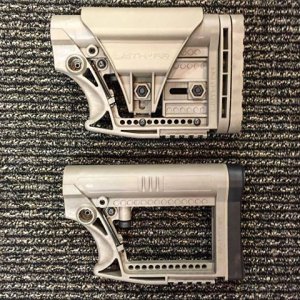
Rick, I think Cerakote FDE is right for this build. My airbrush will do a good job of application, and the dog doesn't care what I put in the oven. I see Luth AR has just released its MB3 carbine stock in FDE and I am very pleased with the Luth stocks on our other AR15s, and their pricing is much better than most others. Not sure on the handguard, but I just might turn and mill my own freefloat tube for something different.

Tom

Luth FDE.jpg
 
Great start and a fun project. I was eyeing the iGaging DRO and I think you've convinced me. Thanks.

Jeff

Sent from my XT1254 using Tapatalk
 
Great start and a fun project. I was eyeing the iGaging DRO and I think you've convinced me. Thanks.

Jeff

Sent from my XT1254 using Tapatalk

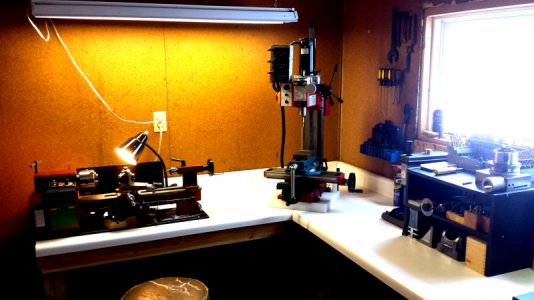
Thanks Jeff. It made little sense to put a $1500 DRO on a $500 mill, but for about $110 I could put 3 axis iGaging units on it. I don't mind that these are 3 separate pieces, and it works to cut the bars to the length needed. Mounting was pretty straight forward. I gained reasonable positional control and good repeatability. What I don't like (but can work with) is that if no movement is sensed in a given axis for a couple minutes, that unit's display shuts off. Turning it back on, it "remembers" where it was, so position is not lost. The LCD is not backlit, so decent lighting is helpful to be able to read the displays easily. Battery life is pretty good, and a couple spare batteries came with each unit. If I'm very careful, I can count on +/- .002" accuracy or better, with accuracy limited by the wide backlash inherent in the HF mill. One of these days I will address that, but I'm having too much fun to stop right now.
Tom

495.jpg
 
Rick,
Did you machine the barrel extension? What steel? S7? 4140? Harden after?
Thanks,
Dave

Dave, I didn't get the barrel extension tap, I got the barrel nut nut tap. So far I've only made one nut and it was 4140 unhardened. It ain't purdy, but it works.
http://www.weaponsguild.com/forum/index.php?topic=43985.0
I left it in it's natural state and it does fine. I do plan more when time allows. I also need to find a barrel nut tap for the AR10.

Tom, I like FDE on the ARs. I also really like that carbine stock. May have to try one out.

And ditto on the igauaging DROs. for the money they're hard to beat. Got a 4 axis set for about $135 delivered a few years back from DavidH.
http://www.hobby-machinist.com/threads/low-cost-dros-from-igaging.18369/#post-166108
 
Under the heading of OOPS:
Since hobbymachinist.com is a site for learning, I'm owning up to a "difficulty" others may encounter when machining a lower on the HF minimill.

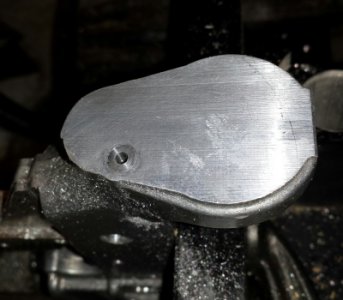
After some family related diversions, I got back to the lower machining. Drilling the tiny hole for the takedown pin detent, I managed to break the drill off in the hole - and of course, below the surface. Talented that way. The mini mill Z axis will not allow much room between the casting and the R8 drill chuck, so peck drilling becomes a real PIA. Lesson learned: Start the hole on the mill, but finish on the drill press so that chips can be cleared very often. Rather than tossing the casting with an appropriately foul eulogy, I decided to salvage it. A little spring detent goes in this hole, so it's not a structural thing that will be stressed upon firing the rifle. With a carbide drill, the hole and the cheap tiny bit were slowly drilled out. The hole was then drilled and reamed to Ø .2505". A Ø .250" aluminum slug was turned on the lathe to the appropriate length, the tiny thru hole was drilled in the center, and the outside of the slug was polished. Then the drilled slug was tapped into the lower receiver with a small deadblow hammer. Crude, but effective. The detent spring now has a home and I can get on with the next op.

Tom

oops.jpg
 
Nice recovery! I'm sure there was much swearing before you worked it out.

Thanks for sharing,

-Ron
 
Back
Top